-

- Forums
- Chatrooms
- Gallery
- Gameplay Videos
- Upload
- Articles
- Mod Reviews
- Shop SP: Games, Movies, Books
 |
 The Vale of Shadows, as mentioned previously, is your first major quest and one that many people have gotten stuck on and asked for help on the Icewind Dale Message Boards. The Vale is darkened by the little sun its walls and cliffs get and is the perfect place for Yeti to dwell and call their home but there is also a large number of skeletons, zombies, ghouls and lesser shadows that wander around too. You will encounter many lesser shadows, some guarding the entrance to the crypts while others remain deep inside their chambers waiting for you to arrive but you should have no problem dispatching them as well as the skeletons, zombies and ghouls.
Your goal is to find out what is happening in the Vale of Shadows and report back to Arundel when you learn as much information as possible and if the Vale of Shadows is responsible for the Great Oaks diminished warmth.
The Outer Crypts are those you will want to explore first and clear out before heading into Kresselack's Tomb and will need to attain two very important items from Crypt 1 (The Gate Key) and Crypt 2 (The Sanctum Key). Let us detail the Crypts so you know what to expect and to make sure you have gone through each one before moving into Kresselack's Tomb
 Crypt One is marked as "1" on the Vale of Shadows Enlarged Map and houses the GATE KEY your party will need to access the first locked door of Kresselack's Tomb. The key can be found in the small alcove ahead as soon as you enter the crypt but getting to it will cause for swinging blades, shot arrows and crackling magic as a slew of skeletons will bombard you with their attacks.
Don't forget to search the rest of the crypt for extra's and most of all, always be checking for hidden traps that could bring one or more party members to the dirt!
 Crypt 2 is marked as "2" on the Vale of Shadows Enlarged Map and houses the second key, the SANCTUM KEY that you will also need while deep inside of Kresselack's Tomb. The key lays at the very bottom of the set of stairs at the back of the crypt and getting there may prove to be a good challenge for a lower level party of 4 or less. There are numerous amounts of skeletons, zombies, ghouls and lesser shadows but before engaging them, you will have to deal with Therik, a skeletal warrior who guards this crypt.
Therik will prompt you to leave immediately and if you continue to badger him, he will be even more persistent to keep you at bay and away from the treasures that lay within. You must penetrate this crypt or you will not be able to get very far while venturing forth into Kresselack's Tomb.
Now if you already have the GATE KEY and leave without a fight, Therik will sense that you have this key and will once again enter dialog mode to attempt to convince you to leave AND hand over the key. However you see fit, bring him down and continue across the bridge after the battle.
It is here that the onslaught of skeletons will come forth, their bones rattling and their empty eye sockets burring into your soul followed by zombies and ghouls. A cleric may want to practice his Turn Undead ability to give the rest of the party some breathing room as the skeletons circle, but in the end you must kill them all and continue down the passage, down the stairs and to the resting place below.
Here in this dank and dark room, you will encounter lesser shadows, skeletons, zombies and ghouls and once you have fisted them all down in their undead heaps, reap the rewards found within and most importantly, get the SANCTUM KEY in the coffin as marked on the Crypt 2 Enlarged Map.
Always remember, move carefully while exploring these ancient crypts for traps await the careless fool.
 A quiet resting place for those within, that is if they weren't walking around trying to slay any living being who walks before them. Another crypt in the Vale of Shadows that houses skeletons, a ghoul here and there as well as a carrion crawler which I have not seen since Baldur's Gate. Watch for its paralization bite that will make your characters simply stand there and receive the blows from the skeletons as they can no longer defend themselves from the skeletal attacks. Search out this crypt well and leave nothing left for the next looters.
Watch thy step in this crypt, traps await thee.
 The last of the crypts where the dead rest has a wonderful dining area full of wooden tables, candles, dust covered shelves and of course, skeletons, ghouls and zombies. Battle your way through their thin forces, search the area and clean it dry and let us head to the last location before we journey to Kresselack's Tomb. The Yeti Lair is next.
Soft boots and nimble hands will find the traps strewn in this crypt.
 The frozen ice cave is home to a good amount of Yeti as well as a storage place for some full boxes, which you will have to get around on cleaning out for the coming spring don't you think? Don't forget to collect the Yeti pelts they leave behind for you can sell them to Conlan in Kuldahar.
Remember this place, for you will be returning after you are done with Kresselack's Tomb but more on that later.
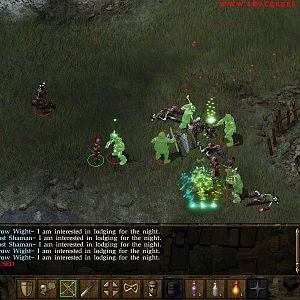
 Although the book states that Kresselack The Black Wolf is simply a myth, he is very real and it will take some good sword swinging, magic casting and lots of healing to get you through each part of Kresselack's Tomb and to his waiting, spectral form. Do know that the deeper you go, the harder it will become and I highly suggest your party has at least two fighters with magical weapons of +1 or better equipped before venturing forth. Within Kresselack's Tomb you will encounter undead you have not seen before in your journey and a cleric with a strong faith may keep you alive much longer, so keep them close by. You will encounter a Mummy or two and a Wight along side of Skeletal Warriors, Skeletons, Zombies, Lesser Shadows and Ghouls. Always remember to keep an eye out for trip wires and dart traps that could slow your party down.
Note as well, if you have a Paladin in your party, you will not be protected from the Mummy Rot Disease due to the fact it is not a natural disease that a Paladin has protection from in general. A Paladin can remove Mummy Rot with the Cure Disease ability he or she has. All green bottles found are Cure Disease potions in case you do not have a Paladin able to remove the Mummy Rot your party may have acquired. Sleeping will not cure Mummy Rot and when your rest is completed, those who had Mummy Rot will be dead.
The Wight in general is pretty tough if you or your party do not have magical weapons of +1 or better as normal weapons will have no effect on this undead creature. A combination of fighters using magical weapons of +1 or better along side of magic missile, chromatic orb or any other offensive magic spell brought forth by a mage or cleric will also help in banishing this foul beast from the face of Faerun.
If you happened to be following along then you'll know that you need the GATE KEY to gain entry into Kresselack's Tomb and this door is noted on the Tomb Entrance Enlarged Map as "1" and it is here that you use this key.
Missing the GATE KEY? Tsk. Tsk. Tsk. You need to explore more, but if you need that nudge, you can find the answer you are looking for here.
As stated under the Outer Crypt Section, you picked up the SANCTUM KEY used for the door on the Tomb Entrance Enlarged Map as "2", you will need this to gain entry into the Sanctum which lays left of the two green pools which you shall see upon entering. You will not be able to enter the Sanctum if you do not have this key.
Missing the SANCTUM KEY? Tsk. Tsk. Tsk. You need to really explore more. You can find this information here.
Within the Sanctum is where you will find the key to the door straight across to the right, on the opposite end of the two green pools, this being the PRIEST KEY. Use this key on the door as mentioned above and retrieve the next item so you can gain entry to the double doors at the top of the stairs in the main chamber as stated below.
Within the Priest Chamber, after using the PRIEST KEY you will find the HOLY SYMBOL OF MYRKUL which will be used to open the two double doors at the top of the stairs directly ahead of the two pools in the main chamber. Upon opening this set of doors, standing before you will be Mytos the Bone Dancer, a Skeletal Mage and his 5 warriors who will demand the keys to be handed over to him. This is a chance for you to gain some extra experience and I suggest you do so by simply attempting to talk Mytos into letting you explore the Tomb for the village of Kuldahar. After draining out every last attempt to let you pass, he will attack you but you will receive experience for trying to do it the peaceful way. Prepare for a dueling battle as the 5 warriors attack you with swords while Mytos the Bone Dancer lashes out at you with his spells.
If you have a cleric in your party, have them speak with Mytos the Bone Dancer and you will receive experience points by talking about the Bone Dancer and Necromancy.
Shouts out to Andrea for this gem!
Explore the area ahead once you have danced the Bone Dancer's dance to his very death and be prepared to face one last tough character, Myrkul's Sending, a spirit who will float towards you to attack with his minions. This should have given you enough practice for the Mummy battle ahead who is guarding the MAUSOLEUM KEY that you will need to gain entry to Kresselack's Tomb in the lower levels. The Mummy is situated behind a secret door but the room behind the wall can clearly be seen and if you don't find it while walking down the corridor to fight the skeletal archers, simply walk around the area and it should highlight soon enough.
Now the map is a little dark on my screen so if it is the same on yours, brighten it up a tad so you can see the hallway that leads to the Mummy area, which is exactly the same as the other side since this map is symmetrical in design. It took me a few minutes to figure out the passage on the right to continue isn't blocked by any walls or pillars as the view suggests within the game. You can get into this hallway by simply walking as you would anywhere else.
Once the Mummy has been taken care of, get the MAUSOLEUM KEY out from his small chamber and take the stairs to Kresselack's Tomb - Level 2 to continue your journey.
Remember, explore the entire area and kill every single foul beast that you come across to be sure that you have covered this level from top to bottom. You don't need to stop mid stride and realize you've forgotten something.
 The fun is waiting for you, in case you think it's going to be easy sailing after teaching those foul beasts above a lesson in sword and magic play but think again and take the time to do it. The battle ahead is not something I even suggest walking everyone straight in to as you will be bombarded by magic missiles from Imbued Wight's, hit with Stinking Cloud, Charm, Horror, Lightning Bolt, Melf's Acid Arrow, Colour Spray and other offensive spells by the Skeletal Mage chilling behind the bottom pillar in the main chamber. This same pillar also has a switch to activate the doors to the last level, the very switch people ask about in terms of finding and opening this door. I'll get back to that in a moment.
As I was saying, to dive into the pit of beasts ahead will be your own doom and even if you have a party well armed with swords for close combat, it will be the skeletal archers from afar that will slice you down and bring your own body to skeletal form. Don't join the evil when you can smite it brave warrior!
There are a few tactics one can use in this situation and having a thief move ahead while hiding in shadows or a mage invisible is always helpful to know the numbers you will be facing. When you're ready, bring the foul creatures down one by one, a pretty sad tactic, but one that works if you want to minimize the damage done to your party. You'd think these game companies would have some sense and when 1 monster moves down the passage to attack, it should alert all the others in viewing distance of the trouble on the way and also head to investigate. Doing this solution, I did things this way so save myself time in having to load up the game over and over again and I'll share that tactic with you.
The entrance you start at on this level has a door right in front of you. I found by placing a line of 3 fighters to block the passage, then take my thief out to the chamber ahead to bring back the foul creatures that followed to my line of fighters. I had my thief run straight through the line, thanks to the nice change in pathfinding for party characters in IWD, the line of fighters simply move out of the way for the thief. Keep the character in plain view so the monsters line up in front of your 3 characters, which they can openly take down. If you don't have 3 fighters as I did, use your 3 strongest characters because there are more than just easy skeletons to bring down in the chamber ahead.
From memory, you're looking at skeletons, skeletal warriors, skeleton archers, imbued wights, skeletal mage, zombies and even a mummy. It's a good experience builder to say the least.
Once the main chamber is cleared and you feel comfortable having your whole party standing in the middle of the triangle floor design with the 3 pillars at each corner, make your way to the door on the right side. To gain entry into the room beyond, you will need the MAUSOLEUM KEY from Kresselack's Tomb Level 1. If you are not sure which door I mean, check Kresselack's Tomb - Level 2 for a better understanding. It is marked as "1" on this map.
Once inside, fight the small group of skeletons and zombies to attain the PLAIN KEY which will give you access to the locked gate on the opposite side, once again this map being symmetrical in design as the one before. The locked gate, if you are having trouble finding it can be easily checked by viewing Kresselack's Tomb - Level 2 Enlarged Map for more details.
Watch thy step before thee as you prepare to step ahead through the now opened gate. Traps await those who rush!
A good battle here against skeletal warriors and don't be fooled if you only fought 3 as there are another 2 hiding on either side of the gates entrance within the shadows. Slay the wights as well that come out of the adjacent room and retrieve the PAINTED PAW STONE. You will need this to activate the switch on the bottom pillar within the main chamber. If you cannot find this switch, check Kresselack's Tomb - Level 2 Enlarged Map for more details and the exact location to get you on your way to meeting Kresselack!
Another note on the PAINTED PAW STONE is that you can wear this as an Amulet, which gives +10 hit points and some cold resistance as a bonus.
Thanks to Robert for this information.
Once you throw the switch, the gears will spin on either side of the large stone door and leave it wide open for your own exploration. Proceed down the stairs.
***NOTE: Rest before going down! Have many heal spells and good offensive spells that you can muster and be ready to protect all weak character classes.***
 This is what adventuring is all about!
Lovely isn't it? This is a great battle that puts you right into the thick of things as soon as you come down the flight of stairs and you will be attacked by all those around you with no mercy. These are Guardians to Kresselack's Tomb you know and they have a job to do. By now you should realize which foul beasts pose the least threat to your party and I suggest having your front lines deal with the more powerful and deadly Tattered Skeletons, Spectral Guards and Spectral Knights that will lunge towards your invading party. At this time, I had a few invisibility spells memorized for characters who were being attacked by a slew of undead just so I could protect them and keep them alive so I could get to them and heal their bloody wounds. Concentrate your magic attacks on the larger undead beasts who will do the most damage and if you have anyone that are better with a bow than a sword, use them to your advantage to deal damage before they reach the front lines.
It's a great battle due to the limited space you have for moving around and once the first wave is done and you move about, others standing in the darkness will then be second, then third until you're left with the Spectral Knights and skeletal warriors guarding the door to Kresselack's Tomb.
I was looking forward to battling this undead who, it is said, to have ravished the Spine of the World with his barbaric attacks and raids, but alas, Kresselack is in a talking mood and nothing more. Learn what you can from him as well as accept his offer on finding the Priestess of Auril. Then and only then will you be on your way to finding out what became of the Vale of Shadows and also, once you return from killing the Priestess will you have access to Kresselack's resting place and the items within.
Return to Kuldahar, speak with Arundel and fill him in on what you've learned.
You're here for one reason and that's to figure out if the Vale of Shadows is the source of the Great Oaks, as well as the village of Kuldahar, problems. Your main quest is from Hrothgar but you do receive another while in the Vale of Shadows, which I will explain further down. Although not a quest given to you by anyone, it is a quest never the less to find all five keys, the Holy Symbol of Myrkul and the Painted Paw Stone so you can penetrate into the heart of Kresselack's Tomb. Here is a break down for you.
You need this to gain entry into Kresselack's Upper Tomb. It can be found here within the Crypts.
You need this to gain entry into the Sanctum within Kresselack's Upper Tomb. It can be found here within the Crypts.
You need this to gain entry into the left portion within Kresselack's Upper Tomb. It can be found here on Level 1.
You need this to gain entry into the right side of the Mausoleum within Kresselack's Tomb Level 2. It can be found here on Level 1.
You need this to gain entry into the left side of the Mausoleum within Kresselack's Tomb Level 2. It can be found here on Level 2.
You need this to gain entry into the chamber to slay Myrkul's Sending within Kresselack's Tomb Level 1. It can be found here on Level 1.
You need this to gain entry into Kresselack's Chamber within Kresselack's Tomb Level 2. It can be found here on Level 2. It is used to pull the switch.
This quest is only available after you have made your way into the heart of Kresselack's Tomb and have come face to face with his eternal spirit. Parlay with him will reveal this quest and in return he will tell you about the evil that plagues the Vale of Shadows and Kuldahar. Kresselack will tell you that a priest of Auril has been milling about his Tomb and if it wasn't for his Guardians, he fears the doors would be open and the winter chill would make its way to the very depths in which Kresselack haunts. He does not want that.
You are to kill this Auril Priestess Lysan, but make sure when you accept the quest, that you take it fully and do not "look into it" or "think about it" as some of the dialog options will have. If you do the latter, the Auril Priestess will not be in the location when you go to look for her.
Where is Lysan? She can be found within the Yeti Lair in the Vale of Shadows and will summon a good handful of Yeti to deal with you while she casts her magics at you. If you've killed the Yeti in the lair from before you will not have so many to deal with at this point when you face her. If you have not killed the Yeti in the lair yet and visit the Yeti Lair for the first time for this quest, the Yeti numbers will be far greater.
Also take note to talk to Lysan for as long as possible and learn what you can of the Vale of Shadows and why it is as it is. This information will not only help you, but also help those within Kuldahar.
Return to speak with Kresselack when you have slain Lysan and he will answer you to the best of his knowledge as well as reward you with the items in his coffin.
Also upon your return to Kuldahar, you can speak with the Tavern owner and learn that Lysan was a barmaid there and during the dialog, let the owner know that Lysan's items could help in solving what is bothering Kuldahar, he will hand over her items, one of them being a very sweet robe that will help you in your journey. Before speaking with the Tavern owner, you should also speak with Amelia about getting a meal. Return to speak with the Tavern owner and discuss the meal, which your dialog options will give you the ability to discuss Lysan's belongings.
Thanks Joe, Alan, Scott, Christo and Erran for the added Lysan information!