-

- Forums
- Chatrooms
- Gallery
- Gameplay Videos
- Upload
- Articles
- Mod Reviews
- Shop SP: Games, Movies, Books
 |
The icy chill of the northern winds cut through Wyrm's Tooth like a sharp blade that slices through to the very bone of those who travel to these reaches. Frozen in time are the cliffs, waterfalls and the life that dwells around these snow covered mountain cliffs. Following in the death of Terikan the Lich from Dorn's Deep your party will arrive here, in Wyrm's Tooth whose secrets lay beneath the very layers of snow and ice waiting to be discovered. I found this chapter to be the shortest of all and had very little difficulty in completing the quests that await thee. So without further notice, let us take a look at this icy world known as Wyrm's Tooth.
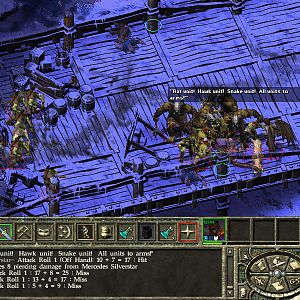
 Ice Trolls, Greater Snow Trolls and Peak Yetis will greet you with a snarl and a slash of their sharp claws as your party steps foot onto the snowy banks of Wyrm's Tooth so do make sure you have some Burning Hand spells ready to lay the final death blow on the Greater Snow Trolls. The Ice Trolls and Peak Yetis will not prove to be very difficult at all for neither need to be laid to rest by fire or acid like the aforementioned Greater Snow Trolls and moving about for your party should be like a walk in the park. As for the strewn and dead bodies laying around everywhere, rather than spoiling it, this you will learn as you explore Wyrm's Tooth.
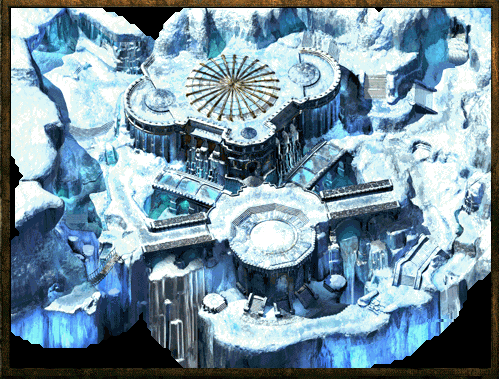
Wyrm's Tooth is broken down to two parts. The first is the Museum located in the centre of Wyrm's Tooth, a Museum full of frozen fish and sea mammals which can be clearly seen through the layer of ice that makes their grave. Although there is a machine that is obviously keeping the museum frozen along with its occupants, I could not get this machine to reverse its effects and unfreeze the museum. Regardless, I was still able to continue on with my journey and complete Wyrm's Tooth and I'm not sure the effects are reversible to begin with.
Now the museum is broken down into two parts. The Upper Museum and the Lower Museum, each having a part in the story that is told within Wyrm's Tooth and I'll get to that in a minute.
Besides the Museum, we have Joril's Lair, a frozen, icy cavern full of Frost Giants, Wyrms and even a dragon's skeleton which spans two caverns across and was obviously slain long ago. Joril's Lair can only be reached by crossing the bridge at the bottom left of the map but you'll need the BOOK OF BRIDGES from the Lower Museum to fix it first, which ties the Museum into the rest of the story and we'll look at that next.
The main quest within Chapter 5 spans from Chapter 4 and well into Chapter 6 and that is the quest to find all six badges which is the key to giving you entrance to the final and last battle that will complete your adventure and give you the answers as to who and what is behind all of this. The badges that can be found in Chapter 5 will be listed and because it is an ongoing quest between three chapters, make sure you don't miss any because you'll be pulling your hair out if you do!
2ND Badge is found within Wyrm's Tooth - Joril's Lair on Joril, a Frost Giant Leader.
The Frost Salamander leader is looking for some assistance in removing the slaves found within the Lower Museum due to the fact that the temperature there is too warm for Kerish or his gathering to enter and take care of it themselves. Although you will be doing the bidding of one who you may not rather do the bidding for, this quest is still available to those who wish to kill the slaves rather than save them. Along with killing the slaves, Kerish also wants the leader of the slaves slain as well, who is none other than Vera, who is hiding out in the Upper Museum.
Doing this quest has its draw backs, most notably less experience than you'd receive if you saved the slaves and there is a good chance you may kill Soth, who has the BOOK ON BRIDGES and if he is killed, there is a good chance you will not get this item. The BOOK OF BRIDGES is needed to gain entry into Joril's Lair and without it, you won't be going anywhere.
So remember, if you take Kerish up on his quest, before you kill the slaves, talk to Soth and get the BOOK OF BRIDGES and then go on your killing spree.
Return to speak with Kerish once the slaves are all killed and Vera is laying on the cold floor of the museum.
Vera is the slave leader and the leader that Kerish wants dead, if you accept his quest before you accept Vera's. What Vera wants of you is to free the slaves, something she herself cannot do because Kerishs' men are all over the Museum looking for her. Since you have the ability to roam as you wish, freeing the slaves yourself for Vera is her next best option and taking this quest rather than the one offered by Kerish will give you more experience than the latter.
When you've freed the slaves from the Lower Museum, return to Vera for your experience and to let her know the slaves have been set free.
Davin's quest will only happen if you yourself decide you want to free the slaves rather than killing them as Kerish would ask of you. Davin understands that although the slaves have gotten away, they have no food and sooner or later they will either die from starvation or die returning to Kerish. Neither option is very good to Davin and he asks that you retrieve the CHAMBER KEY from Kerish so it can be used to get the slaves out and to freedom.
Speak with Kerish and retrieve the CHAMBER KEY noting that you will not let the slaves escape, then return to Davin and free the slaves.
By doing this, all of Kerish's Frost Salamanders, Greater Snow Trolls and Winter Wolves will be on the look out for you and attack you on sight. Battle your way to Vera and let her know the slaves are free, then clean house and kill all those within the Upper Museum, including Kerish.
Although this is not a quest given to you by anyone, it is something you will need to do if you plan on retrieving the 2ND BADGE from Joril's Lair. To do this, you will need to fix and then cross the bridge that is located at the bottom left portion of Wyrm's Tooth but first you will need to acquire the BOOK OF BRIDGES from Soth, who is located in the Lower Museum. Get the book and then return to the bridge to use it so you will be able to cross and fight the foul creatures that reside on the other side!