Icewind Dale

Icewind Dale Solution by Sylvus Moonbow

PROLOGUE   CHAPTER 1    CHAPTER 2   CHAPTER 3
  CHAPTER 4   CHAPTER 5   CHAPTER 6   ITEM LIST

Dragon's Eye
About Dragon's Eye
Outside of Dragon's Eye
Dragon's Eye (LVL 1)
Dragon's Eye (LVL 2)
Dragon's Eye (LVL 3)
Dragon's Eye (LVL 4)
Dragon's Eye (LVL 5)
The Online Maps
The Quests
DRAGON'S EYE - About Dragon's Eye   

      The cold reaches of the Spine of the World house many hidden wonders that only a few scattered people know about, recorded in memories from forgotten tales now only found in the most old and ancient books. Dragon's Eye is one of these places, secluded and nestled deep within the very Spine, its access gained by 3 days of travel to its maw toothed mouth opening that juts out, ready to bite those who venture inside.

You have been sent here to find the source of those who attacked the priests and Verbeegs at the Temple of the Forgotten God from Chapter 1 and your findings will surprise you as you venture into the darkness of the passages beyond. With each step you take, you will realize just how low you are to the chain of command that has plagued Kuldahar and the regions near by and Dragon's Eye will introduce you to new threats which are just on the horizon.

For the adventurer like yourself, Dragon's Eye is a true stepping stone to the higher levels of 10th and more as you will gain lots of experience and fight many beasts as you dig deeper and deeper into the missing Heartstone Gem quest. Do know that the deeper you go, the harder it will become but I'll take you through it step by step and make it easier on yourself and your party of brave warriors.
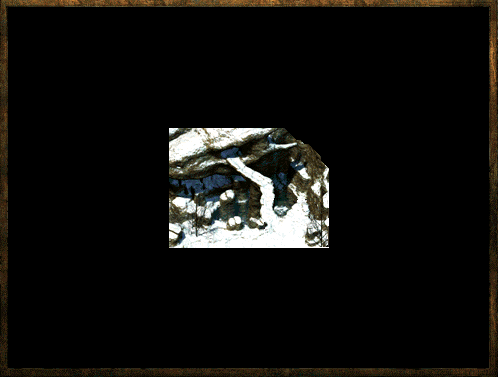
DRAGON'S EYE - Outside of Dragon's Eye   

Outside of Dragon's Eye
Enlarge Outside of Dragon's Eye

The chill and bite of the blowing wind at such high altitudes will cause you more harm than the Ice Trolls who are roaming outside looking for food around the entrance and they will be no match for your party as you cut them down one by one. Before entering Dragon's Eye, you may want to organize your party order so your strongest characters are at the front lines because this will help speed things up as you continue forward. When you're ready, make your way up the snow covered trail and enter Dragon's Eye.

DRAGON'S EYE LVL 1 - Lizard King Lair   

Dragon's Eye LVL 1
Enlarge Dragon's Eye LVL 1

A horrid stench will waft to your nose as you step forth into the corridor ahead as well as the warmth, much like a hot summer day, that shall warm your bones from the freezing cold you just came out from. The glow and crackle of lit fire pits ahead should warn you enough that these are cave passages inhabited by intelligent beings, which you will soon learn of as you take a few steps forward to begin your exploration.

Lizard Men, Tough Lizard Men and Lizard Men Shamans will be the first inhabitants of this dim lit world that will greet you with swords, spears and magic ready but as you battle, you will realize they are droppings to remain six feet under. You will come across Flaming Oil flasks on some of these Lizard Men that you slay and I suggest you try not to waste them unless you really need to because you're saving them for the lower levels where Trolls make their home.

Along with the Lizard Men who call this their home, you will also encounter Bombadier Beetles, Wraith Spiders, Sword Spiders and Phase Spiders within their own lairs, which is primarily on the bottom left of the level. You should take extreme caution with the Bombadier Beetles as they lash out with an acidic, paralyze cloud effect that will cause any party members caught in its radius damage as well as possibly paralyze them. Spiders are spiders and they do damage and poison you too, so make sure you have some antidotes being carried on you so you'll be able to stop the poison from killing your character during battle.

Remember our Elven friend Erevain Blacksheaf staying at the Snowdrift Inn in Easthaven? Well, seems like she was out being a brave warrior herself but unfortunately for her, traveling alone is risky business and she proved that by getting killed by the Sword Spider that is resting by her skeletal corpse. Don't forget to read her journal.

Deep within this network of passages is the Lizard King who is a pretty good and well rounded tough opponent to bring down to his knees for he does not walk alone and always has a circle of Tough Lizard Men and Shamans at his side, but this is not who you are really looking for. In fact, you won't learn who is behind the theft of the Heartstone Gem until the later levels, which I'll get to in a moment.

You will learn and also find some of the missing villagers from Kuldahar on this level, being kept and guarded by Lizard Men Shamans and is only a small piece of the puzzle that you learn while venturing in Dragon's Eye.

Over all this level is not too difficult at all, the Lizard King being the toughest to slay, at least up in these dark passages and there are no traps that I had come across so moving about will be quick and easy for any well rounded party. Free the villagers, learn what you can from them and then head down to the next level.

A reader's note hit me in e-mail awhile back and I thought this is would be an interesting note. It would seem, after the reader had tried several times to make sure it was not a bug or error, that if you clean out the entire area BEFORE you find the Lizard King, his own men will turn to favour your power over the Lizard King. This happened twice to the reader, even after reloading and his own men killed the Lizard King for the reader. Here is the e-mail describing the events, an interesting note to consider indeed!

"One thing I found in the Dragon's Eye level 1 when tackling the Lizard King - you may or may not want to mention it in your walkthrough. I took him on last of all i.e. I had cleared out the whole of the rest of the level. I found that his protective circle turned against him and actually walked out of the alcove to join my party !! After talking to him he turned hostile and his followers took him down for me !! They then turned hostile and I had to kill them. I tried a second time and the same thing happened - so I'm not sure whether it's a peculiar game play issue or it's designed to happen."

Thanks goes out to Kim for good detective work! :)

DRAGON'S EYE LVL 2 - The deeper you go!   

Dragon's Eye LVL 2
Enlarge Dragon's Eye LVL 2

Prepare your party for some very good battles as this is a level dotted with Tough Lizard Men, Trolls, Wraith Spiders, Bombadier Beetles, Sword Spiders and Talonite Priests, all scattered through a maze of twisting passages full of dark and long dancing shadows. This will be the level where you are introduced to the ever so popular and deadly, green warted, slimy skinned Trolls that not only pack a good punch, but also regenerate and bring themselves back up to do more damage. As legends have it and even as history has written, Trolls hate fire as well as acid because the damage done is damage that cannot be undone by their regenerating bodies.

For many veteran AD&D players, killing a Troll was common knowledge but for others who perhaps were just introduced to AD&D when Baldur's Gate came out, Trolls could prove to be a problem, especially when they keep getting up after you strike them down. Upon the last blow, the Troll will fall to the ground and seem dead, but you will notice that you can still target him and attack him. To put the Troll at rest, use either fire or acid while the Troll is on the ground regenerating. Fire arrows, acid arrows or any spell that deals fire or acid damage will do the job and you'll get the experience for the Troll and be able to move on to the other battles that await you and your party.

On the far right end of the map you'll find a very large lair of Bombadier Beetles and you're more than welcome to give it a shot by running down this corridor with sword swinging and magic blasting, but be warned. There are so many that doing so would be fatal as their acid blasts and paralyzing effects would put your entire party at risk and send them to a quick death before you realized what mess you got yourself in. The reward of course for besting all their numbers is a felled corpse at the end of the passage, whose equipment will make it worth your while and time of taking on each beetle and risking your party to the smell of death.

With the dotted and scattered groups of Lizard Men, Spiders and Trolls you will eventually come forth into a very vast and large cavern, illuminated by standing torches that surround a stone dais where the Talonite Priests have come to call their home. That is, until you arrived to spoil their fun. Mother Egenia, the head priest of Ilmater and the temple that resides in Kuldahar is being held against her will by the Talonite Priests and having you arrive just before they sacrifice her to their God is quite the blessing for her indeed. Scattered around these priests are Trolls who are looking for the chance to gain revenge on the fallen brothers you have slain on your journey to this retched place. Show them who's boss here!

During the battle, make sure that you do not cast any radius offensive spells that would hit Mother Egenia because she'll take it as a hostile threat and attack the party along side of the Talonite Priests and no doubt one of the reasons Black Isle did this was so you couldn't cast fireball at the centre of the Talonite circle. That would be the easiest way to dispatch this entire group of priests and Trolls, two fireballs and a looting you will go but since that is not the case, you'll want to use some stealth and lead the Trolls out first before going in for the final battle. Whatever happens, make sure Mother Egenia does not die or attack you because she has information about her capture as well as tells you where other captured villagers can be found.

One of the villagers is Conlan's child, who is very mouthy and rude but if you talk with him long enough, you will receive a key for Conlan's locked chest at the back of the shop. The weapon within will be of great help down the road so make sure you talk with all the villagers.

During this solution, I had Mother Egenia vanish on me after I saved her and she said she'd stick around if I needed healing, which I didn't so I went on my way. When I had cleared all the lower levels, I returned to talk to her again and make sure that I had selected everything I could so when I returned to Kuldahar, I'd get my reward from Sister Calliana at the Temple of Ilmater. No matter were I looked and searched, she was gone and gone for good. Upon my return to Kuldahar and Sister Calliana, they still believe her missing even though I had spoken to her once and saved her from the Talonite Priests. Our readers have also sent in the same problem, obviously an in-game bug.

I don't recall any traps being on this level either, but it's always better to be safe than sorry so always move about carefully regardless of where you are for that extra level of safety.

Once you have cleared this level and are satisfied that you have made the passages safe to walk through, take the dark passage that leads down and get ready for some undead dancing and body dismemberment slaying.

DRAGON'S EYE LVL 3 - Presio's horde   

Dragon's Eye LVL 3
Enlarge Dragon's Eye LVL 3

The smell of rotting flesh with be caught as you get closer to the bottom of the stairs as you make your way deeper and deeper into Dragon's Eye and waiting at the bottom of these stairs is a lovely group of undead whose bodies are rotted and gruesome looking that some of your members may very well turn away. Clerics on the other hand will be more than happy to lay these evil creations to rest and the warriors of your party will want to get their blades driven deep into the undead as they slowly lumber forward.

Cold Wights, Skeleton Archers, Blast Skeletons, Poison Zombies, Wights and Undead Lieutenants await your living, breathing warm fleshed bodies to feast on and make one of their own to join their growing army of death, which you will have to battle your way through endlessly.

The numbers of Cold Wights and Poison Zombies are high but don't let the numbers and large groups fool you as they did me the first time I explored these depths. You'll find the Cold Wights fall quickly, as do the Poison Zombies which don't seem to live up to their name. Not once was anyone of my party members poisoned by any of their attacks. Leading the attack will be the Undead Lieutenants and Blast Skeletons, the latter the more deadly of the two mentioned for upon their death, they explode in a blast of cold energy which sprays and hits any within a 15" radius. I found it was these blasts that caused more harm to my party than the actual battles that took place while I hacked my way through their numbers.

Step carefully while moving through their undead ranks as there are enough wards and traps that will cause one or more members of your party to fall to the dirt and when I say carefully I mean it. One trap removed may make you feel secure, but believe me, you've most likely missed another 4 that are situated around you. Move slowly and double check more often than you normally would as they start to become an annoyance when you think you're safe and someone walks over a pressure point that shocks them into death. It is also totally up to you if you want to clear this entire level of undead, I decided to take the direct route and headed straight down and then to the right towards the bridge. As a note, be careful when you cross the bridge and make sure your party does not wander ahead to fight the undead waiting on the other side as it is just a lure for those stupid enough to attack without checking for traps first. The other side of the bridge is a death trap waiting to happen so have a thief remove the wards that await the unsuspecting.

Soon enough, you will find a small, circular stone building which is across the bridge and in the bottom right corner which houses a good group of Wights, Poison Zombies and Presio, a female priest who is behind the entire creation of the undead army you have just taken care of and slain. Presio casts some very good defensive as well as offensive spells as she does battle with the party and her minion of undead create a beautiful front line that will keep your own fighters at bay while she leashes her magics upon the party. If you love the use of bows and ranged weapons, she's already one step ahead of you by casting Protection from Normal Missiles, another added defense barrier to her wonderful tactics.

For the more advanced, dive right into the room and see how well you fair against the onslaught of her guards as well as her powerful magic, but if you're not that sure of your skills as a player and your party in general, lead them out one by one to make it easier on yourself. I don't suggest it for any game because it spoils the fun factor of what the designers were trying to accomplish by placing the group where they are.

Once the battle is done, search for traps as the back wall and all compartments available to be opened are trapped with enough wards that those nearby will have a bloody death. Clean everything out and read Presio's personal journal for much needed information to the events that you have gotten yourself into.

When you're ready, head upwards to the stairs leading down and make your way to the next level. Do make sure you are checking for traps during your walk and check well for there are many pressure traps all around you.

DRAGON'S EYE LVL 4 - Eldathian's Lair   

Dragon's Eye LVL 4
Enlarge Dragon's Eye LVL 4

Finally, a safe haven for you and your party to rest and relax as you enter a hidden and well protected Temple of Eldath whose walls are covered in old Eldathian tapestries and the floors are covered in old, well used rugs. Resting here is available in the healers quarters of the Eldathian Temple who will be more than happy to welcome you and allow you to stay within their walls so you may explore the Temple and learn about the Eldathian ways.

So why is there a Temple of Eldath situated below three levels of havoc and large scale battles? For the answer, you can talk to Albion, he who welcomes those who have found the hallowed and protected walls of the Temple of Eldath.

Those who are quick to explore the Temple of Eldath will eventually realize that something isn't right. The fact that a temple to a good aligned deity rests beneath an army of undead, holding cells for captured villagers and the lair of a Lizard King just doesn't sit very well. The first thing the party will notice are the rugs, which are in fact not of Eldath nature and even some of the banners are different in colour and design, which will send the alarms off in some of your characters depending on their lore level. Having a Paladin in your party will reveal Albion's true nature, as the aura he gives off is not the aura a Paladin likes to see around someone and by this time, you've busted them and revealed their true nature.

Albion will sound the alarm and sorry to say, this is the only way to expose their true selves and you'd best prepare yourself for a very long and nasty battle.

When the alarm sounds, all the doors will open in the complex and if you can, have a PC close the double doors leading deeper into the temple which will result in stopping the droves and droves of Lizard Men Elite, Trolls and Yuan-ti Elite that will begin to snake their way through the door. This should give you a slight advantage in dealing with Albion and those near by who come to his aid. Although I did this battle with the doors open, as I did not know what to expect, I found that having those main doors closed afterwards gave me some added time to heal and prepare my party for the waves to follow.

Make sure when you kill Albion, if you are fighting with the doors open, the corpses around you will begin to pile up and up so finding items may prove to be difficult so move your mouse around slowly to find everything laying on the ground. What you're looking for is ALBION'S KEY which will unlock the door leading down to the last level, but let's finish off with this one before I finish off this chapter.

The most annoying part of this level, which only adds to its toughness, is that deep within the temple, in a secluded room is a High Summoner Priest, who continues to summon wave after wave of Trolls, Lizard Men and Yuan-ti Elite which keep pouring out over and over again towards your party. You will have to battle your way through each wave as best you can until you are able to bring the High Summoner down and stop him from summoning those creatures. One of the very reasons all the doors open in the temple is because when the foul beasts are summoned, they can easily walk through the complex and find you. Eventually, I honestly started to get annoyed since it was a great tactic that kept me at bay for sometime and I couldn't find the room in which the High Summoner was in. What I ended up doing was holding my party near the entrance, closed the double doors leading into the complex and cast invisibility on my strongest fighter and took him in to explore each room and corridor, searching for this blasted High Summoner. Once I found him and the room, I headed my party directly to that direction to make him beg for mercy as I ran by blade through his eye sockets and turned the blade around causing his body to shake uncontrollably in a spasm of pain that made his spine snap as he arched backwards in his final death scream.

Now it was my turn to lay on the beef to those within the temple and once you've taken care of the High Summoner, you need not worry about any wave or group of beasts heading in your direction to cause you grief. Just move from room to room and take care of those within as well as loot any shelf, table, sack or whatever else you find in your exploration.

The books you will find are great to sell in Kuldahar for some extra coin and are also good for some entertainment since they prove to be an enjoyable read. Perhaps you can save them for afterwards, when you've completed your quest and read them by a warm fire at the Evening Shade Inn in Kuldahar. Of course, it's up to you.

Besides the High Summoner, you'll also be introduced to the High Ritualist and his group of guards, who's just as stupid as the rest of them as he slips and tells you that the Heartstone Gem is with his leader, Yxunomei. Of course, you're going to have to lay the beats on this peep as well, just in case he plans on warning her you know. Spare no expense when it comes to your own safety! This battle is pretty straight forward as your fighters should have no problem taking care of the eight or so Yuan-ti Elite that go to do battle while the High Ritualist weaves his magics. Hold Person is one of his favorites, so be prepared to protect your front lines if one or more of your characters are held in their place.

The last room I explored had people from the caravan that was taken and left behind from Chapter One, the very caravan that Hrothgar had asked you to investigate and it was the goods that went to the Orcs while the captives went to the Yuan-ti and their leader Yxunomei for sacrifice and of course, to eat.

If you go to this room first and speak with the NPCs inside, you can liberate them and have them help you fight your way through the level, which would make things easier if the High Summoner is still bringing forth his summoned creatures to lay the beef down on your party.

Thanks to Gilles for letting us know about the NPCs giving you some added, extra fighting power!

Reise Copperkey, Iholikan Qunual and Marchon of Waterdeep will tell you of how the caravan was taken and what they did to keep themselves alive. The room they are in does hold a purpose though and that is you can rest here while they watch over you, without worrying about being attacked while resting. If you happened to have found this room before killing the High Summoner, you can rest here without any worries and replenish your offensive spell arsenal and heal your bleeding wounds. For myself though, I found this place last as I wanted to get rid of the High Summoner as soon as possible.

Once you've cleared out this level and picked up ALBION'S KEY head to the stairs which lead to the last level of Dragon's Eye.

DRAGON'S EYE LVL 5 - Yxunomei's Heartstone Gem   

Dragon's Eye Level 5
Enlarge Dragon's Eye LVL 5

Finally, all your hard work and time will result in two things on this last level.

The first will be learning who took the Heartstone Gem and being able to slay this foul person.

The second will getting the Heartstone Gem back from their clutches, but doing so will not be an easy task.

I cannot stress enough to you that magical weapons of 2+ or greater are required to bring the foul Yxunomei down who is in fact using the body of a child to hide her true form but don't fret brave warrior, you'll get to see her soon enough. Your journey through the twisting passage, which as you can see from the map is in the form of a snake, will lead you to the chamber that Yxunomei rests and going into any of the rooms off to the side from the main corridor is not needed, although for experience and the items found within, it's worth your while.

Step carefully while moving through the snake like passage for there are pressure points of poison dart traps and paralyze traps that will cause your party grief, especially if they are attacked by the very skilled and excellent Yuan-ti Archers whose arrows seem to always strike true. A paralyzed character while being pelted by three Yuan-ti Archers and their arrows does not stand a chance and I suggest you engage sword to sword combat as soon as possible so they change their weapons to something more appropriate that will stop them from launching their arrows at you. Do pick up their arrows if you have an archer in your party, they will help you in bringing down Yxunomei once you come face to face with her.

The final double doors are guarded by Yuan-ti Archers and Yuan-ti Priests as well as Yuan-ti Elite guards and the very back line of Yuan-ti Archers are standing on pressure traps, so do your best to avoid stepping on them. I found a few fireballs in their general direction did the trick. Once they are taken care of, you want to memorize some defensive spells and good offensive spells for the battle against Yxunomei. This is what I found to be very useful during this battle and I did not have anyone drop from her attacks, although it was my fourth time attempting it.

  • Have your priests cast Bless and Recitation as they are cumulative in their bonus awards.
  • Healing potions in your quick slots that can be quaffed when the situation looks grim.
  • Have your priests memorize healing spells, as many as possible.
  • I found Yxunomei's Magic Resistance was very good, but didn't have much effect when it came to Agannazar's Scorcher.
  • Equip everyone in your party with +2 weapons or better as anything less will have no effect.
Weapon wise, I found the majority of my +2 weapons in Dragon's Eye and equipped my characters accordingly to give them the best chance of victory.

My strategy was simple as I created a front line of my 4 strongest characters and had the middle one walk into Yxunomei's Chamber and lure her out into the hallway, where I brought that character back to the front line so I could get all 4 characters attacking her. My thief, who was now using the arrows from the Yuan-ti Archers was behind this line away from any attacks by Yxunomei and my mage was off to the side so when Yxunomei attacked, the Agannazar's Scorcher I'd cast would not damage or hit any of my front line. Use the space bar when you have to to monitor your party members and health status. Having Bless and Recitation gave my characters a +3 to hit and +4 to Saving Throws and gave Yxunomei a -3 to hit and -4 to her own Saving Throws. This defensive spell tactic helped greatly and I dropped Yxunomei very quickly without any loss of lives within my party.

Readers sent me a few notes on a secret room in the bottom right corner at the back of the torture chamber. Search the area and you will gain access into another room where you will find a few Yuan-Ti Champions. Kill them, search the room and get the Throwing Axe +2 which comes back to you when thrown!

Here is some more information on the secret room from another reader:

"Dragon's Eye, Level 5. In the torture chamber SE of the path next to the bookshelf there is a stone which shows blue. Press that, you hear a click, head back towards the path and there's a new side passage leading to the torturer and a couple of his henchmen. Dispatch them and on the table you find a +2 axe of returning (no Dwarf should be without one) and a couple of decent scrolls."

Thanks to Peter and Errand for this hidden gem!

Pick up the Heartstone Gem, clear out the rest of the level as you see fit and return to Kuldahar to speak with Arundel.

DRAGON'S EYE - Quests   

The journey to Dragon's Eye was to help Arundel locate and return the Heartstone Gem, at least he hopes it is in the Dragon's Eye where you were sent after finding traces of poison the the Alurite Priest in the Temple of the Forgotten God. Besides this, there are other quests that get completed while in Dragon's Eye and many questions answered from those first introduced in Kuldahar. They are:

ARUNDEL'S QUEST [Heartstone Gem]

This is found and located on Yxunomei who resides on the very bottom level of Dragon's Eye and will take some muscle, wit and patience to retrieve it from her as she is a very tough adversary to over come. The quest for the Heartstone Gem ends when you return to Kuldahar and speak with Arundel.

SISTER CALLIANA'S QUEST [mini-quest]

If you recall from Kuldahar, Sister Calliana spoke of Mother Egenia who had gone missing some time ago. It is in Dragon's Eye on level 2 that you will find her being held against her will by Talonite Priests. Find her, free her and she will tell you how she was captured. Return to Kuldahar and speak with Sister Calliana and tell her what you've learned.

As stated in Chapter 1, this quest is a dead end and even though you saved the Revered Mother Egenia, Sister Calliana will not acknowledge the fact and still think she's missing. This is a bug with the game.

LOST VILLAGERS QUEST [mini-quest]

Everyone in Kuldahar was talking about how children and those who lived in the village have gone missing over a period of time and no one is really sure what has become of them or where they could be. These villagers can be found in Dragon's Eye on levels 2 and level 3, being held captive for sacrifices as well as food for the foul beasts found within. Free the villagers and spread the word in Kuldahar of your heroic deeds.

PROLOGUE   CHAPTER 1    CHAPTER 2   CHAPTER 3
  CHAPTER 4   CHAPTER 5   CHAPTER 6   ITEM LIST


Amazon.com
Amazon.ca
Amazon.co.uk
Sorcerer's Place is a project run entirely by fans and for fans. Maintaining Sorcerer's Place and a stable environment for all our hosted sites requires a substantial amount of our time and funds on a regular basis, so please consider supporting us to keep the site up & running smoothly. Thank you!
  • Supporting Sorcerer's Place
  • Has Sorcerer's Place been useful? If you'd like to show your appreciation for our hard work on the site, and help us pay the bills the site generates every month, please consider helping support SP. Thank you!


    Already a supporter? Sign in here!


  • Random Quote
  • "Your ego is positively elven. Drop it a notch, lest I do it for you." -Yeslick, Baldur's Gate


  • Facts & Figures
  • 650 adventurers are currently exploring Sorcerer's Place
  • 1,640 downloads are currently hosted in our game sections and downloads vault
  • gibberishh and 533 guests are currently browsing the forums

Baldur's Gate, Tales of the Sword Coast, Baldur's Gate 2, Throne of Bhaal, Baldur's Gate 3, Neverwinter Nights, Shadows of Undrentide, Hordes of the Underdark and Dragon Age: Origins are © BioWare. Icewind Dale, Heart of Winter, Trials of the Luremaster, Icewind Dale 2 and Planescape: Torment are © Interplay. Pool of Radiance: Ruins of Myth Drannor is © SSI. Dragonshard, Forgotten Realms: Demon Stone, Neverwinter Nights 2, Mask of the Betrayer, Storm of Zehir, Mysteries of Westgate, The Temple of Elemental Evil, Dungeons & Dragons Online: Stormreach are © Atari, Inc. Dungeons & Dragons material is © Wizards of the Coast. All original content is © Sorcerer's Place.

Sorcerers.net is a participant in the Amazon Services LLC Associates Program, an affiliate advertising program designed to provide a means for sites to earn advertising fees by advertising and linking to products on amazon.com, amazon.ca and amazon.co.uk. Amazon and the Amazon logo are trademarks of Amazon.com, Inc. or its affiliates.

Manage Cookie Settings · Privacy Policy · Legal Disclaimer.