Icewind Dale

Icewind Dale Solution by Sylvus Moonbow

PROLOGUE   CHAPTER 1   CHAPTER 2    CHAPTER 3
  CHAPTER 4   CHAPTER 5   CHAPTER 6   ITEM LIST

Dorn's Deep
About Dorn's Deep
Outside Dorn's Deep
Inside Dorn's Deep
Orc Cave 1
Orc Cave 2
Ettin Cave
Dorn's Deep (LVL 1)
Puzzle Chamber
Dorn's Deep (LVL 2)
Dorn's Deep (LVL 3) - Entrance to Terikan's Tomb
Dorn's Deep (LVL 3) - Terikan's Tomb (LVL 1)
Dorn's Deep (LVL 3) - Terikan's Tomb (LVL 2)
The Online Maps
The Quests
DORN'S DEEP - About Dorn's Deep   

       On thy way to the Dwarven Hall nestled deep within the Spine of the World and your next location after finishing and completing The Severed Hand. It is Larrel who has lead you here to search and seek out the very reason as to what has been troubling Kuldahar and its people. Dorn's Deep will begin a series of events that will begin to unfold as you journey through the Dwarven tunnels made ages ago and lure you deeper and deeper into the very depths of the earth in your journey for the answer you seek!

I hope you are well prepared for the adventures that await thee will not only bring you fortune and fame, but also lead you through a series of quests as well as continue to fuel ones the party has come across in previous chapters. It is with this knowledge I give you that we begin to unfold these very quests and events in the start of Chapter 4 - Dorn's Deep.

DORN'S DEEP - Outside of Dorn's Deep   

Outside Dorn's Deep
Enlarge Outside of Dorn's Deep

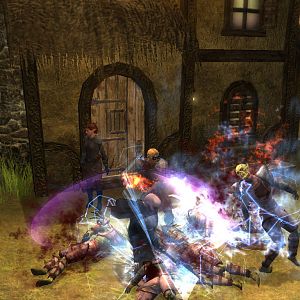
Cold and chilling are the peaks that Dorn's Deep rests on, a snowy ledge packed with thick layers of ice and years of snow falls that have layered upon each other. Footsteps will be one of the first thing a quick party member will spot as they knell down to investigate the fresh fallen snow and it is Orogs that will burst into the scene to attack each member! Swing thy blade true and cast thy magic well and dispose of these foul creatures, a task that should not be very difficult for the party you have created and brought this far.

When you've had enough of flexing thy muscles and bragging about how powerful you are, take a step inward brave warrior and let's see how you fair against the beasts that make their home...inside.

DORN'S DEEP - Inside Dorn's Deep   

Inside of Dorn's Deep
Enlarge the Inside of Dorn's Deep

Magical is it not how the caverns have carved themselves over the centuries which have protected and given the Dwarven race a home.

The first sight you will come across is the wonderful, light blue glow being given off by the very mushroom patches that rest some feet away, an excellent addition to the breath taking graphical work they have put into this product. With that aside, walking forward into the cavern, the party will be greeted by Blue Myconids who live in the very patches of mushrooms that you can see.

Dispatching them was not very difficult for my party and even their attempts at having my members go into beserk mode with their, what looks to be, spit attack failed. Even the very sound made when hitting these creatures gave me the impression that my sword was cleaving them into bits and pieces of shrooms and soon, a large pile had accumulated around my fighters.

Along with the Blue Myconids which you will encounter throughout the cavern and deeper within, Ettins also make their home within the damp, vast caverns and they do pack a serious punch if their numbers reach four or more, so take care while battling them. My dwarf within the party went bonkers when he found them lumbering around within the very passages that his own blood had lived and created so long ago and eventually, even the Ettins were starting to pile up around him so that he got stuck in the middle! Everyone shook their heads and had to help him out, but besides that, it is all we encountered monster wise during our journey here.

High above the the floor though, rests a tower of sorts, the warm glow of lights shine dull through the windows giving a welcomed feeling to go inside and greet whoever lives inside. Well, my greeting was rude, foul and insulting when I first met Bandoth, the wizard who resides within the towers walls. During our conversation, I was able to calm him down enough or perhaps ignore him altogether to purchase some of the spells he had available and other trinkets he had on his dusty shelves. Also, if you follow the dialog correctly, Bandoth will come to tell you of a secret entrance but will only tell you if you help him find his lost apprentice and along with him, should find a vial of Razorwine. This is found in the Ettin Lair as marked on the Ettin Lair Enlarged Map.

Thanks Chris for the info on this particular quest!

Besides Bandoth, there are three caves which one can enter as well as the entrance to Dorn's Deep LVL 1 and we'll look at those next.

DORN'S DEEP - Inside Dorn's Deep - Orc Lairs   

Dorn's Deep Orc Cave 1
Enlarge Dorn's Deep Orc Cave

Dorn's Deep Orc Cave 2
Enlarge Dorn's Deep Orc Cave

         Orcs. Back to the pits from whence thy came foul beasts and it is where you will be sending them as you clear out the two Orcish Lairs found within the vast caverns you are exploring. Each is as easy as the other and even a less experienced party should have absolutely no trouble fending the Orcs off and laying them to the dirt.

Enjoy cleaning thy blade after the battle because as you go deeper, you will have less time to do so, so enjoy it while it lasts brave warrior.

         This text is hidden to space out the table of pictures for the Orcish Caves within Dorn's Deep. Normally, viewing this is impossible unless you are viewing the source or you have highlighted this text within your browser window. On that note, this solution was created for Sorcerer at www.sorcerers.net by Sylvus Moonbow and was not created for any other site to link to or "borrow" for their own site as it is prohibited by the author since its creation. If you wish to have a similar solution on your web site, please feel free to capture your own images and create your own views and text about Icewind Dale.
DORN'S DEEP - Inside Dorn's Deep - Ettin Lair   

Dorn's Deep Ettin Lair
Enlarge Dorn's Deep Ettin Lair

         The sound of rattling bones will echo through thy ears as you walk towards the entrance to this vast and tall cavern which houses numerous Ettins and hanging, human skull bones which they have gathered since they moved in and made it their home. Be ready with thy blades and magic for there Ettins will defend the very home they live in and do their best to beat you to a pulp and join your skulls up with the others dangling towards the cavern floor.

As stated above, this is where you can find Bandoth's apprentice if you acquired the quest from him, except his apprentice is dead but don't fret. The vial you are looking for, that ingredient called Razorwine, can be found on a corpse within the Ettin Lair.

DORN'S DEEP LVL 1 - Stand ready!   

Dorn's Deep LVL 1
Enlarge Dorn's Deep LVL 1

         'tis about time you reached this place for I have been waiting for your adventure to really begin here within Dorn's Deep and I was wondering what was taking you so long to get here! Regardless, you have arrived and it is with that comfort that I can now sit back and warn you of the dangers that await you inside.

Warmth will be felt blowing out of the cave entrance, the heat coming from the lava rivers that flow beneath the stone you are standing upon and it is with this that has made this place livable by those who could not live in such harsh and cold conditions. You will be welcomed by a front line of Orc Elite Archers, who are there not only to pack a serious punch, but to take your attention away from the Drow Sorcerers who linger in the shadows waiting for their chance to strike you down with spells! Backing them up will be the Drow Spellswords, whose own magical resistance will have your own casters targeting the Neo Orog Marauders, Neo Orog Generals and Neo Orogs who stand in the wings waiting for their chance to run you down!

This, in my opinion, is a great battle that uses high ground tactics to create havoc within the party as arrows will fly from either side of you while you cross the lava river, only to be greeted by a wall of Drow Spellswords, Neo Orog Marauders and Neo Orog Generals that will keep your own fighters stuck in combat. This gives the Drow Sorcerers plenty of time and space to weave their spells and have explosion upon explosion slam into each and every one of you.

I highly suggest resting if you are having trouble getting through their wall of defense and have a few distance, area effect spells such as Web, which is great for holding the Drow Sorcerers at bay, giving you some time to hack your way through their front lines. Remember, Drow have great magic resistance and are also immune to Sleep and Charm related spells just as your own Elves are if you have any in your party. Fireballs are devastating to the archers who rest near the Drow Sorcerers and there could be a good chance that the Drow's magic resistance fails them a few times, but remember to have the blast hit the majority of the Neo Orog Archers and the outer blast to catch the Drow. This way, if you make a direct hit on a Drow with a fireball, the outer blast may not reach the Neo Orog Archers and you'll still have them making your party into one giant pin cushion.

Haste is another great spell to use on your front lines who are battling the other front line. The sooner you get through them, the sooner you reach the Drow Sorcerers and strike them down.

If you have anyone who uses arrows, pick them all up for they are great to have further down the road.

Once you've cleared this first wave of greetings that was waiting for you, continue to explore this area, which is dotted with Neo Orog Marauders, Neo Orog Generals along side of Drow Sorcerers, Drow Spellswords and Drow Vanguards. There are two exits leaving this level, one leading down to Krilag, an Orog Chieftain and another leading into the Tomb of Terikan the Lich.

DORN'S DEEP LVL 1 - Puzzle Chamber   

Dorn's Deep Floor Trap
Enlarge Dorn's Deep Floor Trap

It is with this I bring you the solution and answer to the deadly, yet enjoyable puzzle that you must solve if you want to get any further in your exploration of Dorn's Deep and that is to solve the Lightning Bolt puzzle that awaits thee! Found on this level behind a secret door as marked on Dorn's Deep LVL 1 Enlarged Map, you must do a few things first if you plan on going onwards.

First you will need to find the secret door, which is easy enough by having a thief searching the room it can be found in and if you are having trouble doing so, please check Dorn's Deep LVL 1 Enlarged Map for more details. Upon finding it, you will then have access to the chamber beyond and the puzzle that awaits thee.

Now without spoiling it for you, I will simply say that the answer to this puzzle lays in the room you just came from and one with a sharp eye will make note of the runic designs on the table but how you go about using them to solve the puzzle in the next chamber I will leave to you.

Of course, perhaps you have tried this numerous times over and over again to the point of utter frustration that you're starting to look like your father since you've been pulling out all your hair in anger. Well, fret not brave warrior because you have come to the right place for your answer.

What I found best to do in this situation is have your Cleric cast Protection from Lightning and place this on your strongest character, most likely a Fighter of sorts for protection in case you walk on the wrong stone. Every time you do step on a wrong stone, a Lightning Bolt slams into you, but with this spell active, the lightning bolt does nothing but go through you to bounce around in the chamber.

There are three stones you will have to step on, each part of the circular floor design. The first stone is on the outer rim of this circle, followed by a stone in the middle rim and lastly one on the inner rim. Stepping on these in order as stated on the Dorn's Deep Floor Trap Enlarged Map will disarm the trap.

Once you have disarmed the trap, you might be standing around scratching thy head wondering when something is going to happen. Well, something has happened and can be found by returning to the room you came from. Search well the statues and fix the arm on one of them to complete this puzzle. Once you have placed the arm back in place, return to the chamber where you disarmed the trap and you will notice that the floor has sunk, revealing a twisting stone stairway leading into the darkness below. When climbing down these stairs, you will come to a small room full of gears that activate the stairs you have just used to gain entry. On the floor you will spot a body, strewn in blood and with its bones cracked and skin cooked. Step lightly while on the flagstones that make the floor for it is here one can easily be roasted by the fireball trap that awaits thee. Disarm this trap and continue on thy way to Terikan's Tomb.

If you have not cleared out Dorn's Deep LVL 2, do so before heading down these new flight of stairs because you don't want to miss picking up the 1ST BADGE which you will need later on.

So with that said, let us continue our adventure brave warrior for adventure, fortune and fame!

DORN'S DEEP LVL 2 - Krilag the Orog Chieftain   

Dorn's Deep LVL 2
Enlarge Dorn's Deep LVL 2
*Badge Location*

         Deep within these earthly passages await to be explored and you will be greeted by an Umber Hulk who was once the leader of the Orogs at one point or other but who has now met a sad fate. Sabblic-tan is slowly losing his grasp on the life he once had as the Umber Hulk and it's mind has begun to decay what little life he has remaining before becoming a full fledged beast. Listen to his story and listen well and learn of Krilag, the Orog Chieftain that has now replaced Sabblic-tan and who is holding the 1ST BADGE of six that your party will have to find.

You will need this and all six if you plan on facing the foul evil that is behind everything that has been happening within The Spine of the World, so search these caverns well and find this Krilag and his goons, lay them to rest and return to Sabblic-tan for more information and experience.

Besides Krilag and his Neo Orog men, there are also Ettins that occupy these lower tunnels and caverns which you shouldn't have too much trouble with as there are only a small handful that will bare your passage.

Your main goal here is to retrieve Krilag's Badge and be on your way to the Tomb of Terikan the Lich and of course, we will go through a step by step of how to get there next.

DORN'S DEEP LVL 3 - Entrance to Terikan's Tomb   

Terikan's Tomb Entrance
Enlarge Entrance to Terikan's Tomb

         Although the Entrance to Terikan's Tomb Enlarged Map shows lava flowing from the large statue in the middle of the hall, this will only happen once you have defeated Terikan so please do not be confused with the screen capture I have taken as I took it after I had defeated the Lich.

Otherwise, the entrance is the same and it is here you will come across Norlinor, a ghost whose rest has been disturbed by Terikan as well as the other inhabitants of this Dwarven Resting Place who walk and do Terikan's bidding. It is up to you to lay them to rest and to do so, you will have to defeat Terikan on his own turf. A task that may not be very easy for some but I shall do my best to guide you through it as I did when I first went through these darkened passages.

Speak with Norlinor and learn what you can of Terikan as well as what happened to Dorn's Deep many ages past and when you are ready, step forward through one of the passages and let us begin your venture into the heart of Terikan's Lair and slay this foul undead sorcerer!

DORN'S DEEP LVL 3 - Terikan's Tomb LVL 1   

Terikan's Tomb LVL 1
Enlarge Terikan's Tomb LVL 1

         Crypts line the walls of this resting place as do the walking dead who will move in to stop you from getting any further. My dwarven Cleric screamed at the top of his lungs to his deity and vowed to avenge those who had been woken from their eternal slumber, raising his holy symbol high he spat the words to return the dead to whence they came! Skeletons exploded, their bones rattled across the flagstone floor while Zombies kept their distance. Tears strolled down my dwarven friends face as he asked those in the front lines to use crushing weapons, as not to disfigure his comrades any more than needed. Nodding their head in respect, swords were changes to clubs, war hammers and maces as the Zombies were taken care of. The fury in my companions eyes roared and I knew that he would be the one would would deal Terikan his final death blow!

Directly up the stairs of this Tomb you will encounter Terikan for the first time, who will blast you down with his magics and summoned, animated dead corpses he will continue to send your way. Deal with him quickly for the longer you take, the more undead he will animate and bring into the battle, protecting him and prolonging his exposure to weaken your party.

As soon as he has been dropped, be nimble and be quick to search the crypts nearby as some items may very well help you in defeating Terikan and his foul minions. A rough hand touched mine as I reached for the first crypt, my dwarven companion looked me hard in the eye knowing that to loot would only disrespect him and his people who were laid to rest here. It is up to you if you wish to loot the places that the dwarves now rest, especially if you have a dwarf in your party. For respect to my companion, I left the items behind and helped him restore the lids to their proper positions and returned the bones of the skeletons as well as the zombies back to their resting place before heading onward.

The only item that my dwarven companion would let me take was TERIKAN'S KEY, which you will need also to open the door before you and gain entry into his Inner Tomb where the final battle will take place.

If you loot, don't take long for Terikan will return and you will have to battle him again and this will continue until you finally defeat him. For that, we will get to next.

As for strategy, I really didn't have one except that I attacked him with everything I had, surrounding his undead form and hacked away. Arrows are useless on undead for they deal no bashing damage so you're just wasting your arrows. Get in there, mix it up, take some hard earned damage and don't be a pussy wart by using ranged weapons for every battle. Ranged weapons are a sign of a coward, so I hope your whole party isn't equipped with them. My dwarven companion turned the undead that Terikan brought forth so the only threat was Terikan himself, who was quickly dispatched by the swing of a good fighters weapon and strength while my mage sat back and watched, for Terikan has a high resistance to magic.

DORN'S DEEP LVL 3 - Terikan's Tomb LVL 2   
         

Terikan's Tomb LVL 2
Enlarge Terikan's Tomb LVL 2

         You have just found the Inner Tomb to Terikan's Lair, where other resting places also await thy exploration and battle veteran warriors. Terikan can be found at the very end of the chamber, but I suggest you explore each little crypt chamber on either side of the hallway and of course, always be quick to look for traps that are out to harm thee! Within the little crypts you will find treasure that will help you in the battle ahead, as well as helpful items needed to slay Terikan once and for all. If you recall, Norlinor spoke of TERIKAN'S PHYLACTERY which must be taken to Jamoth's Tomb when Terikan has been dropped by the party and by doing this, will stop him from regaining his power from the Phylactery and returning to fight you over and over again.

Now, to retrieve TERIKAN'S PHYLACTERY you have to make your way up the hallway to the forth crypt on your left side and I suggest you check Terikan's Inner Tomb Enlarged Map for the exact details and location to this item so you aren't wandering around getting yourself waxed by his evil minions. I found you are able to very easily sneak your way forward and explore the crypts up to the forth one without Terikan spotting you and sending in his swarm of undead to assault you.

The third tomb on the left side has a Greater Mummy nested inside which you should be ready for and also have some Cure Disease potions and spells on the ready in case one or more party members is touched by this foul creature. Send him back to whence he came and prepare thyself for the final battle against Terikan after you've snagged TERIKAN'S PHYLACTERY.

Other items of interest within the smaller crypts is EVAYNE'S JOURNAL who is the daughter of Larrel within The Severed Hand, the Lich who sent you here in the first place. As always, he is interested in knowing the final moments of his daughter and by handing over EVAYNE'S JOURNAL or at least the telling of it, will gain your party some extra experience with Larrel.

Upon the death of Terikan and after you take TERIKAN'S PHYLACTERY to Jamoth's Tomb, return to speak with Norlinor and tell him that Terikan and his minions have been put to rest, in which he will thank you for a job well done which will gain your party some well rounded experience and also tell you where the FORGE KEY can be attained.

You will also notice that the area itself has been brought back to how it once was as the forge now burns a bright, fiery red and within this forge you can find the FORGE KEY that will get you past the locked door within Terikan's Inner Tomb and also take you to our next Chapter, Chapter 5.

On your way back to the door that will lead you to Wyrm's Tooth, your advancement will be stopped by two very large Bronze Sentries who will do their best to bare you from going onward and it is best your front lines be wielding at least weapons of +2 or better to do any damage. Mages within thy party will have a hard time doing any damage to these Bronze Sentries for as the Lich Terikan, their magic resistance is high. Honestly, I didn't find them a problem and I bested them with my front line very quickly so I could continue to journey and adventure in solving the mysteries I had been sent out to find the answers for.

And like myself, you are ready to do the same so let us turn the page to Chapter 5.

DORN'S DEEP - The Quests   

The main quest within Chapter 4 spans the remaining two chapters as well and that is the quest to find all six badges which is the key to giving you entrance to the final and last battle that will complete your adventure and give you the answers as to who and what is behind all of this. The badges that can be found in Chapter 4 will be listed and because it is an ongoing quest between three chapters, make sure you don't miss any because you'll be pulling your hair out if you do!

BADGE'S QUEST [story advancement / major quest]

1ST Badge

This is found within Dorn's Deep LVL 2 on Krilag, an Orog Chieftain

SAABLIC-TAN'S QUEST [story advancement / badge quest]

Saablic-Tan can be found on Dorn's Deep LVL 2 and is an Umber Hulk who will be the first to introduce you to the major quest of finding all six badges and will give you the location of the 1st badge you will find on Krilag, an Orog Chieftain Kill Krilag and return to Saablic-Tan for your reward and more information.

BANDOTH'S QUEST [mini-quest]

Bandoth is found in his tower mulling away and wondering where his lost apprentice has gone for he had left looking for a rare ingredient Bandoth had needed called Razorwine. Now I never got this quest when I was doing this solution and I wanted to thank everyone who sent me their notes on how to get this quest, so you may get the experience I had missed. To gain this quest for yourself, use the following dialog options when speaking with Bandoth:

1) Apologize for intruding.

2) Ask about Larrel's daughter.

3) Ask about the Dorn's Deep and other related questions.

During some point of this conversation, Bandoth should interrupt you and say if you want anymore information out of him, you'll have to perform a task for him, which is to find Bandoth's apprentice.

The apprentice can be found in the Ettin Lair, dead of course by the large amount of Ettins who make it their home and the rare ingredient is Razorwine, which can be found on one of the corpses within the Ettin Lair.

Thanks Rebecca for adding your insight on this quest!

Thanks Chris for the added information we were missing!

Thanks to Adam for sending in the proper dialog options to use so you can acquire the Bandoth Quest!

NORLINOR'S QUEST [story advancement]

Norlinor can be found at The Entrance to Terikan's Tomb and is a ghost whose spirit cannot leave the material plane because Terikan has made all those resting within the Tomb to return as undead and serve him. Fortunately for Norlinor, he resides outside of the Tomb and has some semblance of his true form and because of this, he has asked you to help him lay his brothers and sisters to rest by slaying Terikan. Upon doing so, return to Norlinor for the location to the FORGE KEY as well as gain some experience for the deed.

FORGE KEY [chapter finale]

The FORGE KEY is used on the door where you finally defeated Terikan and will unlock it so you can begin Chapter 5.

Missing the FORGE KEY? It can be found here.


PROLOGUE   CHAPTER 1   CHAPTER 2    CHAPTER 3
  CHAPTER 4   CHAPTER 5   CHAPTER 6   ITEM LIST


Amazon.com
Amazon.ca
Amazon.co.uk
Sorcerer's Place is a project run entirely by fans and for fans. Maintaining Sorcerer's Place and a stable environment for all our hosted sites requires a substantial amount of our time and funds on a regular basis, so please consider supporting us to keep the site up & running smoothly. Thank you!
  • Supporting Sorcerer's Place
  • Has Sorcerer's Place been useful? If you'd like to show your appreciation for our hard work on the site, and help us pay the bills the site generates every month, please consider helping support SP. Thank you!


    Already a supporter? Sign in here!


  • Random Quote
  • "If I wanted to live a life of tedium, I would have become a monk." -Eldoth, Baldur's Gate


  • Facts & Figures
  • 100 adventurers are currently exploring Sorcerer's Place
  • 1,280 downloads are currently hosted on-site
  • 89 guests are currently browsing the forums

Baldur's Gate, Tales of the Sword Coast, Baldur's Gate 2, Throne of Bhaal, Baldur's Gate 3, Neverwinter Nights, Shadows of Undrentide, Hordes of the Underdark and Dragon Age: Origins are © BioWare. Icewind Dale, Heart of Winter, Trials of the Luremaster, Icewind Dale 2 and Planescape: Torment are © Interplay. Pool of Radiance: Ruins of Myth Drannor is © SSI. Dragonshard, Forgotten Realms: Demon Stone, Neverwinter Nights 2, Mask of the Betrayer, Storm of Zehir, Mysteries of Westgate, The Temple of Elemental Evil, Dungeons & Dragons Online: Stormreach are © Atari, Inc. Dungeons & Dragons material is © Wizards of the Coast. All original content is © Sorcerer's Place.

Sorcerers.net is a participant in the Amazon Services LLC Associates Program, an affiliate advertising program designed to provide a means for sites to earn advertising fees by advertising and linking to products on amazon.com, amazon.ca and amazon.co.uk. Amazon and the Amazon logo are trademarks of Amazon.com, Inc. or its affiliates.

Manage Cookie Settings · Privacy Policy · Legal Disclaimer.