-

- Forums
- Chatrooms
- Gallery
- Gameplay Videos
- Upload
- Articles
- Mod Reviews
- Shop SP: Games, Movies, Books
|
|
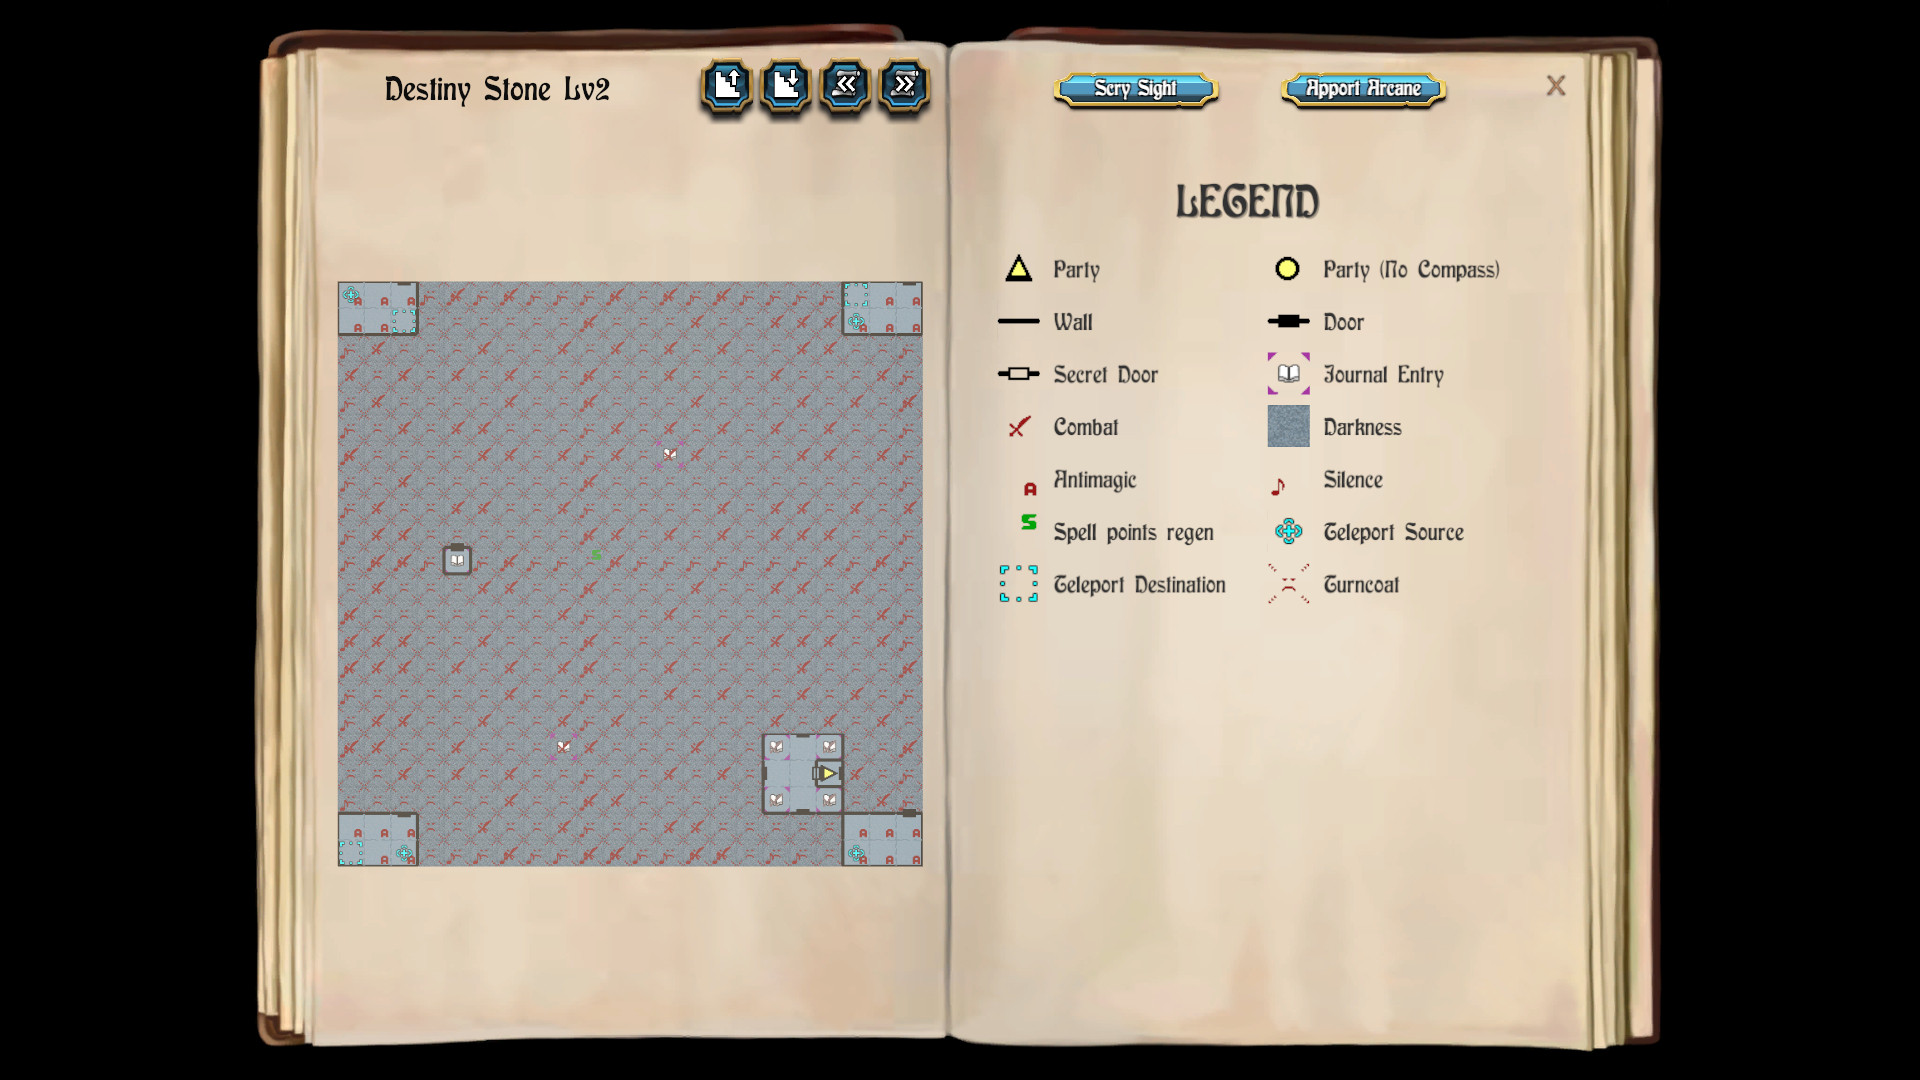
DESTINY STONE, LEVEL 2
Four Statues
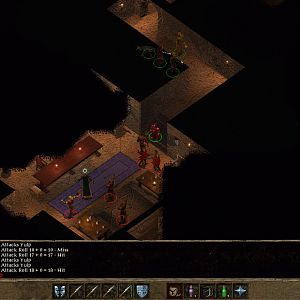
I start off at 3N 18E. I'm in a room with four statues that will attack me when I choose the option to look them. They are a Basilisk at 2N 18E, a Deathadren at 2N 16E, a Dragon called Gandravalk at 4N 16E, and a warrior named D'Artagnon at 4N 18E.
Where Are You Going?
I go south through the door from 2N 17E. Most of the level is a massive dark zone, with LOTS of silent squares (bad for Bards) and pretty much all the dark squares will turn any summoned monsters against you unless you equipped them with Kato's Bracers beforehand (like my Kringle Brother is).
The level also offers LOTs of fights against random monsters. There are a few monsters here that can create real problems.
Life Forcers and Demi Liches can cause Draining. Take them out first and foremost.
An individual Dexter can use a breath weapon at a distance, and can cause Stoning if they're up close. They become priority targets if they happen to appear within melee range, but are not so much to worry about if they start at a distance.
Skull Giants can cause Critical Hits, and usually will attack AFTER Talia has used the HEAL power from Wand Segment 6. One solution is to attack them while they're up close, AND have one of the Archmages use a Far Foes spell on them that will push them back before they attack. Allows me to attack them for free every time. If there's enough of them, I may go with a Dreamspell to also raise my AC enough to avoid their attacks.
Riddle Masters always appear one at a time, but can use either Death Strike or cause Possession with their physical attacks after Talia has used Wand Segment 6. They are also a priority target when they appear.
A real problem are Diet Fiends. They often show up in very numerous groups, usually attack first, and can cause Withering with their attacks, which HEAL can't do anything about. If they're already on top of me in melee range, I'll usually just reload. If hordes of them are at a distance, I go all out with a Dreamspell from one Archmage, and then a Mangar's Mind Mallet from another. Those two spells together soften them up (for subsequent uses of Wand Segment 3), and protect the party from their attacks for the rest of the combat. Diet Fiends are the only time when I have my Archmages pour their Spell Points into offensive spells on this level. Even though there's a Spell Point restoring square on this level (more on this later), I still want to keep my Spell Point pool handy for things like Far Foes and such when I need them.
I start things by winning the ones at 3N 14E, 4N 13E, 3N 12E, 2N 10E, 2N 9E, 1N 8E, 0N 9E, 0N 10E, 1N 12E, 1N 13E, 0N 13E and 0N 14E.
I loop around to the north part of the level, and then win fights against random monsters at 20N 16E, 18N 16E, 19N 17E, 20N 17E, 20N 18E, 19N 18E, 17N 19E, 18N 20E, 17N 21E, 15N 20E, 15N 18E, 16N 18E, 17N 17E, 15N 17E, 16N 16E, 16N 14E, 15N 13E and 15N 12E. A voice asks after the last fight: "Where are you going?"
I resume by winning fights against random monsters at 16N 12E, 17N 13E, 18N 12E, 19N 12E, 19N 14E, 21N 14E, 20N 13E, 21N 12E, 21N 10E, 20N 9E, 19N 8E, 19N 10E, 18N 9E, 17N 9E, 16N 10E, 15N 10E, 15N 8E, 14N 9E, 13N 8E, 12N 9E, 12N 10E and 11N 10E.
There is a Spell Point regenerating square at 11N 9E. I sit on it until Talia and Mordred are fully recharged.
The Four Statues Will Attack You If Examined
I now win fights against random monsters in a very long sequence of 11N 6E, 10N 6E, 10N 5E, 8N 5E, 7N 4E, 7N 6E, 6N 6E, 5N 6E, 4N 4E, 3N 4E, 3N 6E, 2N 6E, 0N 6E, 1N 5E, 3N 2E, 4N 1E, 4N 0E, 5N 1E, 5N 2E, 7N 2E, 8N 2E, 8N 1E, 7N 1E, 7N 0E, 8N 0E, 9N 0E, 10N 1E, 11N 1E, 11N 2E, 12N 2E, 12N 1E, 13N 1E, 14N 2E, 15N 0E, 16N 2E, 17N 1E, 18N 0E, 19N 1E, 18N 2E, 21N 4E, 21N 6E, 19N 5E, 18N 4E, 18N 6E, 17N 6E, 16N 5E, 16N 4E, 15N 5E, 15N 6E, A voice at 11N 4E says: "The four statues will attack you if examined." I go back to the Spell Point-replenishing square at 11N 9E and sit on it until Talia and Mordred are fully recharged again.
It's Kind of Slippery Here
I win fights against random monsters in an extended sequence of 12N 12E, 9N 12E, 10N 13E, 12N 14E, 13N 14E, 13N 16E, 12N 16E, 10N 16E, 10N 17E, 12N 17E, 13N 17E, 12N 18E, 11N 18E, 10N 19E, 13N 9E, 13N 21E, 11N 20E, 9N 20E, 8N 20E, 7N 21E, 4N 21E, 2N 20E, 5N 20E, 5N 18E, 6N 19E, 8N 18E, 8N 17E, 8N 16E, 7N 17E, 6N 17E, 5N 16E, 6N 14E, 8N 14E, 7N 12E, 6N 12E, 5N 10E, 4N 9E and 4N 8E. I get a message after the last fight: "It's kind of slippery here."
I continue with fights against random monsters at 5N 8E, 7N 8E, 7N 9E, 8N 9E, 9N 8E and 10N 9E. I again go back to the Spell Point-replenishing square at 11N 9E and sit on it until Talia and Mordred are fully recharged again.
Teleport to Level 3
I make my way to 2N 21E, and step south through the door. The teleporter at 0N 19E takes me to 0N 0E.
The teleporter at 0N 2E takes me to 20N 2E. The teleporter at 21N 0E takes me to 21N 19E.
The teleporter at 20N 19E takes me to the third and last level of the Destiny Stone.