Getting Here: Simply take a walk here from any other district within Athkatla.
"When you are in need of healing or guidance, the Temple District is one district you
should visit. It is where one can get the services to raise a fallen companion or heal the deep wounds caused during
battle or where one can make a donation to their favorite church."
| The Temple District - Buildings - Guarded Compound |
|
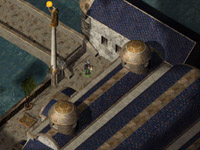
Outside the Guarded Compound
|
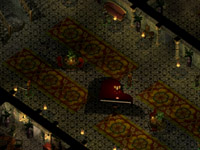
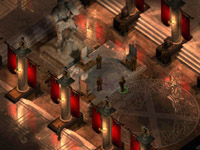
Inside the Guarded Compound
|
|
|
Sion and Ketta live here, two slave traders in the city of Athkatla and upon entering their home, they will ask that you leave
and if you do not, they will return with forces to match your party. This of course is not a bluff and if you continue to explore their home, that force they
have brought will be waiting for you on the second level. Snoop their home and you will be in for some very good, well rounded battles that will have
everyone in your party participating.
Moving across the floor towards the stairs at the back of the ground floor will trigger a protection alarm that will summon
some dazzling beasts of wonder that you will have to deal with first hand, so do be ready with everything you have. By setting off this protection device
you will bring forth a Glabrezu, an Efreeti, a Nishruu and one or two Ogre Berserkers who are more than happy to have you standing in the middle of them.
Now some will say easy victory will come if you dart back into the shadows, taking one character ahead to trigger the protection
alarm and then race back to the entrance so the creatures can fight against each other. Sure, you can do this, if your feet are quick enough but you will not
get the experience for the creatures that are slain and plus, it's not very brave at all.
Keeping the Nishruu away from your mages or any other spell casters should be your top priority because this magical creature
drains the charges from magical items being used by any character so concentrate ranged attacks of both spells and arrows if you like to use those in battle
on this beast. The Glabrezu on the other hand is the same foul beast one will face in The Planar Sphere and if you had trouble with
them there, be ready to go toe to toe again. The Efreeti is another worry, casting spells and dealing radius spell damage to the entire party during the battle
while the Ogre Berserkers are nothing more than a nuisance.
So why this large amount of magical creatures you ask? Due to the fact that this place is stocked with magical equipment and most
of that resides on the second floor of the compound and no doubt to make those not powerful enough to deal with the first floor, to disregard the second and
return to the streets.
The battle on the first floor may have
seemed a challenge to some and even difficult for others, it all depends
on the level of your current party but with enough determination, preparation
and offensive and defensive spells at your finger tips, the battle should
go your way enough that eventually, the foul beasts will be lying on
the compound floor. Don't pat yourself on the back too quickly. This was
only a taste of what is to come and if you plan on exploring further,
rest up, memorize your spells and save your game before heading up the
stairs to the second floor. Do this to save yourself time in case you
fail and don't be angered if you do because this next battle is definitely
not a walk in the park like many of the other encounters found in Athkatla.
Know every strength and weakness of your
party, know the spells they have and organize your potions to give everyone
a helping hand when things start to go awry. First off, if you have potions
of healing, extra healing, elixirs, hand them out and even their numbers
to everyone in the party, regardless of the fact that your spell casters
or weaker characters are going to be standing in the back of the group.
This is because of your location when you arrive at the top of the second
level. Oils of speed come in very handy as well to front line fighters
as do potions of fire resistance, fire giant strength and potion of armor
bottles.
|
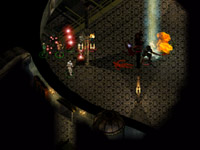
Inside the Guarded Compound
|
|
|
One advantage of having the stairs so close is the ability to retreat if things get too hairy for the
party and that tactic of running down the stairs and leading everyone down one by one to dismantle them. Tsk, tsk, tsk on you if
you do this because this group is beatable if you use some party tactics and keep everyone organized as well as monitored during
the battle. This was by far one of the better battles in the game and rewarding if you do it correctly rather than the cheap and
cowardly way.
Stalman, Maferan, Olaf Rassmusem, Koshi, Ketta and Sion will greet you here and this is the very group
that both Ketta and Sion spoke of when you burst into their home unannounced.
If you feel the need to summon creatures, do so as soon as you can because having them around will not
only give you some breathing room against this group, but also have some of their attacks that would have been towards you, on the creatures
you summoned. During the battle, I called forth three fire elementals and I must say that each one was quickly cut down by the group I was
facing, but it also bought me time to deal damage to some of the more deadly members of this very group.
Magic Missile was very helpful in disrupting
enemy spell casters and to deal quick damage to an enemy who was almost
dead and I actually ended up using all my Magic Missiles that I had to
resort to using scrolls of the same just to keep up. Flame Strike is deadly
and with Aerie and Jaheira
casting one at the same time caused for some sparks to fly!
The rest of the battle was won by a strong front line of fighters who engaged the spell casters as quickly as
possible as well as kept the threat of having my own spell casters taking damage by melee attacks. If you find yourself needing room, do
be very careful for there are traps littered all around the party you will be facing and they'll be more than happy to finish you off if you
get stuck in one of these traps or end up taking large amounts of damage because of one.
Once you have waxed this party, clean your blades and reward yourself by searching the entire second floor for
the items at hand.
| The Temple District - Buildings - Radiant Heart Building |
|
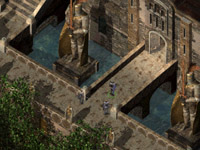
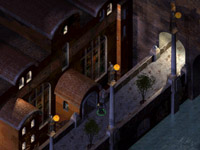
Outside the Radiant Heart Headquarters
|
Inside the Radiant Heart Headquarters
|
|
|
Ah, welcome to the Headquarters for all Paladin tards! Let us rejoice by spilling their blood on the cobble stones they so
dare to walk on day in and day out!
Actually, this building is magnificent
and rightly so for it houses some of the most notable and well known Paladins
in all of Athkatla who uphold justice, honor and peace for all those who
ask or are in need of such. Large stone statues reach towards the ceiling
of this wondrous building casting their shadows of glory on the marble
floor below. In fact, this was one place I was very impressed with for
I did not expect it to be so large in size and was even compelled to stay
for longer than I had planned, in awe of such construction and art found
within.
Once you have taken a deep breath, do make sure you speak with everyone inside, especially Sir Ryan Trawl who may just have some
work to toss your way if you are so interested and of course, you can also find Keldorn here if you did not happen to take him
along in your party upon first meeting in the sewers below.
| The Temple District - Houses - Pimlico Estate |
|
|
Outside of Pimlico Estate
|
|
|
|
|
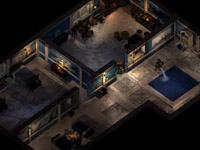
Inside of Pimlico Estate
|
|
|
|
The Pimlico Estate will cross your path if you happen to have Korgan in your
party and you're on the search for the BOOK OF KAZA but you'll find that
when you do enter the estate, that someone else has gotten to it before you.
A dead body, obviously that of Pimlico is screaming for justice, his blood splattered all over the floor and the walls where he lays
and those who had entered and taken the BOOK OF KAZA can be found in The Slums District
atop of The Copper Coronet.
Search the estate and take what you can find of use and be on your way.
| The Temple District - Temples - Temple of Helm |
|
|
Outside of the Temple of Helm
|
|
|
|
|
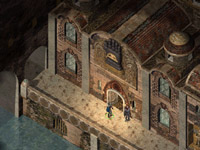
Inside the Temple of Helm
|
|
|
|
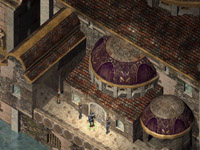
A very large building that has the symbol of Helm above the entrance so missing this building
would be very impossible. Temple of Helm guards stand by the door and greet those who enter and make their way into the inner
chamber of the temple.
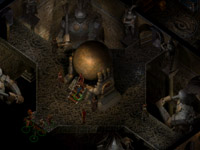
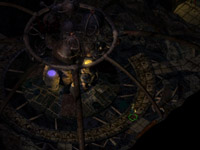
Inside the temple, two very large hands are in the middle of the inner chamber holding a large
bronze sphere where many of the priests reside, keeping the area clean and well maintained.
Speaking with the High Watcher Oisig would be of your best interest, who wishes that the party
look into a possible new cult that is forming in the sewers of the Temple District as many of the commoners
have made their way into the sewers and have never been seen again.
If you're looking for healing or items that may help later in your adventure, you can also find it here
if you simply ask.
| AVAILABLE SERVICES |
COST |
| Cure Light Wounds |
50gp |
| Cure Serious Wounds |
150gp |
| Cure Critical Wounds |
200gp |
| Heal |
750gp |
| Dispel Magic |
200gp |
| Remove Curse |
300gp |
| Slow Poison |
150gp |
| Raise Dead |
1,200gp |
| Resurrection |
1,800gp |
| Greater Restoration |
750gp |
| Plate Mail +1 |
6,550gp |
| Large Shield +2 |
4,585gp |
| War Hammer +1 |
3,930gp |
| Potion of Healing |
98gp |
| Potion of Genius |
393gp |
| Potion Mind Focusing |
655gp |
| Potion of Heroism |
1,048gp |
| Potion of Power |
2,227gp |
| Potion of Insight |
393gp |
| Elixir of Health |
327gp |
| Potion of Healing |
196gp |
| Antidote |
131gp |
| Stone to Flesh Scroll |
196gp |
| Protection from Acid |
982gp |
| Protection from Cold |
982gp |
| Protection from Fire |
982gp |
| Protection from Poison |
982gp |
| Protection from Undead |
982gp |
| Protection from Petrification |
786gp |
| The Temple District - Temples - Temple of Lathander |
|
|
Outside of the Temple of Lathander
|
|
|
|
|
Inside the Temple of Lathander
|
|
|
|
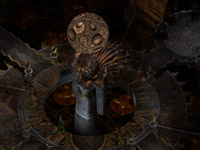
Not far away from the Temple
of Helm is the Temple of Lathander whose building
is just as large as the Temple of Helm and just
as magnificent. The inside of the building is just as grand as a very large
rotating sphere casts moving shadows on the stone floor that makes the room.
Services if you are in need of them can be bought at the right price and you'll want to speak with
Dawnbringer Sain if you've happened to complete the quests for the Temple of Helm because he will have something
that may just very well interest the party.
| AVAILABLE SERVICES |
COST |
| Cure Light Wounds |
50gp |
| Cure Serious Wounds |
150gp |
| Cure Critical Wounds |
200gp |
| Heal |
750gp |
| Dispel Magic |
200gp |
| Remove Curse |
320gp |
| Slow Poison |
150gp |
| Raise Dead |
1,200gp |
| Resurrection |
1,800gp |
| Greater Restoration |
750gp |
| Potion of Healing |
102gp |
| Potion of Genius |
408gp |
| Potion of Mind Focusing |
680gp |
| Potion of Insight |
408gp |
| Elixir of Health |
340gp |
| Antidote |
136gp |
| Boots of Grounding |
1,224gp |
| Staff of Striking |
680gp |
| Stone to Flesh Scroll |
204gp |
| Protection from Acid |
1,020gp |
| Protection from Cold |
1,020gp |
| Protection from Fire |
1,020gp |
| Protection from Undead |
1,020gp |
| Protection from Petrification |
816gp |
| Raise Dead |
4,760gp |
| Helm of Charm Protection |
1,088gp |
| Restoration Scroll |
1,020gp |
| Wooden Stakes |
1gp |
| The Temple District - Temples - Temple of Talos |
|
|
Outside of the Temple of Talos
|
|
|
|
|
Inside the Temple of Talos
|
|
|
|
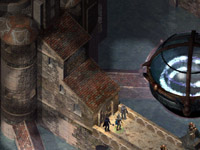
It seems strange that the Temple of Talos is empty but that is the way
it is when you enter this dark and shadowed chamber. No services can be bought here and not even the Shadow Knight that guards
the inner chamber will be of much use or help to the party.
| The Temple District - The People |
|
This is a full list of all People found within The Temple District.
- NPC Keldorn
- 5 Shield Knights
- Dawn Bringer Alvanna
- 6 Morning Knights
- 2 Commoners
- 2 Peasants
- 9 Knights of the Order
- Miranda
- Canie
- Halfling Women
- Town Crier
- Talon Zogas
- Counter Carravis
- 3 Storm Knights
- Garrick
- Lady Iriana
- Cyrando
- Sir Cadril
- High Watcher Oisig
- Guardian Telwyn
- Sir Donalus
- Dawnmaster Krell
- Dawnmaster Sain
- Sir Ryan Trawl
- Sir Zarath
- Sir Mardus
- Squire Melvin
- Prelate Wessalen
- Lanie
- Talon Nirkhas
- Heckler
- Gaal
| The Temple District - All Quests |
|
This is a full list of all Quests found within The Temple District.
| HUNT FOR THE UNSEEING EYE |
High Watcher Oisig will speak with you and ask that you look into the recent events that have befallen the Temple District and that
is the emergence of a new following of people to what is being called The Unseeing Eye. A possible cult or faction has begun and its known location is beneath
the Temple District in the sewers.
Investigating the Unseeing Eye and completing it will earn you a reputation
gain of +1, 7,000gp and a Mace "Ardulia's Fall" +1.
NOTE: This quest is only available once you have completed the Unseeing Eye Quest for the Temple of Helm.
Upon your return, Guardian Telwyn, found within the Temple of Helm will be so impressed with your removal of the Unseeing Eye
that he will offer you another quest and ask of your services to speak with Sir Sarles who can be found in the Government District
staying at the Jysstev's Estate. He will only be here if you have received this quest, so attempting to speak with him if you
have not been given this specific quest will be impossible.
You will be running around of course as Sir Sarles needs ILLITHIUM and
he will send you to speak with Jerlia the Ore Merchant about purchasing the 200 pounds he needs. Now Jerlia will tell you that
you can purchase real ILLITHIUM or buy a substitute for it.
If you opt to buy real ILLITIHUM, Jerlia will send you to speak with
Unger Hilldark found in The Copper Coronet and once again, he will tell you of Neb, a man who stole his only shipment of ILLITHIUM
and he can be found in a house within the Bridge District. Returning the real ILLITHIUM to Sir Sarles will earn the party 21,750xp and he
will agree to make what the Temple of Helm wants. You will also receive 1,000gp from the Temple of Helm and 20,000xp.
If you decide to go with the substitute, Sir Sarles will know of your trickery and promptly leave but you can still give the substitute to the Temple of Helm. You will only receive 11,000xp and
1,000gp. Why would you do it this way you ask? Well, the Mace of Disruption +1 can be coated with pure ILLITHIUM to make it
a +2 weapon which is great against undead as it protects the wielder from energy drain and deals some nasty damage against undead beasts you'll be facing much later on in the game.
Completion of either choice will make a quest for the Temple of Lathander available to the party.
After the completion of the first quest given to you by Guardian Telwyn, he will tell you to make your way over to the Temple of Lathander and speak with
Dawnbringer Sain, who will ask that you intercept the delivery of the DAWN RING, which was stolen from the temple by a priest of Talos.
This will take you to The Slums District where you are to meet Travin, the contact that the priest of Talos was going to meet and learn of the
location of the stolen DAWN RING. Once you learn where it is, you will be off to Borinall's House which is above The Copper Coronet. You will
have to battle him and his mugger pals to get the DAWN RING back.
Returning the DAWN RING to the Temple of Lathander will give the party 16,250xp, 1,000gp and the Helm of Glory, which will be given to you
by Guardian Telwyn of the Temple of Helm once the task is completed.
| SIR RYAN TRAWL'S QUEST FOR THE FALLEN PALADINS |
Received from Sir Ryan Trawl who can be found in the Radiant Heart Headquarters building, he will ask of your
service to help find Anarg, a now Fallen Paladin who has taken a few good men along with him and out of the order and is causing
problems that the Radiant Heart simply does not need at the moment. Sir Ryan Trawl would like you to side with Anarg and learn what
he and his men are up to, letting you know that they can be found within the Bridge District.
Finding Anarg and the Fallen Paladins will only make you return to Sir Ryan Trawl as acceptance into Anarg's group as well as the ability
to speak with him can only be gained by getting ANARG'S CUP, which
the Order took away from him once he defected.
By getting ANARG'S CUP, then and only then will he come out and speak
with you.
Completion of this quest will earn the party 10,250xp for bringing ANARG'S CUP
to him and a reputation bonus of +1 as well as the Gloves of Healing from Sir Ryan Trawl as thanks for removing Anarg and the Fallen Paladin threat.
| The Temple District - All Items |
|
This is a full list of all Magical
Items found within The Temple District. Their locations can be found
by viewing the rooms separately through the solution as they are also covered
in the Room Statistics.
NOTE: Store bought items are in this list.
- Potion of Healing
- Potion of Genius
- Potion of Mind Focusing
- Potion of Insight
- Elixir of Health
- Potion of Healing
- Antidote
- Stone to Flesh
- Raise Dead Scroll
- Protection from Poison
- Potion from Cold
- Restoration Scroll
- Ring of Animal Friendship
- Ring of Protection +1
- 1 Dart of Wounding
- Morning Star +2
- Katana "Celestial Fury"
- Katana +1
- Full Plate Mail +1
- Helmet of Defense
- Helmet of Charm Protection
- Two Handed Sword +2
- Large Shield +2
- Battle Axe +2
- Plate Mail Armor +1
- Mace +2
- Spear +3
- Sling +2
- Adventurer's Robe
- 9 Arrows +1
- 8 Arrows of Piercing
- 8 Bullets +1
- 10 Bullets +2
- 4 Arrows of Fire
- 10 Darts "Asp Nest"
- 20 Bolts of Lightning
- 10 Bolts +2
- 10 Darts of Wounding
- 4 Acid Arrows
- Wand of Paralyzation
- Wand of Fear
- Wand of Frost
- 8 Extra Healing Potions
- 2 Oils of Speed
- Potion of Agility
- Plate Mail +1
- Boots of Grounding
- Staff of Striking
- Large Shield +2
- Helm of Charm Protection
- Wooden Stakes
- War Hammer +1
- Potion of Healing
- Potion of Genius
- Potion of Mind Focusing
- Potion of Heroism
- Potion of Power
- Potion of Insight
- Elixir of Health
- Potion of Healing
- Antidote
- Stone to Flesh Scroll
- Protection from Acid Scroll
- Protection from Cold Scroll
- Protection from Fire Scroll
- Protection from Poison Scroll
- Protection from Undead Scroll
- Protection from Petrification Scroll
- Armor Spell [Wizard]
- Identify Spell [Wizard]
- Mordenkainen's Sword Spell [Wizard]
| The Temple District - All Monsters |
|
This is a full list of all Monsters
found within the rooms on all levels of The Temple District,
their locations can be found by viewing the rooms separately through the
solution as they are also covered in the Room Statistics.
- Sion
- Ketta
- Glabrezu
- Efreeti
- Nishruu
- Ogre Berserker
- Stalman
- Maferan
- Olaf Rassmusem
- Koshi
|
 |
|
|
|
It was the Temple District that I was first introduced to Keldorn and when I did
come across him, we parted without him ever joining my party. During my adventures though, it was Aerie that
complained about Korgan and said if he wasn't gone in a day, she would be. This was a big choice for me but
in the end, I switched Korgan for Keldorn but well after I had completed the
Unseeing Eye quest.
Although I was very close to Korgan in terms of a character (I loved his comments), Keldorn has
fit as a replacement pretty well in terms of stepping it up on the battle field. Korgan's ability with battle axes is one
thing I will never be able to replace in the party but I was not about to let Aerie go as she was far too important to me and the
party.
| 01 |
Grub |
Barbarian |
Half Orc |
| 02 |
Valygar |
[Stalker] |
Human |
| 03 |
Minsc |
Ranger |
Human |
| 04 |
Jaheira |
Fighter/Druid |
Half Elf |
| 05 |
Keldorn / Korgan |
[Inquisitor] / [Berserker] |
Human / Dwarf |
| 06 |
Aerie |
Cleric/Mage |
Avariel |
|
|
|
|
|
|
|
|
|
|