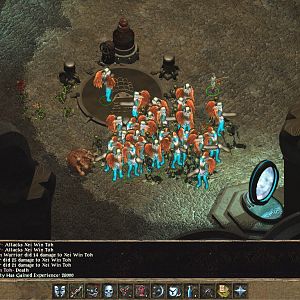
Getting Here: You must receive the following information:
| VALYGAR'S QUEST TO THE PLANAR SPHERE |
Valygar can be found in Umar Hills within his cabin, hiding from the Cowled Wizards who seek his body to be able to enter
The Planar Sphere as he is the only one who can get you inside the strange building. The Planar Sphere is located in The Slums District and
by accepting to help Valygar can you gain entrance. If you are helping the Cowled Wizards hunt Valygar down, his own body will also be able to gain you
entrance. How you get into The Planar Sphere is, of course, up to you.
"Nay! Saw it with me own eyes I did this morn as the sun was rising over The Copper Coronet, scared me something
white I say and the pigeons nesting near by. Just popped out of the air, as if it had a right to be there, crushing poor 'ol Flaux's house it did.
I stood there with me eyes wide as the sun beamed off the smooth surface of the sphere and smoke curled around its base from where it had blasted away
the buildings before. 'tis a strange thing, attracted the attention of the Cowled Wizards too, but it seems even they can't figure out what it is nor
how to get inside. Best keep your distance and forget ye even saw it!"
| Planar Sphere - Level One - Planar Sphere Entrance |
|
|
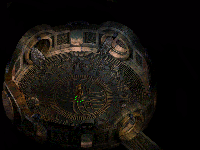
Planar Sphere Entrance
|
|
|
The circular room stands silent and still, three closed doors stand before you and the last, wide open behind
your party, the very door you just came through. The doors themselves are circular as well, just like the room and look very solid and thick, perhaps
one reason as to why nothing can be heard coming from behind them. The very door ahead of you though cannot be opened by normal means and even a skilled
thief will have difficulty picking its lock, which needs the PLANAR KEY to open it.
Perhaps exploring the other two doors, which can be opened normally, would help in finding this key that you need.
|
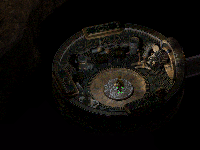
Golem Guardian
|
|
|
Guardian of this room is a Clay Golem, who
will dart forward and attack the party for entering this room, so you will have to do your best to bring it down because there
are three very important items to be found within. That would be the PLANAR KEY needed to open the
door in the Planar Sphere Entrance room and some COAL needed for the
Furnace Room found deeper within the Planar Sphere. The last item is part of a Golem, whose GOLEM ARM
will be used to create and activate a Golem in the Golem Experiment room.
Search the rest of the room as well and take whatever else you find that will be able to help your party while you are venturing
into the Planar Sphere's depths.
|
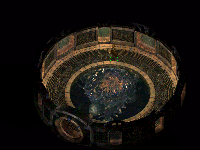
Mephit Guardian
|
|
|
A Steam Mephit will fly towards you, its tail lashing side to side as it comes in for the attack and an easy
creature for you to bring down as it is no real threat to your party and more of an annoyance anyhow. You'd think you would have seen the last of them
in Irenicus' Dungeon but they still seem popular as a fill in for some areas. The room is empty and if you haven't been to
the Golem Guardian room yet, I suggest you head on over because that is where the items you need are.
|
Welcome Room
|
|
|
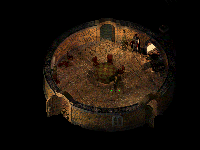
Before this door will even open, you will have to get the PLANAR KEY which can be
found in the Golem Guardian Room and once you have that, then you will gain entry into the room beyond.
Reyna, Onvo and Anca can be found in this room, standing about and quietly talking to themselves, although their weapons are
ready as you make your way through, their faces hard, telling of a tale that they have gone through to get where they are. Speaking with either one of them will
help give you some needed information on the areas beyond, so listen to them well. They are fellow Knights of Solamnia who entered the sphere when it came
to their world and have not seen their world since, the room they are now in has been their home for sometime, the areas beyond too tough for the three of them
to take on themselves.
|
 |
|
 |
| Planar Sphere - Level One - Welcome Room | Room Statistics |
- Reyna
- Onvo
- Anca
- Notable Information Learned
- Warding Whip Spell [Wizard]
- 3 exits
|
|
|
 |
|
|
 |
|
 |
|
Sahuagin Room
|
|
|
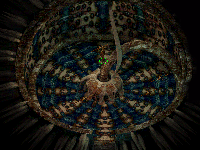
Wet is the floor when you open this door as a few inches of water makes its way up to your ankles and
even the walls are wet and soft to the touch. It is home to a good number of Sahuagins who have been living inside of the Planar Sphere
and invading their home is not something they take lightly. Bring it on is what I say and best you do the same! Charge forward with your swords drawn and your magic
crackling and let their blood mix with the water you stand in, then return to the Welcome Room and show those Knights of Solamnia who the
real brave warriors are. Clean your blades, search the room and move on.
|
Halfling Havoc
|
|
|
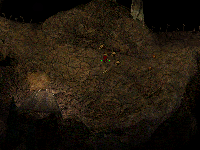
Opening the door to this strange looking,
bony area will introduce you to some very tough Halfling Warriors who have
been gnawing on some meat and upon seeing you, they rush the party. Now
these guys pack a punch and even worse so are those of Togan, Kayard, Entu
and Modagish who are feasting on their own pile of food and they bite very
hard if you're not careful. Do not underestimate this group of spellcasters
and warriors because if you do, you'll find yourself laying face down in
the dirt wondering what happened.
|
Halfling Havoc
|
|
|
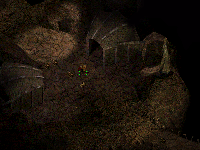
Now this was my first "real" battle against any spell caster and to top it off, it was one
that I had to worry about as Modagish and Entu weave their magics to protect themselves and also hurt your party. Mental Domination
was one nasty spell that was cast against my party as well as Maze, which is annoying when it's cast on your main party member that
you count on in times like these. Silence is also another tactic they will cast at you and I ended up trying this battle over and over
again until I got it right and waxed them. It taught me a few things about counter strike spells, that's for sure.
Do your best at bringing them down with both sword and magic, clean the mess up and make sure you grab
the COAL which you will need to fire up the
furnaces in the Furnace Room.
| Planar Sphere - Level One - Golem Experiment Room |
|
|
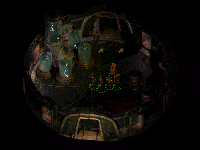
Golem Experiment Room
|
|
|
Phase Spiders and Ettercaps will rush towards
the door to attack the party as the door opens, behind them large tanks
bubble, a Golem that is almost complete rests in one of them. Bring down
these foul creatures so you can search the room and its contents and find
more COAL
for the Furnace Room as well as a book on GOLEM
BUILDING which you will also need for you must complete the Golem
that is in the tank. The Golem here needs two parts to be completed, the
GOLEM
ARM and the GOLEM
HEAD, their locations are listed below.
GOLEM ARM can be found in the Golem Guardian Room.
GOLEM HEAD can be found in the Clock Room.
Finding both parts and assembling them will complete the Golem who will then be able to open the door on the right side of the room,
which cannot be opened by any other means.
|
Furnace Room
|
|
|
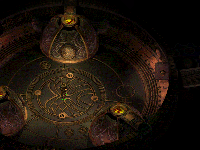
Screams are followed by running Halflings as they come to charge you as you make your way into this room,
which consists of three very large furnaces, although currently inactive, as well as being very well guarded. The Halfling Warriors are being ordered
by Taibela and Necre, who will do everything in their own power and abilities to keep you from activating these furnaces.
Once you have bested these crazy Halflings, you'll want to get the furnaces up and running and to do so, you will
need three lumps of COAL, each one is placed into its own
furnace to activate it. When you activate one, a Fire Elemental will appear, to do its best to keep you from turning on the others in the room,
and after you turn on each furnace, a Fire Elemental will be there to do battle.
COAL can be found in four places
within the Planar Sphere, those locations are listed below.
Located in the Golem Guardian room.
Located on a halfling in the Halfling Havoc room.
Located in the Golem Experiment room.
Located in the Clock Room.
|
Clock Room
|
|
|
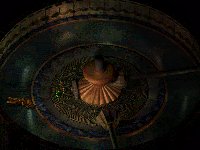
The sound of gears slowing grinding can be
heard as you open the door and are greeted by the insides of a very large
clock, or what seems to be. Gears, both large and small have begun their
rotation and a ticking sound has begun to get louder as well as quicker.
Stone Elementals activate as well upon your entrance and move towards you
at an alarming rate. Swing your sword and best these evil creations so you
can search the room without being bothered. Doing so will uncover the GOLEM
HEAD one will need for the Golem Experiment
room and an extra stash of COAL
in case you happened to miss one of the other stashes found within the Planar
Sphere.
Once this room has been taken care of by the party, move on out.
| Planar Sphere - Level One - Obsidian Sphere Room |
|
|
Obsidian Sphere Room
|
|
|
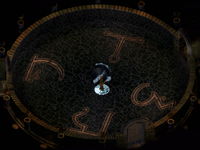
A black, obsidian sphere rests in the very
center of this room, waves of energy racing around it in a fluid motion
that will immediately attract your attention. Your eyes will also be averted
to the runes placed around the sphere which hum softly with each step you take
towards the obsidian sphere. Two other doors exit this room, not including
the one you've come through while following the Golem, who will race through
this room and into the Elder Orb Room. The very
door in the southern part of the room cannot be opened by normal means and
you will have to step on each rune in order to unlock this door so you can
gain access to The Power Core. The order you step
on these runes are listed below.
1st rune - The rune to the top of the obsidian sphere.
2nd rune - The rune to the bottom of the obsidian sphere.
3rd rune - The rune to the right of the obsidian sphere.
4th rune - The rune to the left of the obsidian sphere.
|
 |
|
 |
| Planar Sphere - Level One - Obsidian Sphere Room | Room Statistics |
- Empty
- No creatures moving about
- No items found
- 3 exits
|
|
|
 |
|
|
 |
|
 |
|
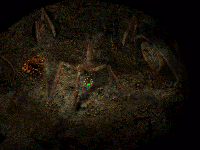
Elder Orb Room
|
|
|
It is this room that the Golem created from the Golem Experiment Room will make a wild dash
for, speaking of intruders to the sphere and moves to dispatch the Elder Orb that has come to make this small place its home. Give the Golem a helping hand in
removing this threat to you and the Planar Sphere.
Search the ground well once the Elder Orb has been removed for you never know what may lay hidden here.
|
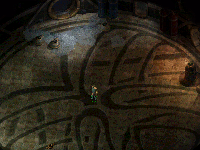
Tolgerias' Welcome
|
|
|
Prepare yourself for a very good magical battle, for it is the Cowled Wizard Tolgerias and his assistant who will greet
you when you step forth into this room. Seems like the Cowled Wizards entered the Planar Sphere while following you inside and have plans
on stopping you from ruining their own plans. The range of spells that Tolgerias will weave and throw in your direction are enough to give anyone
headaches, so have a lot of protections as well as spells to pierce away Tolgerias' own protections. His assistant mage, is at best, an annoyance, a caster
to keep you on your heels and at bay with his summoning spells. I had a lot of fun with this battle, rushing forward to get my fighters into the room
while my mages removed his magical protections. Besides these two, the room is empty.
|
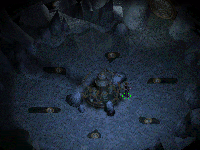
Cold Room
|
|
|
You will have to make your way through this room or the Warm Room if you wish to reach the Power Core that
is powering the Planar Sphere. This chilling room is littered with Ice Trolls, Ice Mephits and Ice Salamanders and is by far the easier
of the two rooms to go through I found personally. Battle through their own defenses, search the room and move on.
Sylvus Moonbow walked with you and guided you within the Planar Sphere!
|
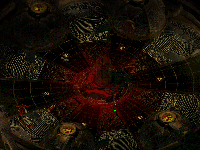
Warm Room
|
|
|
You will have to make your way through this room or the Cold Room if you wish
to reach the Power Core that is powering the Planar Sphere. This blistering, boiling room is littered
with Fire Elementals, Greater Fire Elementals, Smoke Mephits, Fire Mephits, Fire Salamander's and an Efreeti to add to that number and is by far,
much tougher than the Cold Room. Battle these foul beasts until they are dead and then search the room. You will find
a few items of note that will help you in your journey through the Planar Sphere.
|
Power Core
|
|
|
A very large, very strange and evil looking statue, or perhaps even outer shell of some very large creature, makes the
center of this room and is also the Power Core that you will have to power up to get the Planar Sphere back to the
Material Plane. Guarding this area though are Stone and Clay Golems, who roam the platforms in pairs, so be ready to have them come at you in full force!
Once you have dealt with these creations, you may want to search the area for there are a few items and one in particular
you may very well be interested in.
If you have the DEMON HEART already from the Demonic Plane, simply put the heart into the Power Core
to give it the power it will need and return to speak with Lavok and hear what he has to say. If you do not have the DEMON HEART as of yet, it is one journey you will have to go one,
and one you won't so quickly forget!
The stairs leaving this area lead up into the Cold Room and the Warm Room.
|
Lavok's Study
|
|
|
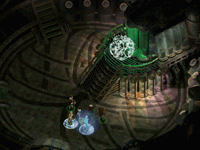
Lavok can be found here, Valygar's own blood and maker of the Planar Sphere. When you enter,
Lavok will show no mercy on you and attack you right away, so be ready and use all your battle skills to bring him down to the point of speaking. During this battle, he will be able to fight
back the very evil that has consumed him for so long and ask that you help him return the Planar Sphere to the Material Plane so he may see the sun once more before he dies.
Accepting this, you will have to leave the Planar Sphere and make a short journey into the very pits of the Demonic Plane. There, you will search for
a Demon whose heart can be the only thing that powers the Planar Sphere so it may return to the Material Plane. It's your only chance to get back, so it must be done.
Taking too long on this quest to slay this Demon
will only have Lavok perish, the evil finally tainting him and upon your
return, he will have nothing more to say to you, his target gone red and
will remain laying on the very steps he will perish on. If you didn't
diddy daddle by resting for 2 weeks at a time, or who knows what else
you've been doing while on this quest, Lavok will ask that you take his
body out of the Planar Sphere so he may see the
sun one last time. Do this and your adventure for fortune and fame within
the Planar Sphere will be over.
|
The Spore Colony
|
|
|
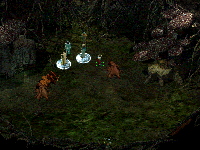
The Spore Colony is but a small area, dotted with bushes, grass and trees along side of two Spore Colonies that
call forth a slew of Myconids to defend against you and your party. Taking out each Spore Colony will stop the flow of Myconids being brought to this area and once you have
cleaned up and made them corpses, search the area and be on your way.
Crazy ass mushrooms that attack thee if you are not careful! Draw thy mighty blade brave warrior and slay 'em! Slay 'em all I say!
|
Lizard Man Room
|
|
|
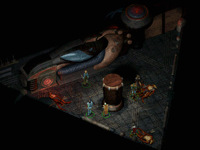
To walk through the door means to come to this Lizard Man Room and be assaulted by
the Lizard Men who make this their place of living. Growling and lashing their tails behind them, these easy and stupid creatures will be no
match for you and your party, so slice 'em, dice 'em and serve 'em on a plate, search the room quickly and be gone. There are other places you
should be exploring!
Lizards! LIZARDS! AAAAHHHH!
My heart skipped a few beats as I left the Planar Sphere and stepped on the surface of leather-like
skin, which was the very floor and it moved and sank to each step that I took. The whispers I heard in my head were filled with evil sayings and screams
of dying men, women and children alike echoed all around me. Knowing I had come here for one thing, I set my mind on that, concentrating to keep the voices
and screams away even though they followed me wherever I went. Twisted and distorted faces yawned at me from the very cliffs and rocks that jutted out like
jagged teeth, their tears of blood swallowed by another mouth some feet below.
|
Hunting for Demons
|
|
|
Welcome to a place you will not so easily forget and a place that still has lasting memories flash before my very eyes, the
screams even come to me at night while I sleep, but only during the times when the moon is at its full. Do not walk in here as an arrogant warrior thinking
that ground where you walk is owned by you because you are in for a mighty slap in the face by the very Demons who walk this place. You will learn what it is like
to dance with a Tanar'ri and Lea'liyl, Demons of this place and if you don't find them, they will certainly find you and when they do, best you be ready with
everything you've got because once they fix their gaze on you or a member of your party, they will stop at nothing until they are dead.
|
A Helping Hand
|
|
|
Casting Bless, Chant, Protection from Evil, Defensive Harmony, Resist Fear, Protection from Fire, Barkskin, Free Action, Chaotic Commands, Magic Resistance
are all excellent spells to be cast on members of the party or even one of your main fighters who will be able to go toe to toe with either the Tanar'ri or Lea'liyl. Added potions of
Extra Healing, Oil of Speed, Potion of Defense and Fire Giant Strength will make your fighter a force to be reckoned with. Add some back up in your hunt and your one fighter could be the hero of this
plane. The Staff of Fire +2 that summons Fire Elementals is good to use here because the creatures found on this plane use fire based attacks and you can send your Fire Elementals to
battle the minor beasts, Imps, Salamanders, Fire Mephits and Maurezhi because the Fire Elementals are resistant to those fire attacks.
|
A Last Search Effort
|
|
|
I had the rest of my party members protected
by radius spells and were backup if my main fighter happened to need it. With proper planning on both defensive and offensive spells poured onto your strongest member, you should have
no problem taking the demons down. One main reason you may want to go one on one is because the Tanar'ri or Lea'liyl may concentrate its attack on other party members, and as soon as
one of them is held in position by its stare, the demon will do nothing else but make its way to that character and attack them until it is dead, then move on to the next. Having Free
Action and Chaotic Commands flowing around your main fighter, they will be immune to this tactic and all you have to worry about is keeping an eye out on their health, quaff a few Potions
of Extra Healing and watch the foul beasts perish.
I had a lot of fun here, once I got myself all geared up and ready to go, I summoned three Fire Elementals, drank a Potion of Defense which lowers your AC base
to 0 and after adding the rest of the magical items I was already wearing, plus the spells casted on me before leaving, gave me an AC of -10. Following the Potion of Defense, I quickly drank a Potion of Fire Giant Strength to boost my 19
strength to 22, then rubbed an Oil of Speed flask on my skin to haste myself. Called to the Fire Elementals and the rest is history.
There are three Demons here, two Tanar'ri and one Lea'liyl which I suggest you kill if you're having fun hunting them, which I was. Grab one or all three
DEMON HEARTS and return to the inside of the Planar Sphere.
| The Planar Sphere - All Quests |
|
This is a full list of all Quests found within The Planar Sphere.
Finding the PLANAR KEY is done by searching the contents
found in the Golem Guardian room.
Acquiring this key will allow you passage into the Welcome
Room.
The three furnaces found in the Furnace Room need
to be activated so you can give power to the obsidian sphere in the Obsidian
Sphere room. To activate each furnace, you need to find three pieces
of COAL
and toss each one into each furnace.
The location of some COAL is listed below.
Located in the Golem Guardian room.
Located on a halfling in the Halfling Havoc room.
Located in the Golem Experiment room.
Located in the Clock Room.
| FINISHING THE INCOMPLETE GOLEM |
It would seem parts of an incomplete Golem found in the Golem
Experiment Room can be located through out the Planar
Sphere. Putting this Golem back together would be a good idea if you
wanted to get deeper into the Planar Sphere. The
locations of each missing part are listed below.
GOLEM ARM can be found in Golem Guardian room on Level One.
GOLEM HEAD can be found in the Clock Room on Level One.
Putting the Golem together will give you entry into the Obsidian Sphere Room and give you 23,500xp.
The Planar Sphere has to be returned to the Material Plane if you have any hopes of continuing your adventure
in Athkatla. You will have to travel to the Demonic Plane to find, kill a Demon and take the
DEMON HEART back to the Power Core.
Accepting to find the DEMON HEART for Lavok will give you 28,750xp
and getting the power back on to the Planar Sphere will earn you 45,000xp.
Bringing Lavok outside to see the sun before he passes away will gain each member in the party an additional 45,000xp.
| Planar Sphere - All Items |
|
This is a full list of all Magical
Items found within the Planar Sphere. Their locations can be found
by viewing the rooms separately through the solution as they are also covered
in the Room Statistics.
- 40 Bullets +2
- 40 Bullets +1
- 40 Bolts +2
- 40 Bolts of Lightning
- 40 Arrows +2
- 16 Bolts of Biting
- 6 Paralytic Bolts
- 40 Darts of Wounding
- 30 Arrows of Piercing
- 40 Ice Arrows
- 60 Darts +1
- 120 Fire Arrows
- 10 Potions of Extra Healing
- Ring of the Ram
- Leather Armor +2 "Protection of the Second"
- Ninja-To +1
- Battle Axe +2
- Helm of Defense
- Large Shield +1, +4 vs Missiles
- Staff of Fire +2
- Ring of Danger Sense
- Quarter Staff +1
- Stiletto of Demarchess Dagger +2
- Cloak of Protection +1
- Composite Long Bow "Ripper" +2
- Gauntlets of Ogre Power
- Sling +2
- Emotion Spell [Wizard]
- Polymorph Self Spell [Wizard]
- Spirit Armor Spell [Wizard]
- Globe of Invulnerability Spell [Wizard]
- Otiluke's Resilient Sphere Spell [Wizard]
- Conjure Lesser Air Elemental Spell [Wizard]
- Minor Spell Turning Spell [Wizard]
- Spell Thrust Spell [Wizard]
- Breach Spell [Wizard]
- Polymorph Other Spell [Wizard]
- Haste Spell [Wizard]
- Warding Whip Spell [Wizard]
| Planar Sphere - All Monsters |
|
This is a full list of all Monsters
found within the rooms on all levels of the Planar Sphere,
their locations can be found by viewing the rooms separately through the
solution as they are also covered in the Room Statistics.
- Lots of Golems
- Lots of Halflings
- Some Lizard Men
- Some Salamanders
- Some Mephits
- A few Fire Elementals
- 1x Elder Orb
- 1x Lea'liyl Demon
- 2x Tanar'ri Demon
- 1x Efreeti
- 1x Tolgerias
- 1x Mage Assistant
|
 |
|
 |
|
| 01 |
Grub |
Barbarian |
Half Orc |
| 02 |
Minsc |
Ranger |
Human |
| 03 |
Korgan |
[Berserker] |
Dwarf |
| 04 |
Aerie |
Cleric/Mage |
Avariel |
| 05 |
Nalia |
Mage/Thief |
Human |
| 06 |
Valygar |
[Stalker] |
Human |
Once I completed the Planar Sphere, Valygar asked if he
could remain in my party and during the adventure, I was very impressed with him and his overall attitude towards
adventure and the party. Valygar is now a full member of my party.
Nalia was arrested right after I completed this, and it is a timed event that happens
randomly in the area you are in and happens after you've completed De'Arnise Hold. Back
down to five members of my party, I was off to pick up Jaheira and see what her quest
about The Harpers was all about. Nalia can wait for the time being, but as my adventure
continues, my party tweaking is starting to get very, very tight and someone is going to have to go soon enough. I
still haven't come to the choice as to who that will be.
|
|
|
 |
|
|
 |
|
 |
|


