Getting Here: You must receive the following quest:
| NALIA'S QUEST TO DE'ARNISE HOLD |
Nalia, who you need to speak to before getting De'Arnise Hold placed on your world map, can be found in the
Slums District within The Copper Coronet trying her best to find a group of
men or women who can return with her and help save De'Arnise Hold from the fate that has befallen it. Speaking with Nalia
and accepting her quest will allow you to travel to this Troll infested Hold, which you may have Nalia accompany you for the
journey, or not, it is up to you. She is a valuable member of the party to have while you are moving about in De'Arnise Hold as she knows it well and the
rooms found within, plus she knows those people who can be found in and around the Hold itself. If you decide not to take her along, once you have completed
clearing out De'Arnise Hold, you will come across her again when she comes to thank you.
Once you receive this quest, it will place De'Arnise Hold on your map.
"De'Arnise Hold, aye, I know of it well and that is because the young man named Glacius is my brother.
He's been living there for sometime, helping build a name for himself and the nobles that stay inside the walls. A beautiful place too,
and away from civilization, the kind that can turn your living space into poor, slum infested areas. Green grass, song birds and high rock
ledges make it a beautiful place to go and visit for a few days. If you're going there, say hello to Glacius for me and let him know our
father is doing well."
| De'Arnise Hold - Outside - The Palisade |
|
|
The Palisade
|
|
|
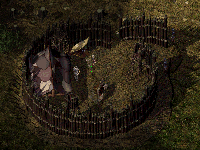
The wooden Palisade is not very large and would give no real protection if the wandering Trolls united and
charged this place, for even the two De'Arnise Guards and Captain Arat would be unable to stop the rush. Captain Arat can be found here
and if you speak with him, he has some good information to pass to you as well as to Nalia if you so happen to
have her in your party.
Speak with Captain Arat for a total of seven times and each time, he will continue to give you a set of 40 fire arrows, which
will come in very handy while you are moving about inside clearing it of Trolls.
I'd like to send shouts out to Darcy Braun for this
added information!
North of here, one can find a secret passage that will take you inside of De'Arnise Hold.
|
 |
|
 |
| De'Arnise Hold - The Palisade | Area Statistics... |
- Captain Arat
- De'Arnise Guards
- Notable Information Learned
- Quest from Captain Arat to lower draw bridge
- 140 Fire Arrows
|
|
|
 |
|
|
 |
|
 |
Thanks to Mark for the heads up on the Fire Arrows Captain Arat gives you!
| De'Arnise Hold - Outside - The Secret Door |
|
|
The Secret Door
|
|
|
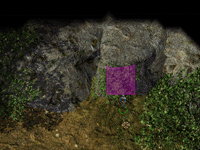
Found behind a thick layer of bushes and leaves, lays the secret entrance into De'Arnise Hold that will get you
on the inside and get you on your way to solving this quest. Easily found by having someone walk around its location or even detecting traps,
you will spot the outline which you simply push inwards to allow the party to enter.
Once your eyes have adjusted to the darkness beyond, move in and begin to explore De'Arnise Hold!
| De'Arnise Hold - Outside - Draw Bridge Crank |
|
|
Draw Bridge Crank
|
|
|
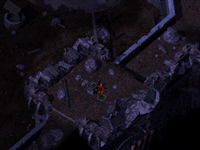
High above the draw bridge rests the crank needed to turn so you can get the draw bridge down and Captain
Arat's men inside The Courtyard, who will assist you in reclaiming De'Arnise Hold against the foul beasts that have come to defend its invasion!
Get to the battle as soon as possible and give those beasts something to cry about!
Getting here is done by leaving from De'Arnise Hold Level 1 or by De'Arnise Hold Level 2 via the Reading Room. Take the stairs
up to the platform above and follow it until you come to the Draw Bridge Crank.
| De'Arnise Hold - Outside - The Courtyard |
|
|
The Courtyard
|
|
|
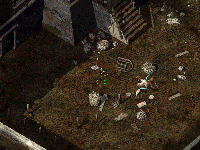
A large scale battle will take place here if you have already taken care of the draw bridge as Captain Arat's
troops can be seen here fighting against Trolls and Yuan-ti so give them a helping hand to make the battle go quicker. An Otyugh also makes
its home here in The Courtyard and can be taken care of easily by heading up the stairs and pelting it with arrows as it is much too large to
follow you.
The Courtyard dogs can also be found here, which if you are planning on making any STEW, will need
to kill all of them and take all the DOG MEAT that is needed to
brew this for the foul beasts found on De'Arnise Hold Level 3.
| De'Arnise Hold - Level 1 - Storage Room |
|
|
Storage Room
|
|
|
Dust swirls around in circles by your feet as you step into the damp room beyond, a single
torch flickering by a closed wooden door gently lights this storage room. Wooden crates, boxes and a single table make
the room's occupants and they are as still as the air around you.
Here you will start off in your exploration of De'Arnise Hold, a secret passage leading
under the noses of the Trolls who now call this home. Equip yourself well with the items that are found here as the Trolls have
yet to move into this area and know nothing of the treasures that lay within.
Open the door to the other side of this Storage Room and do the same and always remember to be looking
for cracks in the wall that may very well lead to other parts of De'Arnise Hold.
|
 |
|
 |
| De'Arnise Hold - Level 1 - Storage Room | Room Statistics... |
- No creatures moving about
- 12 Bullets +1
- 29 Darts +1
- 10 Bolts +2
- 26 Bolts of Lightning
- 20 Arrows +2
- Light Crossbow +1
- 5x Healing Potion
- Potion of Defense
- Friends Spell [Wizard]
- Identify Spell [Wizard]
- Globe of Invulnerability Spell [Wizard]
- Agannazar's Scorcher Spell [Wizard]
- 2 exits
|
|
|
 |
|
|
 |
|
 |
| De'Arnise Hold - Level 1 - Servants Chamber |
|
|
Servants Chamber
|
|
|
Screams echo from behind the wall as you burst into the room, watching in horror as a very large, moist
and glistening skinned Troll is ripping through the chest of a terrified servant, whose own bloody, bubbling cry fades and is quickly forgotten
as the Troll turns its attention on you!
Battle hard and don't forget to slay this foul beast you'll need to finish him off with acid or fire, which will
make him a nice rug to step over once he's done thrashing around.
Search well this room and keep an eye out for people coming out of the very walls!
| De'Arnise Hold - Level 1 - Weapons Room |
|
|
Weapons Room
|
|
|
Shuffling is heard in the room ahead as the door opens inward, a young man whose face looks
worried and one that has been awake for many days greets you here within the Weapons Room. Daleson is his name and has been a
long standing member of the De'Arnise Hold so listen to what he has to say because the information he holds may very well help
you in the later stages of this Hold.
The room itself holds some important equipment if you need to set anyone up in your party
with some, a wide range of items. Searching this room though will reveal a more important passage to treasure that can
be found deep within these walls, so look well at the northern wall for the passage that resides here. The door that leads to
the tower stairs is unusable as the stairs are now blocked making going up them impossible.
|
 |
|
 |
| De'Arnise Hold - Level 1 - Weapons Room | Room Statistics... |
- Daleson
- Notable Information Learned
- Quarter Staff +1
- Spear +1
- Long Bow +1
- 40 Bolts of Biting
- 20 Bolts +1
- 50 Arrows of Fire
- 12 Acid Arrows
- 40 Bullets +2
- 40 Darts of Wounding
- 3 exits
|
|
|
 |
|
|
 |
|
 |
| De'Arnise Hold - Level 1 - Forge Room |
|
|
Forge Room
|
|
|
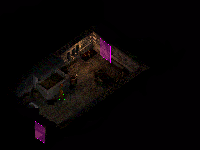
A room well hidden from the roaming bands of Trolls that you will eventually come across
and it houses a forge that can help in putting together a magical item called The Flail of Ages, a powerful weapon that,
if all three parts are found, will create an item that not only does regular flail damage, but also deal 1 point of acid, fire
and cold damage. This is a very good weapon to give a cleric or someone who is proficient in flails and well worth spending
the slots on for a weapon of this destructive power.
The rest of the room is filled with shelves, boxes, chests and crates and is only reachable by
going through the secret passage and small hallway that lays between the Weapons Room and The Forge.
Now to use the forge, you simply can collect
each piece separately and put it together piece by piece or find all three
parts and then return to create the weapon with all functions. I saved
myself the time of running around De'Arnise Hold
finding the parts only to return here and have to find another part. Simply,
finding all three parts and then returning was better for myself to do.
The locations of each part and where they reside are listed below to make your search easier:
FLAIL HEAD [COLD] is found in The Forgotten Room on Level 1.
FLAIL HEAD [ACID] is found in The Boardroom on Level 2.
FLAIL HEAD [FIRE] is found in The Golem Chamber on Level 2.
Besides the Forge, it is worth while to give this room a quick search and of course, check the walls because you never, ever
know what you could find.
| De'Arnise Hold - Level 1 - The Forgotten Room |
|
|
The Forgotten Room
|
|
|
Perhaps the deepest room in all of De'Arnise Hold that would have been undisturbed for some time as Trolls
aren't the smartest bunch and one wall looks just the same as another to them and when you walk into this room, the thick layer of dust
tells you it's been a long time since anyone was here.
An elephant statue resides in one corner of the room, along with other strange and exotic items, one you will
most likely want to take notice of and hold on to and that is the FLAIL HEAD [COLD] needed for
the Fail of Ages.
This part is used with the other two that are scattered throughout De'Arnise Hold and then used in The Forge to put all the
parts together into one item.
| De'Arnise Hold - Level 1 - Mess Hall |
|
|
Mess Hall
|
|
|
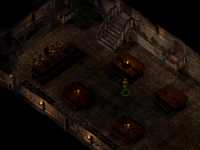
A place to feast, that is if De'Arnise Hold wasn't so full of foul Trolls and their kin. Grand and well made
wooden tables can be found here, some tables still with the food that was being eaten during the first wave of attacks on the Hold. Some of
the candles are still burning, although about to go out at any second and you'd best hope it doesn't happen when the Trolls who are located
here attack!
Swinging and snapping their maws at the air before them, a small wave of Trolls and Ice Trolls will greet you
here and should be no match for you by now, especially if you happened to pick up the fire and acid arrows found in the first few rooms that
you came through to enter the Hold. Take them down and secure the outer area from any more threats and be on your way.
Searching this room will reveal you nothing, although just outside in the southern hallway where the doors to
The Courtyard can be found is a locked chest which does hold something useful to a would be thief or weaker mage.
| De'Arnise Hold - Level 1 - Guards Bed Chamber |
|
|
Guards Bed Chamber
|
|
|
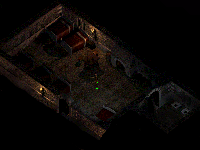
Empty long ago, these beds lay jolted an quickly
moved in haste, the sheets themselves seemed to have been just thrown off
and lay scattered around the room, the guards who used these are no more
it would seem. A fireplace crackles gently in the pit, perhaps that is why
no Trolls had made their way into this room, the stench alone from the latrine
should have been enough to attract droves of them.
In their haste, the guards left a lot of extra equipment in their storage chests, which would be a good
idea to look into for some added materials that you may already be running low on or will in the very near future.
| De'Arnise Hold - Level 1 - The Kitchen |
|
|
The Kitchen
|
|
|
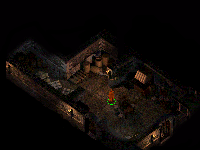
The smell of freshly baked food does not greet you when you walk into this bare and now empty kitchen,
the sacks of food as well as boxes have been torn open by sharp claws and very large footprints mark the floor where flour is strewn
all about.
The range here though could be of some
use as Daleson spoke of some type of strange STEW
that he had to make more than a few times to feed some foul beasts that
had come with the Trolls during the attack, the ingredients are DOG
MEAT. These dogs that are needed to make this STEW
can be found in The Courtyard and the STEW
can then be used on the beasts that you will come across in a later stage
of this exploration and I will get to that once we come across it.
To make the STEW, simply take all four parts of the DOG MEAT you
have gathered from the dogs out in The Courtyard and use the range. It will create a nice, fresh pot of STEW for you.
| De'Arnise Hold - Level 1 - Cold Storage Room |
|
|
Cold Storage Room
|
|
|
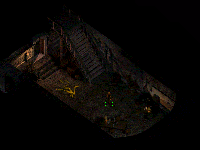
Your breath can clearly be seen as you make your way into this room, the Cold Storage Room
which houses a servant who was using this place to hide, no doubt thinking that none of the Trolls would want to spend its time in a cooler
room, but they were wrong. The Troll makes quick work of the servant and it is up to you to avenge them by dropping this foul beast to the
cold cobble floor!
Stairs go upwards to De'Arnise Hold Level 2.
Sylvus Moonbow fought a battle here against Sorcerer and sent that mage packing! :)
| De'Arnise Hold - Level 2 - The Pantry |
|
|
The Pantry
|
|
|
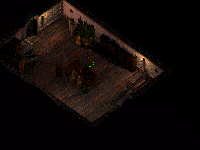
Coming up from the stairs, you will enter The Pantry which has a line of items along its walls and
packed into its corners but otherwise is empty of any foul beasts, but sure enough you will find enough to keep you busy as you
continue to venture forth through De'Arnise's Hold.
Stairs go down to De'Arnise Hold Level 1.
Sorcerer's Place provides you with the best Online Solutions!
| De'Arnise Hold - Level 2 - Lord De'Arnise's Chamber |
|
|
Lord De'Arnise's Chamber
|
|
|
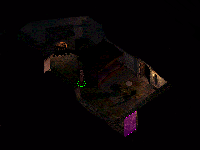
The door to this room will be locked if you have yet to find and pick up the KEEP KEY which will
allow you to gain entry into Lord De'Arnise's Chamber beyond. Entering the room, you will be greeted by a beautiful bed, one that someone of such high standings as the Lord himself would be found
sleeping in.
The room is warmed by a light burning fireplace as well as a single torch that flickers by the side of the door, illuminating a round
table and casting shadows onto the floor behind it. This room has not been disturbed as the rest of De'Arnise's Hold has and resting here should be trouble-free once
you're inside.
Search well this room for a hidden passage can be found that leads to other secrets found on this floor.
| De'Arnise Hold - Level 2 - Lord De'Arnise's Storage |
|
|
Lord De'Arnise's Storage
|
|
|
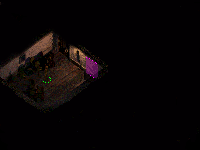
The storage room of Lord De'Arnise holds many items of interest and looking through all the contents
would be wise before you open the unlocked door, which you may wish to double check before you turn the handle itself. Boxes, crates,
even a small table and chairs make this room, a place where Lord De'Arnise kept all his spare equipment.
Gaining entry to this area must be done from Lord De'Arnise's Chamber and the secret door found in the
southern wall. A long passage will lead to a dead end, which one would be wise to search. The door out in the hallway cannot be opened
into The Reading Room, jammed from over use.
| De'Arnise Hold - Level 2 - The Boardroom |
|
|
The Boardroom
|
|
|
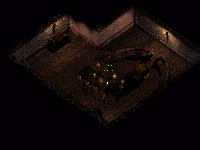
The wooden door opens into a vast room where a large table sits in the middle of the room
as does standing room some distance away. It is very well illuminated and is where Lord De'Arnise held most of his more
important meetings with members of the family and promising nobles in the surrounding area.
It is also where one can find Glacius, who after all the wave of attacks, has lost his way,
not knowing who is friend nor enemy and he will attack you on sight and someone you should dispose of quickly so you can
be on your way.
Glacius is holding the FLAIL HEAD [ACID] part
for the Flail of Ages so do keep a look out for it.
A reader sent this little nibble in. If you have Nalia in your party, she will comment on how it seems Glacius is more charmed than
anything and if you have the Ring of Human Influence on you, use it on Glacius to charm him back to normal. This will gain you 22,550xp and he will hand over the
FLAIL HEAD [ACID] that you need. In comparison to the experience you receive
for killing him, charming him back is much more beneficial.
Thanks to Palpatine for sending in this awesome pointer!
| De'Arnise Hold - Level 2 - Glacius' Room |
|
|
Glacius' Room
|
|
|
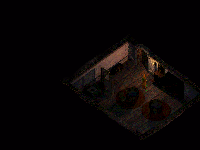
This is where Glacius stayed most of the time, doing paper work for Lord De'Arnise as well as
all the records of those staying within the Hold's walls. Tables, chairs and a few cabinets make up the majority of this room,
piles and stacks of papers can be found on all.
If Glacius was not in here, he was usually on patrol of the grounds or keeping
up with the latest gossip that was whispered of at the tables of others.
| De'Arnise Hold - Level 2 - The Garden |
|
|
The Garden
|
|
|
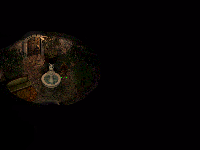
Relaxing is this circular room which smells
of fresh plants and flowers, a running fountain trickles slowly in the
center as well. A soft sofa adds to the tranquillity here and closing both
doors would serve as a nice resting place if one had to heal or memorize
spells. Unfortunately, this room has nothing of interest but what you see
and searching through the fountain, in each plant and even the sofa cushions
themselves will reveal nothing.
Be on your way brave warrior to slay the rest of the Trolls!
| De'Arnise Hold - Level 2 - Spare Bedroom |
|
|
Spare Bedroom
|
|
|
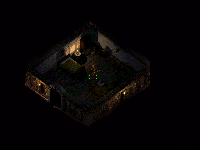
When Lord De'Arnise had guests visiting from out of Amn or those who were some distance away from
their own home, it is here that they would stay, in a quiet corner of De'Arnise's Hold and away from the main hustle and bustle
of the Hold. A short distance to The Garden to relax as well as the Reading Room, both very quiet rooms themselves, making the
guests stay here enjoyable.
A soft bed, table and cabinets as well
as the warm glow from the lantern burning on the night table, screams
relaxation. One though, should not so easily lower their guard so soon,
so stay sharp!
| De'Arnise Hold - Level 2 - Reading Room |
|
|
Reading Room
|
|
|
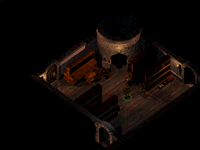
Shelves stacked with books make this room, a room guests can come to relax in and
read a few of the important notes on Faerun history or De'Arnise's Hold itself. During the warmer months, readers
are welcome to use the tower stairs that lead up to the roof of De'Arnise's Hold and enjoy the rays of the sun
and the songs of the birds.
Besides the books, there are also a few Trolls and a Yuan-Ti Mage guarding the stairs
that lead outside, where one must head if they plan on lowering the draw bridge for Captain Arat's men. Battle hard
and show them you mean business!
While searching this room, keep an eye out for the KEEP KEY, which can be used
to open all the locked doors on De'Arnise's Hold Level 2, except for the jammed door in this room. It cannot be opened by any means. Period.
| De'Arnise Hold - Level 2 - Guest Room |
|
|

Guest Room
|
|
|
Another room much like the Spare
Bedroom but smaller and easily forgotten if one happens to walk by it
is so small and packed. On occasion, Lord De'Arnise liked to sleep here,
sneaking out of his own bedroom to be like one of the guests and experience
the quiet time he received from being here.
No servants come knocking on the guest door, allowing
him to enjoy a late afternoon nap or read one of his favorite books.
| De'Arnise Hold - Level 2 - Lady Delcia's Room |
|
|
Lady Delcia's Room
|
|
|
Unlocking this door will require the KEEP KEY and once you
are able to gain access to this room, you shall come across Lady Delcia and a De'Arnise Guard who locked themselves in the room to stay out of the wandering Trolls way. They have
been locked inside here since the raids and have done very well for themselves, waiting patiently for help, although Lady Delcia will not be too pleased to see
such a bunch of louts as yourself saving her. Nevertheless, this room you should search once Lady Delcia is done with all her chatter and check the walls while you're at it too,
you never know what you will find.
| De'Arnise Hold - Level 2 - Golem Chamber |
|
|
Golem Chamber
|
|
|
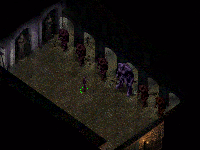
The ever famous Golem Room, where brave warriors have gone in alive and never left again due to the sheer
terror of these Stone and Iron Golems who guard the treasure left behind. Even a nimble footed character will have trouble making a dash towards
the door in hopes of escape, these Golems don't mess around and will do everything in their power to block the door and your own escape! The effort,
if you are able to make it, is well worth all the trouble you put yourself in for other than the FLAIL HEAD [FIRE]
which I should add you can take without activating the Golems, other items of extreme power await your taking!
The easiest way to deal with these magical guardians is to have a Cleric cast Sanctuary on themselves, walk in, grab the items
and simply walk out with no harm done. Do keep the rest of your party at bay though, so they do not attract the attention of the guardians when they come to
life. If you do not have a Cleric in your party, your task will prove to be a little more difficult and range from a number of strategies as well as simply
attacking the Golems and bringing them to their death. If you've got your own strategy, send it in and I'll put it under a TIP! part
of this room's description, credit given to you.
|
 |
|
 |
| BATTLE TIP! Sent in by Angel |
-
At this point, my group consists of my ranger/cleric, Minsc,
Jaheira, Yoshimo, Aerie, and Nalia. I saved this room for last and had the
complete Flail of the Ages. In preparation I and Minsc drank potions of
giant strength and someone cast bless. I found out which treasure statue
triggered which golems. The first statue (farthest from the golems)
triggers a flesh golem and a clay golem. The middle statue triggers a stone
golem and the iron golem. The third statue triggers a clay golem and a
stone golem.
I triggered the first statue and took care of the flesh and clay golems
without too much hassle. Then I triggered the third statue and dealt
with the clay and stone golems. That was a bit more difficult. We healed
up, saved, and prepared for the last two golems. I lined up with the iron
golem and Aerie lined up behind me to cast healing spells. I also had 5
extra-healing potions ready in my quick slot. Everyone else took on the
stone golem. When all was said and done, I had killed the iron golem by
myself and had to finish off the stone golem. I lost Minsc and Jaheira in
the battle, but I was on my way back to town, so getting them raised was
easy.
|
|
|
 |
|
|
 |
|
 |
Past this room, down the hallway you came from is another hidden passage, which will lead to a set of stairs that spiral downward
to De'Arnise's Hold Level 3, where your search for Lord De'Arnise will come to an end.
| De'Arnise Hold - Level 3 - The Basement |
|
|
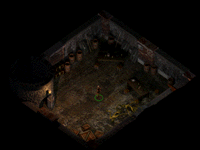
The Basement
|
|
|
The cool air will strike you as you make your way down the last steps of stairs, entering the very
basement of De'Arnise's Hold here you will eventually find and come across Lord De'Arnise who has been
captured by the leader of the Trolls. Barrels, boxes, crates and other littered junk lay piled along the walls and in each corner
of the room.
Search it well and prepare yourself for a battle because as soon as you open the door ahead, you will be attacked by
very strong Trolls.
| De'Arnise Hold - Level 3 - Torture Chamber |
|
|
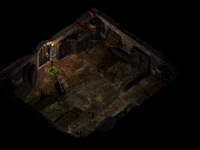
Torture Chamber
|
|
|
A roar of rage will echo out of this room
as you open the door as a Spectral Troll and his two guards who also happen
to be Trolls, will lumber towards you, their teeth showing and their claws
ready to rip you to pieces! Stand your ground and battle them at the door
so any mages in your party won't be attacked as your front line will keep
the Trolls at bay. If you have a cleric in your party as well, it is best
to have them behind your front line casting healing spells on them and a
potion or two on those battling the Trolls wouldn't be so bad either.
The Spectral Troll won't need to be killed with acid or fire to deal that final death blow, but the other two Trolls will so
keep that in mind, you don't need them standing back up after this battle while you're licking your wounds.
| De'Arnise Hold - Level 3 - Umber Hulk Meeting |
|
|
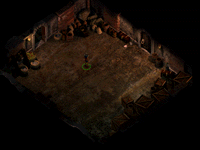
Umber Hulk Meeting
|
|
|
You will want to take a moment to look through your inventory slots and make sure you have the
STEW ready to feed the Umber Hulks that
are guarding this room. Although, you do not need to give them the STEW to
carry on, but it is easier if you do not want to fight all these Umber Hulks found within as their confusion stare can cause a lot of
havoc on the party.
If the STEW is all ready,
give it to a character you wish to do the task and have a mage cast invisibility on them or a cleric cast sanctuary on themselves and then open
the door. Once inside the room, head through the door that is opened on the left wall and go down the hallway of cells to the very end, where part
of the wall has been blasted out. This is where the Umber Hulks entered the complex and it is also here that they are fed, loving the STEW
that you have cooked up for them.
|

Feeding Pit
|
|
|
Place the stew on the rubble, simply move your mouse until the rubble itself highlights blue and just like
any other container, open it. Inside the rubble you will find some dog bones but are nothing worth taking that can help you within De'Arnise Hold
or at least not that I could find. Put the STEW from your inventory into the rubble
where the dog bones were and get out of there. Do not leave the same way you came in, but go the other way, around to the back door which will return you to where all the Umber
Hulks were standing around. Once you're back in the original room, close both doors to the hallway and have the rest of your party join you.
| De'Arnise Hold - Level 3 - Torgal's Den |
|
|
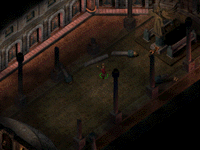
Torgal's Den
|
|
|
Torgal waits in this room with two of his guards and will do everything in his power to stop you from
taking back De'Arnise Hold, his own fury and rage is enough to bring down the party, so be ready for a very tough
battle. Torgal plays to win but so do you. Beating them will test your own party's strength as you battle side by side against these foul
beasts. If you can, mock and tease Torgal into leaving the room he's found in while another member of your party stands by the door and when
Torgal rushes with his rage and stupidity into your room, close the door and take him on alone.
With Torgal taken care of, his two guards should be no match for your party now, so slice 'em down and put an
end to all of this mayhem once and for all!
The room ahead is beautiful as corinthian pillars span from the floor to the ceiling while a grand stone statue
rests at the far end of the room. A limp and dead body also rests beneath this statue, that being Lord De'Arnise himself who was killed by
Torgal and his guards, tortured for fun no doubt. Say a prayer to the fallen, search the room and be off.
| De'Arnise Hold - The People |
|
This is a full list of all People found within De'Arnise Hold.
- Captain Arat [Notable Information Learned]
- Lady Delcia [Notable Information Learned]
- Daleson [Notable Information Learned]
- Servants [Once De'Arnise Hold is saved]
- Major Domo [Once De'Arnise Hold is saved]
- Isaea Roenal [Once De'Arnise Hold is saved]
- De'Arnise Hold Guards
- Glacius
| De'Arnise Hold - All Quests |
|
This is a full list of all Quests found within De'Arnise Hold.
Nalia has asked that you help clear out De'Arnise Hold from the Trolls that have come to make their home there
and by doing so, will create another chain of events and quests that you will have to complete while you do this.
Completion of Nalia's Quest will earn you 10,650xp.
| THE SECRET ENTRANCE TO DE'ARNISE HOLD |
It is whispered by the servants of De'Arnise Hold that a network of secret passages wind their way through the lower levels
of De'Arnise Hold and out into the wilderness around it. Find thing secret entrance can be done by going north of The Palisade
and searching the rock face that is covered by thick bushes. Behind them, you will spot the cracks in the stone wall and be able to access De'Arnise Hold.
Finding the secret entrance will get you inside of De'Arnise Hold.
| OPENING THE DRAWBRIDGE QUEST |
One will have to battle their way out into The Courtyard and through De'Arnise Hold to get to the
crank that will bring down the drawbridge for Captain Arat's troops. Once opened, the De'Arnise Hold Guards will penetrate the complex and will be
found battling Trolls and Yuan-Tis and with your help, will bring them down much quicker.
Completing Captain Arat's Quest and lowering the drawbridge will earn you 29,750xp.
| FINDING THE FLAIL OF AGES PARTS |
The Flail of Ages is worth the time and effort it will take in searching De'Arnise Hold to find all three parts and then
construct it in The Forge room found on De'Arnise Hold Level 1.
These parts are listed below:
FLAIL HEAD [COLD] is found in The Forgotten Room on Level 1.
FLAIL HEAD [ACID] is found in The Boardroom on Level 2.
FLAIL HEAD [FIRE] is found in The Golem Chamber on Level 2.
Once you have all three, head to The Forge room and use the forge itself to merge all three Flail Heads together to form the Flail of Ages +3.
Putting the Flail of Ages together will earn you a sweet weapon and 22,350xp.
The Umber Hulks found on De'Arnise Hold Level 3 love the STEW that is brought
to them for feeding and you can be an Umber Hulk feeder as well and all you need to do is kill the four dogs in The Courtyard, bring the DOG MEAT
to The Kitchen, use the range and make some STEW.
When you arrive to the room where the Umber Hulks are, which is the Umber Hulk Meeting room, simply have a mage cast invisibility or a cleric cast sanctuary, enter the room
and head down the hallway to the wall that has been bashed in. Leave the stew on the rubble and leave the hallway via the other route, return to the room and close both doors. See the Umber Hulk Meeting
room for more details on this method.
Your party will receive 11,500xp for making the STEW and 18,750xp for luring the Umber Hulks out of the room.
| Umar Hills - Imnesvale - All Items |
|
This is a full list of all Magical
Items found within De'Arnise Hold and their locations can be found
by viewing the rooms separately through the solution as they are also covered
in the Room Statistics.
- 52 Bullets +1
- 89 Darts +1
- 46 Bolts of Lightning
- 40 Bolts of Biting
- 40 Bolts +2
- 20 Arrows +2
- 40 Bolts of Biting
- 50 Bolts +1
- 140 Arrows of Fire
- 72 Acid Arrows
- 112 Bullets +2
- 60 Darts of Wounding
- 21 Darts of Stunning
- 5x Healing Potion
- 2x Potion of Extra Healing
- Oil of Speed Potion
- Potion of Defense
- Light Crossbow +1
- Quarter Staff +1
- Spear +1
- Long Bow +1
- Elven Court Bow +3
- War Hammer +1, +4 vs Giantkin
- Battle Axe +3, Frostweaver
- Shield Amulet
- Orc Leather +3
- Feeblemind Spell [Wizard]
- Control Undead Spell [Wizard]
- Shield Spell [Wizard]
- Conjure Lesser Air Elemental Spell [Wizard]
- Conjure Lesser Earth Elemental Spell [Wizard]
- Minor Spell Turning Spell [Wizard]
- Spell Thrust Spell [Wizard]
- Infravision Spell [Wizard]
- Detect Illusion Spell [Wizard]
- Magic Missile Spell [Wizard]
- Find Familiar Spell [Wizard]
- Breach Spell [Wizard]
- Protection from Normal Missiles Spell [Wizard]
- Friends Spell [Wizard]
- Identify Spell [Wizard]
- Globe of Invulnerability Spell [Wizard]
- Agannazar's Scorcher Spell [Wizard]
- Wand of Frost
- Ring of Earth Control
| De'Arnise Hold - All Monsters |
|
This is a full list of all Monsters
found within the rooms on all levels of De'Arnise Hold, their locations
can be found by viewing the rooms separately through the solution as they
are also covered in the Room Statistics.
- Lots of Trolls
- Some Ice Trolls
- 1x Spectral Troll
- 1x Yuan-ti Mage
- Many Umber Hulks
- 1x Glacius
- 1x Otyugh
- 1x Iron Golem
- Some Stone Golems
|


