-

- Forums
- Chatrooms
- Gallery
- Gameplay Videos
- Upload
- Articles
- Mod Reviews
- Shop SP: Games, Movies, Books
CHAPTER 1 | CHAPTER 2 | CHAPTER 3 | CHAPTER 4 | CHAPTER 5 | CHAPTER 6 | CHAPTER 7 | CHAPTER 8 | CHAPTER 9 | CHAPTER 10 | |
Amkethran | Sendai's Enclave | Abazigal's Lair | Return to Amkethran | |
SENDAI'S ENCLAVE
Woodcutter
The party now travels to Sendai's Enclave, and then speak briefly with a Woodcutter. I then go north, and notice recently dug graves.
I travel west and summon a Planetar. I then head south, where I get attacked by a Hive Mother, a few Drow, as well as a couple of Umber Hulk Elders who cannot be killed by Death Spell. Imoen drops a Dragon's Breath, and this suffices to waste everything besides the Hive Mother. Keldorn's Carsomyr brings down the Hive Mother's protections, and she soon dies.
I then head east. I pursue the dialogue options with the Woodcutter that presses him about his wife. He soon reveals himself to be a Drow Captain. His forces are around me on all sides, so offensive spells won't really help. They will also generously use warrior High-Level Abilities like Smite and Greater Whirlwind Attack. Note that I positioned the Planetar to occupy the Drow Mage to the southeast beforehand. The Planetar actually managed to get rid of the Mage instantly with a vorpal hit. Beyond that I managed to win in straight physical combat.
A chest in the cabin has a Rune of Clangeddin. I go back to the Pocket Plane, and then give Cespenar the Rune of Clangeddin, the Runehammer, and 5,000gp to upgrade to the Runehammer +5 (immunity to level-draining, immunity to fear, Strength to 22 1/day, 4-16 +10 damage vs. undead, undead must save vs. death at -4 penalty or be destroyed). Anomen keeps this as an option against undead or if he wants to immunize himself against fear.
Now I kill a few more Drow on the north side. The way into the Enclave itself is open, but Imoen must disarm a trap first.
Entrance Tunnel
Now I have to fight my way through a long tunnel. There will intially be some Spore Colonies and Myconids. I wait until I've killed the Colonies before Imoen uses a Death Spell to get rid of the Myconids.
After that I set up a Fire Storm and Incendiary Cloud against oncoming monsters. Jaheira immunizes herself with a Protection from Fire, and goes across to lead more monsters across the Incendiary Cloud.
It's then a more going steadily east and killing off what's left.
Thelynn'ss
I step into the room to the northeast. There will be a massive force of Drow that will attack, led by a Kensai named Thelynn'ss. I start off with a Storm of Vengeance from Anomen and an Earthquake from Jaheira. Keldorn hits the forces at a distance with his Dispel Magic to make sure they become vulnerable to damage from the spells. Jaheira and Sarevok combine Greater Whirlwind Attacks to take out Thelynn'ss as quickly as possible before he does much damage.
Imoen caps everything with a Dragon's Breath. It's then a mop up. Thelynn'ss leaves behind the Amulet of the Cheetah (increases movement rate by 2, Improved Haste 2/day), but I don't have much use for it.
The video concludes with a cutscene involving Sendai, Master Bennon, and a Drow Guard Captain.
Slavemaster
Now I enter the north tunnels. A Slavemaster gets his Derro and Orog Slaves after me. If you're so inclined, you could milk this part for a LOT of experience. Imoen immediately summons a Planetar. I steadily make my way onwards, killing as many Slaves as I can. The Planetar falls behind, but I don't mind. It will act as a rearguard that will kill even more Slaves for more xp. Imoen chips in with the odd offensive spell when they get numerous. I eventually make my way to the other end, where I finally kill the Slavemaster himself.
The video concludes with me leaving and making my way through the Drow Crossroads, and killing a bunch of Spiders helped along by a Chain Lightning from Imoen. I then prepare to enter the south tunnels.
Lashar'ra
Now I enter the South Tunnels. Strewn about are a LOT of spiders, including Phase Spiders, Sword Spiders, Mutated Spiders, and a Spider Queen named Lashar'ra.
There will also be a LOT of web traps. Imoen guzzles a Potion of Perception, goes invisible through her Staff of the Magi, and then makes the rounds. She is able to disarm all of the traps without getting noticed by the spiders. The battlefield is now free of any mines.
As it turns out I have four characters in my party who are now immune to poison, Avastrian (Ring of Gaxx), Jaheira (after getting her 15th level as a Druid), Keldorn (Ring of Anti-Venom), and Sarevok (Amulet of Ilmater). These four charge the Spiders head on, while Anomen and Imoen fire missile weapons from a safe distance. Imoen helps things along with a Horrid Wilting when they become really numerous.
Odamaron
Now I head back to the Crossroads. There will be many Drow guarding the entrance to the door the northwest. I fall back on a similar method. Imoen sets up a few Skull Traps at the stairs. I then encourage the Drow to come forward by blanketing them with an Incendiary Cloud and a Fire Storm from outside the fog of war. Some of them kill themselves on the Skull Traps. I kill off any that are remaining through brute force.
On the other side of the door will be a Lich named Odamaron. Suffice to say I buff up beforehand. This includes Remove Fear, as well as Spell Immunity: Abjuration and Spell Shield for Avastrian. Anomen switches over to the Runehammer.
Odamaron also brings in a few Skeleton Warriors to help him out. SCS adds another Apprentice Lich, who himself can cast high-level spells, as well as a Dark Planetar and a Vampire Mage. There isn't really a set script you can follow for this battle, it's going to be a pretty crazy one. But there are a few themes you can keep in mind:
Avastrian returns to the Pocket Plane. For 5,000gp, he has Cespenar use the Eye of Tyr to upgrade Carsomyr to a +6 weapon. Now Keldorn will have a +6 weapon against Melissan during Ascension, and possibly be able to bring down her protections on contact.
A container just left of the entrance is trapped, and has the Skull of the Lich. For 5,000gp, I have Cespenar use the Skull to upgrade the Spectral Brand to a +5 weapon that also immunizes its wielder to level-draining. This will be Jaheira's main weapon for the rest of the game, although she'll keep Pitchwife for foes that require blunt damage or foes with acid attacks (e.g. Draconis).
*Evil* Unholy Reaver
Here's the same battle for the evil party. The themes are pretty much the same, but the execution plays out differently (hence my comment about how the battle can't follow a set script). One difference was that Asteroth did manage to get off Creeping Doom.
The key difference here is that the evil party can make immediate use of the Heart of the Damned under the Item Upgrade Mod. I give Cespenar the Soul Reaver (obtained from the Demonknights in the Koa-Toan Caves), Carsomyr (which I've saved all this time after killing Firkraag), the Heart of the Damned, and 20,000gp to create the Soul Reaver +6 (+50% magic resistance, +1d6 magic damage, dispel magic on striking the target, -2 THAC0 penalty for 2 minutes). This essentially allows Sarevok to play the same kind of role as Keldorn, but as a rough equivalent to the Blackgaurd prestige class in D&D 3.5e.
Drow Wardstone
Now I leave the room, starting a cutscene whereby Sendai has become aware of my presence.
There will be a very large force of Drow in the middle of the crossroads, including a pair of Hive Mothers. The method is the same. Imoen sets up her Skull Traps near the top of the stairs. I then hit them from just outside the fog of war with a Storm of Vengeance from Anomen, a Fire Storm also from Anomen, an Earthquake from Jaheira, and an Incendiary Cloud from Imoen. Some of the Drow kill themselves on the Skull Traps. Keldorn uses a Dispel Magic on the oncoming forces to make sure they become vulnerable to the damage from my spells. The strategy proves a success, as I am able to quickly kill any that make it out of the barrage alive.
I then head towards the door to the northeast corner. It is guarded by a couple of Umber Hulk Elders, who are killed easily enough. The door requires the Drow Wardstone to open.
Ogremoch
Now I go through the door using the Drow Wardstone. I get a warning from a Drow Priestess named Diaytha. She bids me to challenge the Earth Elemental Prince named Ogremoch, who's waiting through the east door. Ogremoch and his two Greater Earth Elementals are easy enough to kill. Anomen and Sarevok, being closest to Ogremoch to begin with, exercise prudence by using Armor of Faith and Hardiness respectively. Avastrian, Jaheira, and Keldorn bring him down with Greater Whirlwind Attacks. After that it's just a matter of riding out the Earthquake.
Diaytha
Now it's time to fight Diaytha herself. Her helpers will include a Vampire, a Demonknight, and a Hive Mother. I buff up beforehand, including a Remove Fear spell.
Anomen botched his attempt at a Fire Storm, but it wasn't really needed. Avastrian's Spell Immunity: Conjuration absorbed the Insect Plague-effect from the Vampire. Jaheira retreated to avoid it. Beyond that it is often a matter of letting characters who enjoy resistance to physical attacks, magical damage, and level draining simply march in and take care of them one by one. This is pretty much what Avastrian, Jaheira, and Keldorn did. Keldorn's Carsomyr made short work of Diaytha's defences, and she was soon killed afterwards.
Diaytha leaves behind the Darksteel Shield +4 (+10% each to acid, cold, electrical, and fire damage). This will be Jaheira's shield for the rest of the game. And indeed it not only boosts her armor class, but its elemental resistances also stack nicely with those Jaheira has accrued from her equipment and from her advancing to high levels as a Druid. Korgan uses the shield in the evil party.
Captain Eggesiag and the Spectator
I continue on and accept the Spectator's idea of using a geas to turn it into a one on one duel between Captain Eggesiag and Avastrian. The Captain is definitely killable for a decently developed Bhaalspawn warrior but it gets ridiculously easy for Avastrian, who simply puts up a Protection from Magic Weapons and then goes into a Greater Whirlwind Attack.
The Captain leaves behind the Bowstring of Gond, which can be used to upgrade either the Firetooth Crossbow or the Darkfire Bow.
Mythykyl
Anomen puts Chaotic Commands on as many party members as he can. This doesn't include Sarevok, who switches over to his Psion's Blade. Note that it is important to do this before stepping through the next door.
Once I step through, it won't just be the nearby pair of Vampiric Illithids. A whole bunch of Mind Flayers and Umber Hulks will teleport in. This is the reason why you must prepare before you step in. You have to immediately begin fighting as soon as you step through the door. The name of the game is killing them as quickly as possible, with the reliable method being to combine multiple Greater Whirlwind Attacks round after round to cut through them like a scythe through wheat.
A nearby pool has some Liquid Mercury in it.
Avastrian continues to the northeast, to get the next group's attention. This consists not just of Mythykyl and a few other Mind Flayers, but also some Human Thralls, including a couple of Mages. Not only that, several more Umber Hulks and Mind Flayers will teleport in. Again, string together Greater Whirlwind Attacks round after round to cut everything down as quickly as you can. Keldorn is able to hunt down and kill the Mages with his Carsomyr.
Once that's all down, Avastrian teleports back to the Pocket Plane. He gives Cespenar the Angurvadal sword, plus the Liquid Mercury, plus 10,000gp to upgrade to Angurvadal +5 (+5 Longsword, sets user's Strength to 22, immunity to level-draining). This will be his off-hand weapon for the rest of the game, as the combat advantages of 22 Strength in my opinion outweigh the benefits of other available off-hand weapons.
This also means Avastrian equips the Amulet of the Seldarine he received at the start of Throne of Bhaal (+1 to saving throws, +10% magic resistance) and transfers the Amulet of Power over to Anomen. This in turn means that Anomen can wield the Storm Star Mace without having to worry about getting level-drained. Anomen enjoying immunity to getting Silenced is a nice perk as well. Avastrian adjusts by having a second-level spell slot used for the Vocalize spell.
Sendai
On the other side of the door will be my major battle against Sendai. My buff ups are particularly geared towards protecting myself against magical attacks. They include multiple Death Wards, Magic Resistance for Anomen and Jaheira, as well as a Spell Immunity: Abjuration for Avastrian. Anomen also buffs himself with Righteous Magic and a Potion of Agility.
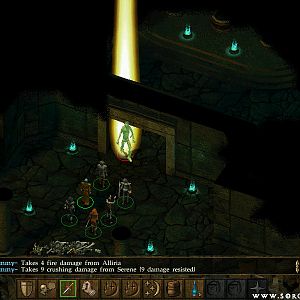
I then go through and start combat. Sendai has prepared seven statues in replication of herself. Each is of differing classes. In order of appearance, they are; Cleric, Mage, Fighter/Thief, Berserker, Cleric/Mage, Fighter, and Thief.
One of the changes that SCS has introduced is that the Statues will no longer wait until the previous one has activated. They will activate at short and regular time intervals irrespective of whether the previous one(s) have been killed. Also, two Drow will spawn at the entrance each round. Some of them will be Mages or Fighter/Mages. As you can surely grasp, it can be easy for even high-level parties to get overwhelmed in this fight.
The general rule of thumb is for me to let Keldorn and Avastrian position themselves close to the Mage or Cleric/Mage statues and present themselves as the targets so that they can absorb the hostile spells relatively harmlessly. Jaheira, Anomen, and Sarevok stay on the west side of the room, either killing the non-Mage Statues or the Drow that come in through the entrance. Again, it's not a fool proof plan since the room is so small. Sometimes the Mage or Cleric/Mage statues will target other party members. Sometimes all you can do is roll with the punches and hope for the best. What I have described is nonetheless a guideline that should be adhered to as much as possible to minimize the risks.
Another linchpin for my strategy is to have Imoen tuck herself into the pedestal towards the southwest corner, and make use of her Project Image spells well away from the Mage and Cleric/Mage statues. The first Image immediately goes into Time Stop at around 3:20 of the video. The Image then summons a Planetar near the Mage statue towards the southeast corner to give it another magic-resistant target. The Image then summons another Planetar near Jaheira so that Anomen, Jaheira, and Sarevok have help against the incoming Drow and other Statues. The Image then caps the sequence by summoning a Skeleton Warrior.
The Image then casts other spells as needed. First, it casts a Prismatic Spray and kills outright at least two of the Drow. A couple of buffed-up Drow Fighter/Mages have come in, so the Image then uses the party-friendly Remove Magic.
Meanwhile, the Mage Statue has cast Imprisonment on one of the Planetars. It also goes into an extended Time Stop sequence whereby it hits the party members on the west side of the room with two Horrid Wiltings (see what I mean). The party manages to weather things, but they certainly need to use healing potions and healing spells thereafter.
As an aside, Avastrian has been getting ganged up on. His buffs have worn out, and he's been taking a beating. At 6:02 is an example of how beneficial a Chain Contingency can be in the heat of combat.
Getting hit with Horrid Wiltings has also been beneficial to me in a way, because the Statue's Time Stop sequence destroyed Imoen's first Image. This allows her to then cast her other Project Image. The second Image then starts another Time Stop at around 6:32 of the video. The second Image then summons two more Planetars. It then caps the sequence with a Dragon's Breath, as by now a lot of Drow have accumulated in the room.
Some of the Statues have now been killed, and the Mage and Cleric/Mage statues are the only ones active at the moment (the Fighter/Thief statue will soon activate). Avastrian, Keldorn, and the Planetars, begin to hunt down the Statues and overwhelm them. Keldorn brings one of the Statue's buffs down with his Carsomyr at around 7:53. Once that happens, other party members swarm in for the kill. In fact, Sarevok kills it outright with his Deathbringer Assault.
The second Image begins another Time Stop sequence at around 8:14. The sequence then includes two Horrid Wiltings, hoping to bring down the active Statues, as well as bringing in a Skeleton Warrior.
At around 9:00 victory is in sight. Only the Cleric/Mage and the Fighter/Thief Statues are left The Cleric/Mage statue is protecting itself with illusions, so Keldorn gets rid of them with True Seeing. This allows the Planetars to immediately go on the hunt. Anomen now has a free hand to regularly cast Mass Cure to keep the party on the up and up.
Avastrian creates a Simulacrum at around 9:28 of the video via his Vhailor's Helm, with the point of spamming the Scrolls of Protection from Magic.
The party members and the Planetars have killed off the Cleric/Mage statue, and the Fighter/Mage Statue will soon follow. The Simulacrum is ready and waiting.
At around 9:50 of the video, now that all of the Statues have fallen, Sendai will appear along with a Fallen Deva. If allowed to, Sendai can use a whole lot of buffs to make herself pretty much invulnerable to anything and everything. And if given time to, she can wreak absolute havoc on the party. I have the Simulacrum immediately target her with a spammed Protection from Magic scroll to prevent her from casting any spells.
The party gets rid of the Fallen Deva, and then starts to attack Sendai herself. Keep in mind that she can still activate a Contigency and a Chain Contingency, but nonetheless it is only a matter of time before she falls.
*Evil* Sendai
Here's the same battle for the evil party. The themes are similar, although the fight does show that with having had less practice than I do now, the execution wasn't as refined. There is of course also the other difference of Jan having to rely on illusions to enable his backstabbing approach to combat.
Speak to Yourself
I get hauled back to the Pocket Plane after killing Sendai, where the Solar obliges me to speak to another version of myself. The video shows dialogue options that are considered good as opposed to evil.
When I return, Sendai leaves behind the following:
*Evil* Speak to Yourself
Here is equivalent video for Asteroth, showing dialogue choices that are considered evil as opposed to good.
Innocence
Avastrian returns to the Pocket Plane. He then grabs the opportunity to reset his Spell Sequencer and his Chain Contingency. He then enters the room due south.
This time the test is whether he's willing to give up his power and experience in order to return to a state of innocence. Innocence turns into the Slayer and attacks. This battle is easily won, but I show how effective a Fighter/Mage can be here. Avastrian initially protects himself with Protection from Magic Weapons. He then uses a Greater Whirlwind Attack with his Flail of Ages. He then casts Time Stop. The sequence is two more Greater Whirlwind Attacks, with another Protection from Magic Weapons at the tail end of the Time Stop (and thus no opportunity for the Slayer to interrupt). Another Greater Whirlwind Attack seals things.
The good power is the ability to use Draw Upon Holy Might twice a day, which might be pretty useful on occasion for its +6 bonuses to Strength, Dexterity, and Constitution.
*Evil* Doubt
For Asteroth, it's Doubt instead of Innocence. And Asteroth has no doubts about wanting to embrace evil power. For Asteroth, multiple Greater Whirlwind Attacks with his Flail of Ages while protected by Ironskins proves sufficient.
The evil power is an offensive ability called Dark Taint, which inflicts 8d6 damage plus 6 damage per round and Slowness for 24 seconds on a single target unless a saving throw vs. spells at -4 is made.
Now it's time to head for Abazigal's Lair.