-

- Forums
- Chatrooms
- Gallery
- Gameplay Videos
- Upload
- Articles
- Mod Reviews
- Shop SP: Games, Movies, Books

CHAPTER 1 | CHAPTER 2 | CHAPTER 3 | CHAPTER 4 | CHAPTER 5 | CHAPTER 6 | CHAPTER 7 | CHAPTER 8 | CHAPTER 9 | CHAPTER 10 | |
Amkethran | Sendai's Enclave | Abazigal's Lair | Return to Amkethran | |
RETURN TO AMKETHRAN
Balthazar's Army
The party returns to Amkethran. I immediately put up some buffs, and then have Imoen summon a Planetar. I gradually make my way through town and towards the gates to the Monastery, battling a lot of Mercenaries and Monks along the way.
A lot of the times I simply cut down the Mercenaries and Monks in straight physical combat. Anomen proves that he can still become a very effective melee fighter after buffing himself up with Armor of Faith, a Potion of Agility, Improved Haste, and Righteous Magic. Imoen bides her time, and unleashes offensive spells when enough enemies crowd around the party.
I eventually make to the gates of the Monastery, when I now have a LOT of Monks swarm me. Jaheira shows some spellcasting power of her own when she casts a Nature's Beauty spell, killing a few of the Monks outright and blinding the others. It's only a matter of time.
Saemon's Ruse
There's a number of ways to get in. I could pick up the key that one of the Monks left behind, but I'd miss out on a little more xp.
Instead, I enter the Smugglers' Cave again. I agree to go along with Saemon's idea. I do some buffing up beforehand, including a Spell Immunity: Abjuration for Avastrian.
Once Saemon gets me in through the front gate I have to fight a Monk, two Fighters, and two Mages. Avastrian rushes ahead and positions himself in their midst. He then casts Protection from Magic Weapons. The Mages manage to get in Time Stops, but they don't do much with it.
Meanwhile Anomen gets off a Storm of Vengeance, while Jaheira bounces a Creeping Doom off one of the Fighters so that it spread to the Mages as well. The battle is won soon thereafter.
Balthazar
Avastrian's goal is to convince Balthazar to join him in the final battle against Melissan. This requires both a very high reputation and a very high Charisma. Avastrian already has the former, but he needs to cast a Friends spell to get the latter.
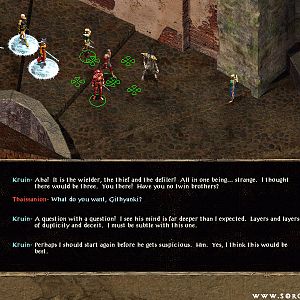
He then goes on ahead. Convincing Balthazar to join typically involves dialogue choices that both confront him with his own misdeeds, as well as stressing the need to end Melissan's plans. The video shows a series of dialogue choices that work to get the job done.
*Evil* Balthazar
The evil party prefers to kill Balthazar and some of his elite Monk guards. Balthazar not only has the standard Monk abilities (Stunning Fist, Quivering Palm, Lay on Hands), but also has an assortment of special powers and qualities. The following list is what I have observed thus far:
Edwin summons a Dark Planetar, which holds up Balthazar and another Monk. This buys the evil party enough time to wipe out Balthazar's other Monks. The evil party is then able to kill Balthazar with multiple Greater Whirlwind Attacks round after round even in spite of his use of Chant and Solar Stance.
The Truth about Melissan
Avastrian is called back to the Pocket Plane, where the Solar reveals the truth about Melissan's intentions. The video shows me selecting the good-aligned dialogue choices.
*Evil* Asteroth instead selects the dialogue choices that involve wanting to inherit great power.
The Ravager
I now return to the Pocket Plane, and buff up. Imoen summons a Planetar. I then enter the northeast room for a confrontation with the Ravager. The Ravager will also be helped out by several Bone Blades.
The Bone Blades are going to zero in on Imoen, so she always keeps herself protected with Protection from Magic Weapons.
The Bone Blades themselves won't die unless the Ravager falls, so keep your eyes on the prize. First, I protect myself physically. Jaheira casts Defensive Harmony. Avastrian puts himself up front and protects himself with Protection from Magic Weapons. Keldorn and Sarevok use Hardiness. After that, they charge in and use multiple Greater Whirlwind Attacks round after round until he falls. Keldorn's Carsomyr brought down the Ravager's Globe of Blades during the process.
The good aligned power is the ability use Resurrection.
*Evil* The Ravager
The equivalent video for the evil party. The evil aligned power is 25% resistance to all physical damage.
I have two separate sections for the final chapter, one for the Good Party and one for the Evil Party.


