-

- Forums
- Chatrooms
- Gallery
- Gameplay Videos
- Upload
- Articles
- Mod Reviews
- Shop SP: Games, Movies, Books
|
|
The enemies of Targos number more than we had thought. Even as the Lady Elytharra's warning of traitors still echoed in my mind, we were beset by a crazed mage, dressed all in rags! Bastinados was sorely wounded, and without my healing arts might have been lost. He will think twice before insulting a lunatic's mother again - especially when the lunatic is a mage.
We passed a make-shift infirmary on our way to meet this Shawford Crale. I am pleased to see that others of my calling have come to the aid of Targos. Although the sight of Master Fiddlebender's "airship" gives me cause to wonder, yet again, about the sanity of the gnomish mind.
Alia Shield-Maiden, the Annals of Halgren
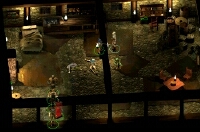
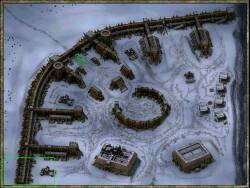 When you reach the Palisade, you'll find Shawford Crale in the building to your immediate right. Go in and speak to him. You'll get your first bit of gold for your help down on the docks. Now, because you're new, he'll send you on a few errands to test out your abilities. The first job is to go see Olap Tamewater, the chief engineer. Apparently there have been some troubles with the lumber needed to finish the Palisade (sound familiar?). Behind Shawford, you'll find Nolan the Healer. He's not particularly happy about being in Targos, but he's making do. He has some combat tips to for rangers and druids, and spellcasters in general. He will also heal your party for free.
To find Olap, head north and a little east towards the edge of the Palisade wall. On your way there, take some time to wander about the Palisade. There are a number of soldiers milling around that you can chat with, and many of them can give you small, and quite amusing quests. In particular, keep your eyes open for a fellow named Anson; when he commiserates with you about the minor quests in the Docks, ask him how he cleared the rats from the warehouse. He'll recognise the dead cat you collected there as one he stole from Firtha for ratcatching duty. You can then go to tell Firtha how her cat died for 300 xp. (For a list of the various other small quests available and the rewards for completing them, refer to the Quest List).
 You'll find Olap Tamewater in a very bad mood. He's responsible for completing the Palisade, but the lumber he needs hasn't arrived yet. If you haven't spoken to Lumbar Gundwall already, Olap sends you into town to find him. Once you've spoken to Lumbar, you give the information about the broken crane and stranded lumber to Olap. As an engineer, he recognises the problem immediately: a broken 'crane wheel'. But Olap doesn't have time to go down and deal with it himself. Fortunately, he knows someone who can: his father, Jorun Tamewater. So now you need to go back to the Targos Docks and speak to Jorun (he's still outside the Salty Dog).
From this point on you're going to be doing a lot of running around between the three areas. To help you get around, go talk to Swift Thomas. You can find him near where you first entered the Palisade. He can help you get around a little faster.
Go back down to the Docks and speak to Jorun. Just like any well-prepared dwarf, Jorun happens to have a spare 'crane wheel' with him at the moment, and he's happy to give it to you. (If you want to speak to Gohar at the Salty Dog about the weeping widow's husband Donovan, this would be a good time to do it.)
Now head back up to Targos proper. The crane is right beside Lumbar. Just place the 'crane wheel' on the crane and it's fixed. Speak to Lumbar briefly (he'll continue to complain, but you'll get some quest points for helping him out) and then head back to Olap. Olap is glad to hear that the crane is fixed and that the lumber he needs is on its way. Now you can report back to Shawford.
 Your next job from Shawford is to help out a soldier named Isherwood. You'll find him on the western side of the Palisade. Apparently he is in dire need of some arrows. On your way you might run into a rather unhappy soldier named Caulder. He seems to be having some trouble with his catapult. If you have at least average intelligence, you see what the problem is and can offer your assistance. Except, Caulder doesn't want any. He doesn't even want a hammer to bang in the nails. But if you have a high charisma and you're really persistent you can talk him into letting you help.
When you find Isherwood, he immediately explains that he's got a severe shortage of arrows. Once you tell him that Shawford has sent you along to help him, he's quite ecstatic. Find out how many arrows he needs and then head down to the Gallaway Trading Post to collect them.
If you've met Deirdre Gallaway already, you know that she isn't exactly happy with the Targos guard at the moment. She's even less happy when you tell her that you need 300 arrows. There are a couple of ways to get Deirdre to help. You can offer to compensate her yourself (she doesn't want any more IOUs from Ulbrec), in which case it'll cost you 50 gp. If you have a persuasive touch, you can talk her into giving them to you by convincing her that Targos needs the arrows, and it's in her best interests to see that the Targos guards can keep the goblins out of the town. Once you've finished the arrangements, you can head back to Shawford again. If you let Isherwood know that his arrows are on the way, he'll give you 2 jars of Flaming Oil as thanks.
Shawford is starting to be impressed with your abilities, and he's ready to trust you with more responsibilities (honestly, all this does build character'). Your next assignment is to go and speak with Koluhm, the Priest of Myrkul. If you've already spoken with Koluhm, you'll know that he's speaking with the spirit of a dead goblin, trying to get some information out of him. Shawford wants that information. Head back into Targos to find him (his house is just north of the southern entrance to Targos).
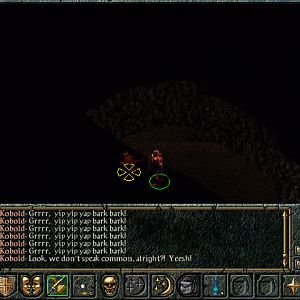
 When you find Koluhm, tell him that Shawford sent you to find out what he's learned from the goblin so far. Unfortunately, Koluhm has encountered a problem: he doesn't speak goblin, and can't understand what the spirit is saying. You can offer to write it all out and then take the note to Shawford, who will have it translated. Alternatively, any drow, duergar, dwarf, elf or half-orc in your party will be able to translate directly and won't need the letter (both dwarves and half-orcs speak goblin). Once translated, the information proves both interesting and alarming. Instead of one band, there are several bands of goblins involved, and at least three leaders: Caballus, Ghotag and Vghotan. You also learn that an attack on the walls has been planned, and could come at any moment. A character with high intelligence will catch Koluhm interrogating the townsperson's corpse. Apparently, Koluhm has learned the location of the townspersons hidden treasure (just below the fireplace in the lowest corner on the left-hand wall). If the character also has the Intimidate skill, they can get the location of a second treasure cache from Koluhm.
Of course, Shawford is quite alarmed to hear the ghost's tale, and wants everyone to report to the Palisade immediately. He's heard that the Iron Collar mercenary band hasn't done much other than drink up the town's coin. Still, he needs every sword he can get. Your final errand for Shawford is to get the Iron Collar band to report to the Palisade. And as far as Shawford is concerned, if they don't report to duty, the Iron Collar band should be dealt with however you see fit.
 If you killed the Iron Collar band in one of your earlier dealings with them, you'll explain to Shawford that you heard they died in the goblin attacks on the docks. Otherwise, head back to the Salty Dog for your confrontation with the Iron Collar mercenary band. As you may have guessed already, they really aren't very interested in reporting for duty (do you still wonder why they had to flee Cormyr in a hurry?). Depending on your skills and how you want to roleplay it, there are a few ways to deal with this. You can provoke them into a fight, and lay down the Law of Targos (remember, Shawford did give you permission to do so). You can also try to convince them that if they don't show up, not only will their supply of coin be cut off, they'll also be fined for all the coin they've spent already, and kicked out of Targos. The third way is to blackmail them into doing what you want. For this, explain that Phaen was exposed as a traitor, and that they could easily be seen as traitors themselves by their association with him. If they don't report at the wall, they will most assuredly be killed as traitors before the day is out. Killing them nets you 150 xp for each of them, plus you get their equipment. If you can get them to report to duty, you'll earn 600 xp plus you'll get a better reward (900 xp) from Shawford.
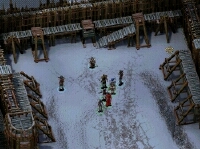
Once you've dealt with the Iron Collar band, head back up to the Palisade and give Shawford your report on them. If you managed to convince them to report, he's very impressed with you. The conversation is cut short, however, by the alarm going off: the goblins are at the walls. Shawford orders the gates into town closed, and goes to warn Ulbrec. He sends you to the Palisade walls, with instructions to meet back after the battle.
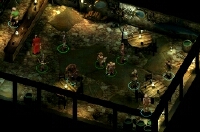
 As soon as you leave the headquarters, you're in combat. Just north of the building are several goblins, along with some hounds, and a mounted goblin named Vghotan, one of the three goblins named by Koluhm. This first battle isn't too tricky, as long as you're mindful of the goblin archers. You might want to try to surround Vghotan rather than leave only one character attacking him. As soon as you've killed the last of these goblins, you'll be shown a view of the northeast Palisade. A magic-using goblin (Caballus) appears inside the Palisade and casts a fireball at the wall, leaving a gaping hole. Another band of goblins appears, led by Ghotag, before Caballus disappears.
Before you rush right into the battle, take some time to heal any party members that might need it. You can also quickly loot the dead goblins (you'll get an interesting item from Vghotan called a "Worg Collar").
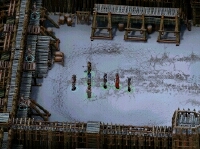
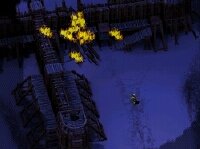
Head to the very north east section of the outer Palisade wall to find Ghotag and his goblin band. This fight is similar to your battle with Vghotan. If you focus most of your attention on Ghotag, and the rest on the goblin archers further back, then once he's dead you can easily clean up the rest of the goblins from his band. Again, when the battle is done take a few moments to heal and clean up the items dropped by the goblins (Ghotag drops a potion of Mirror Image along with a Light Crossbow +1).
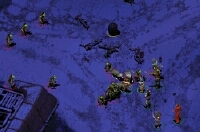
 Now Caballus reappears at the western side of the Palisade, making another hole in the wall. This time, Caballus sticks around for the fight. When you're ready, head over for the last goblin battle. You may find that Caballus is a little more difficult to take out than the other two goblin leaders. As soon as you get close to him, he'll cast some debilitating spells such as Colour Spray and Sleep, so be careful who you send into melee. The other goblins with him will also form a protective wall around him, so you may not get close to him right away. If you're lucky, his spells will take out some of his own troops. There is also a line of goblin archers standing behind him, so you'll need to pick and choose your targets carefully.
When you've finished off the last of the goblins, the battle is over. Clean up the loot (including a "Filthy Goblin Staff" from Caballus) and report to Shawford's headquarters. When you speak with Shawford, he is elated with your performance and tells you to go report to Ulbrec. You can also ask Shawford for gold up front. If you succeed, he'll give you 1000 gp, as well as a lecture on there being more to life than just gold, before sending you on to Ulbrec.
Lord Ulbrec has several things to share with you. First, he's quite pleased with your performance (500 xp). He also has some 'unsettling' news. Apparently, Oswald Fiddlebender has been using his air ship to provide intelligence reports to Ulbrec. What he's learned is that the goblin force that attacked Targos was just a small, advance group. The main army has taken Shaengarne Bridge south of Targos, which means that reinforcements from Neverwinter won't be able to reach Targos. He's also worried because there is still no word from his missing scouts. Ulbrec figures that the main goblin force is too big for the Targos army to deal with. However, he figures that a small band could sneak through the goblin lines and find a way to re-take the bridge. Ulbrec has selected your party for the job.
Before you leave, make sure you take some time to wrap up any unfinished business. You'll also want to spend some time making various purchases, such as stocking up on ammunition, spells and whatever potions you can. And don't forget to get all your items identified before you go. When you're ready to leave, head to the Palisade gate and follow the path outside. Once you leave the map, you'll begin Chapter 1.