-

- Forums
- Chatrooms
- Gallery
- Gameplay Videos
- Upload
- Articles
- Mod Reviews
- Shop SP: Games, Movies, Books
|
|
At long last, we have found the entrance to the fortress itself! Now we will finally be able to challenge the leaders of the horde themselves, and end the threat to Targos.
Alia is recovering well, although she has yet to regain her full strength. Halgren no longer frets over her so, and has re-claimed his rightful place at the forefront of our small band. I must admit, while leadership has its attractions, I much prefer the comfort of the shadows than the scrutiny of the limelight.
Kei the Wooden Idol, the Annals of Halgren
 You now find yourself outside in the outer compound of the Horde Fortress. There are some Orc Archers on the wall to the right. As soon as the archers spot you, they will be joined by two Verbeeg, an Orog Commander and a Goblin shaman. The Verbeeg come at you from the south west area of the compound, pinning you between them and the forces coming from the wooden walls of the fortress.
When this first little skirmish is done, carefully check the barrels nearby for some goodies - mostly ammo, but also some potions. Before you go any further, spend a few moments scouting out the area. Anywhere you move you'll be heading towards a fight, and it's best to plan which route you want to take.
If you head up onto the top of the wooden fortress, you will run into another Goblin Sorcerer as well as some Goblin Hordlings and a couple of Bugbears. A little further beyond them is a hardened ice Troll, an Orog, Orog Commander, Orc shaman and an Orc witch doctor. On the far west side of the wooden fortress are some Orcs and another Orog commander.
The door to the inner chambers is in the central area of the compound. It's guarded by two Half-Goblins, two Hobgoblin archers and a Hobgoblin sergeant. Plus there are there are still a few Orc archers on the walls above.
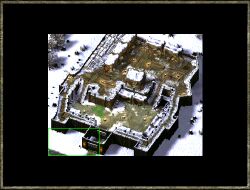
Clear out the outer compound, and check all of the barrels and containers in the area. You'll notice that the door leading inside is warded - the Iron and Black Ward Stones work here as well. Take a few moments to get your party ready - there are some tough fights ahead. You may also want to rest before continuing on to the Inner Fortress chambers.
 The first chamber of the inner fortress is guarded by two Bugbears. Shortly after the battle begins, an Old Orc will appear and join the fray. He's pretty tough for an Orc, and has a good stock of healing potions that will keep him going for quite a while. He can also deal out a fair amount of damage, so don't take any chances with him: take him out as quickly as you can so you don't use up too many resources. Afterwards, check his body for the key to the door.
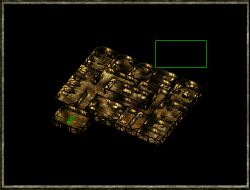
There's only one way to go from here, and that's north through the door. You'll open the door, and overhear a conversation between Guthma and something called Sherincal. When it's done, don't go rushing on inside. Doing so will undoubtedly lead to being quickly overwhelmed by the forces inside. Scouting out the chambers inside is a good idea.
 You'll find a large group of Chieftains and High Chieftains in the first chamber to the north east. If you fight them where they stand, they will soon be joined by every other inhabitant of the fortress. Leaving the bulk of your party in the first chamber, use a single scout to lead this first group of enemies down the hall to where the rest of your party awaits. These guys are all pretty tough (450 xp for each), and will be backed up by two spell casters (an Orc witch Doctor and a Goblin sorcerer) and two Bugbears. If you can, use spells such as web or entangle to hold them up - this would also be a good time for a fireball or two. If your scout was careful, then only the enemies in that first chamber will be alerted.
After that first big group is dealt with, there are a few ways to go. Guthma himself is in the central chamber - if you go inside the room to sneak a peek he'll challenge you automatically, so be careful. To the east of you is a chamber with two Orogs and an Orog Chief. Again, try to lead them out of the chamber or Guthma will be on top of you.
In the top north chamber you'll find an Orc witch doctor and two more Orogs. A few party members can sneak up into this chamber and deal with them quite nicely.
 With the main rooms cleared out, you've already done the bulk of the work. You can take a look around the rest of the complex, but you'll want to deal with Guthma as soon as you can. He's located in the central chamber, along with another Goblin High Chieftain. As soon as Guthma sees you, he'll challenge you. It doesn't really matter what you say to him - he'll attack you regardless - although you can taunt him and find out a few other details you may not already know. When the fight begins, Guthma and the High Chieftain will be joined by another Orc High Chieftain, a Goblin sorcerer and an Orc witch doctor (these last three will appear wherever the battle is). Guthma is tough, but certainly not unbeatable. Whatever strategy worked for you against the other group of Chieftains will also work here. When the battle is done, check Guthma's body for a random magical item, and a pretty good mace (Mountains of Selune). Check the body of the High Goblin Chieftain for a ring (Bane Immunity Ring).
With all the big guys out of the way, you can clean-up the rest of the inner fortress area. Head west down the corridor to the set of three rooms in the south east corner. You'll find a Bugbear Jailkeeper (450 xp), and Braston, the missing scout. Talking to Braston will reveal a few more minor bits of information, but you probably know most of it by now anyway. If you're still clearing out the map, tell Braston to wait here - otherwise, he has a very bad habit of getting in the line of fire. You'll also find the desiccated bodies of some other humanoid prisoners in one of the other rooms.
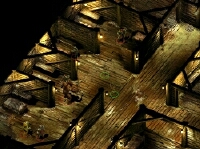
Follow the corridor north and east to the end. The door on your right leads to the kitchens, and the Ogre cooks aren't too happy that you've interrupted their work. When you're finished with them, follow the corridor back around to the other side, above Guthma's room. You'll find the first door is locked; unlock it and head inside to find a locked, and trapped, chest which should contain a nice random magical item.
 There's one door left in the corridor, but you just know it won't be all that simple. Here you'll find the quarters of the Orc High shaman. When you first enter, you'll face a Goblin Sorcerer and an Orc witch doctor. In the south adjoining room is the Orc High Shaman. The north adjoining room is a Goblin sorcerer. Loot the bodies and check all of the containers here for some scrolls and potions, and a suit of Studded Leather +1 (on the body of the Orc High Shaman).
On your way out the door, don't forget to stop and pick up Braston. Head back to the outer compound, and then go through the main gates of the fortress, and back to Ennelia on the Horde Fortress Gates map. Ennelia and Braston are quite happy to see each other (2100 xp for saving Braston from the Horde) and will reward you with the Longbow of Fire Resistance. The two scouts don't seem to have much more to say to you, so head back to Targos with news of your success.
Swift Thomas will greet you at the Palisade gates, and is predictably happy to see you. Before reporting to Ulbrec, you can stop off at Shawford Crale's place to collect your payment (6000 gp). When you finally report to Ulbrec, he is off course ecstatic about your successful return (2100 xp). But he has still more things for you to do - but you knew that already, right?