-

- Forums
- Chatrooms
- Gallery
- Gameplay Videos
- Upload
- Articles
- Mod Reviews
- Shop SP: Games, Movies, Books
|
|
Origins | Ostagar | Lothering | Circle Tower | Warden's Keep (DLC) | Return to Ostagar (DLC) | Stone Prisoner (DLC) | Brecilian Forest | Redcliffe | The Urn of Sacred Ashes | Orzammar | Deep Roads | Denerim | Final Onslaught |
Redcliffe Village | Castle Redcliffe - Level 1 | Castle Redcliffe - Level 2 | Chanter's Board | Mages' Collective | |
Chanter's Board
Now I begin to do a series of quests offered by the Chanter's Board in Redcliffe.
Caravan Down
Once I accept this quest, the area for it will appear on the world map. Leliana promptly summons and scripts her Blight Wolf. The thing with this battle is, it's actually the Darkspawn that wait for you to turn the corner and come into their view. The way for me to negate that is for Wynne to get the jump on them with a Fireball that catches several soldiers plus one of the emissaries right away. Aldarion also seals the first Emissary's fate with Crushing Prison.
A second Emissary and a Genlock Alpha come into view. Aldarion dooms the Emissary with single-target spells, while Alistair and the Blight Wolf bring down the Alpha. Leliana and Wynne of course tear it up at a distance. I go back to Sister Farrah to collect my reward.
Brothers and Sons
I accept another quest, to investigate the disappearance of soldiers from a battlefield. The Deserted Battlefield will appear on the world map.
Once I arrive, a soldier's corpse will be within immediate view. It holds the Soldier's Diary needed to complete the quest.
Next, I'll have to fight through several waves of Wolves to get to the other side. As long as the Wolf numbers are small enough I am content to let my attack and defense ratings assert themselves.
A Great Bear appears as I approach the north end of the area. It has a lot of health, and can hit for pretty good damage. Both Leliana and Wynne rip into it at a distance, while Alistair, Aldarion, and the Blight Wolf wear it down up close. Wynne is of course ready to cast healing spells when needed. I then go back to Chanter Farrah for my reward.
Skin Deep
This is a simple quest. If I bring back at least 9 corpse galls to the Chantry, I'll get 3gp. But if I have at least 18 (I have 22 in fact), I'll get 5gp and 500xp.
Desperate Haven
The first part of the video involves picking up the Desperate Haven quest from the Redcliffe Chanter's Board.
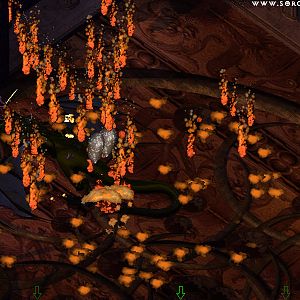
It is hard to recommend a precise plan or strategy for this battle, because 'the ball can bounce so many ways' so to speak. You can, however, break the Darkspawn into three distinct groups: 1) one on the right 2) one of the left and 3) A Hurlock Emissary on the far left side. The Emissary is the greatest danger in this fight. The sooner and the more often I can minimize his spellcasting, the better. My immediate priority is to train Alistair on the Emissary right away, with the intention of Alistair using shield talents to keep the Emissary off his feet. It's the surest way to minimize the Emissary's dangers, but it's also risky because I'm having Alistair stick his neck out all alone. He uses Health Poultices whenever necessary. Wynne also keeps a close eye on Alistair, even using Lifeward on him at one point as a precaution.
While I'm sending Alistair towards the Emissary, I'm also trying to get rid of the east group as quickly as I can. Aldarion hits the two foremost Hurlocks in the right group with a Cone of Cold. Wynne also hits most of the right group with a Fireball. It then becomes a matter of cutting them down as quickly as possible after they've been softened up.
Leliana switches over to her bow after the right group has been wiped out. Aldarion runs west, and then hits the left group with his Cone of Cold + Shock combo. Alistair also has the Emissary at death's door, effectively making the rest of the fight a mop up. I then report my success to Chanter Farrah and get 2 gold as well as 175xp. Note that how many Refugees survive does not affect the reward.
Unintended Consequences
For the Unintended Consequences quest to be available at the Chanter's Board, you must first have completed the Summoning Sciences quest in the Circle Tower so as to have released the Trickster's Whim.
I make my way to Lake Calenhad after accepting the quest. I then get the encounter while travelling back to Redcliffe Village. Once I reach the Roadside, Leliana promptly summons a Blight Wolf and sets its script.
I will in fact have to fight several Trickster Whims with varying abilities, including the main boss Whim, who is a powerful Assassin. It turns out three of them are just in line for a Cone of Cold. Getting rid of the Mage Trickster Whim is the most immediate priority, so Aldarion finishes him off with Winter's Grasp and then Lightning. I get rid of the minion Trickster Whims after that. Lastly, I surround the boss Trickster Whim. Leliana positions herself behind him so that she can inflict backstab attacks. It's only a matter of time.
The boss Trickster Whim leaves behind the Magus War Boots (+12 defense), which will be Wynne's boots for the rest of the game. I then return to Redcliffe to get my reward from Chanter Farrah.
I now do a couple of quests for the Mages' Collective.