-

- Forums
- Chatrooms
- Gallery
- Gameplay Videos
- Upload
- Articles
- Mod Reviews
- Shop SP: Games, Movies, Books
|
|
Origins | Ostagar | Lothering | Circle Tower | Warden's Keep (DLC) | Return to Ostagar (DLC) | Stone Prisoner (DLC) | Brecilian Forest | Redcliffe | The Urn of Sacred Ashes | Orzammar | Deep Roads | Denerim | Final Onslaught |
The Harrowing | Apprentice Quarters | Senior Mage Quarters | The Basement |
MAGE TOWER BASEMENT
Repository Doors
I begin the video by informing Jowan and Lily that I have obtained the Rod of Fire. Now they want to go to the repository. We go down the stairs to the Apprentice Quarters and then through the door that leads to the Basement.
The next part of the video involves me trying to help Jowan and Lily get through the repository doors so that they can reach Jowan's Phylactery. I can get through the first door thanks to a password that Lily has obtained. The second door is an anti-magic door that I can't do anything about. The door to the right, however, does open after using the Rod of Fire. The video concludes with me killing a single Sentinel.
Sentinels
So now it's time to make our way through the various chambers in the basement in search of Jowan's phylactery. I equip Lily with a Mace and a Dagger, while I equip Jowan with a spare Magic Staff. I'll get the items back from them later on so that I can subsequently sell them. The video largely consists me fighting Sentinels which are not tough individually. Note that I won't get any xp if Jowan or Lily land the killing blow, so I always make sure I get the killing blow.
Aldarion always uses a well-placed Cone of Cold spell whenever he's faced with multiple Sentinels. At around 1:28, he selects +1 Dexterity, +1 Magic, and +1 Cunning on his level up so that he can acquire the Improved Coercion skill.
At around 4:15 of the video I run into two Sentinels and a Robed Sentinel that can cast spells. Aldarion catches all of them with a Cone of Cold and then makes it a priority to take out the Robed Sentinel as quickly as possible, since its spells can become a nuisance.
Deepstalkers
Next is a fight with two Deepstalkers along with a Deepstalker Leader. The Leader isn't especially tough so I go to work on the others first in order to cut down the numbers. Then the Leader can be saved for last.
Apprentice's Amulet and Ephemeralist's Belt
I continue south for a bit and then kill off a few more Sentinels. Chests in the small room to the south hold the Apprentice's Amulet (+1 armor, +5% cold resistance, +5% fire resistance) and the Ephemeralist's Belt (+1% spirit resist). The belt is obviously no big deal, but I hold onto the Amulet because about three of the future NPCs will end up wearing one of these.
Enchanter's Cowl
I continue on and through the next door, battling more Sentinels along the way. Note how I always seek the optimum position for both party members and the Sentinels before I unleash the Cone of Cold. Furthermore, remember that I always try to make sure I land the killing blow if I can for the xp. Sometimes this means holding up on my own spells, and letting Jowan cast his spells, so that I can deliver the killing blow before Jowan's cooldowns elapse. And lucky me, one of them has dropped a Garnet that I can hold onto for a quest much later in the game.
There will be two chests nearby. One of them has a random item. The other has an Enchanter's Cowl (+5 mental resistance, +5% to all damage resistances), which is a welcome upgrade for Aldarion.
Blackened Heartwood Staff
I continue westwards and kill more Sentinels. I then find myself in a very large room. A nearby chest has a decent interim staff, the Blackened Heartwood Staff (+2 nature damage, +2 spell power). Note that I'll need a successful Persuasion check to be able to keep it.
Eleni Zinovia
Here is where I speak to a statue that holds the essence of Eleni Zinovia, past consort to Archon Valerius. I get the Codex Entry for "Tevinter Imperium" for this.
Tevinter Artifact
Now I use the Rod of Fire in conjunction with the Tevinter Artifact that resembles a dog statue to blow a hole in the nearby wall. The way to the Phylactery Chamber is now open.
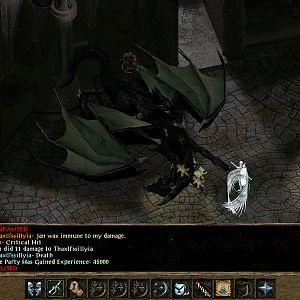
Sentinel Guardian
Next is the fight against two Sentinels and the Sentinel Guardian. And again, I use the Cone of Cold against them when the positioning is right for it. I take out the two Sentinels first then deal with the Sentinel Guardian. Of course I always make sure Aldarion lands the killing blow.
Jowan's Phylactery
Now we go up the stairs. Jowan rather ceremoniously drops his Phylactery to the floor to break it. We then leave through the door that was sealed against magic, and then make for the stairs back up to the Apprentices' Quarters.
Bound in Blood and Magic
Once we go through the door, we get apprehended by Knight-Commander Greagoir, First Enchanter Irving, and a couple other Templars. Jowan suddenly reveals his Blood Mage powers to knock them unconscious and then escapes. Everyone comes to, whereupon Greagoir has Lily sent away. He's pretty burned at Aldarion too, except Duncan intervenes with the Rite of Conscription to recruit Aldarion into the Grey Wardens.
Aldarion is brought to the fortress of Ostagar.