-

- Forums
- Chatrooms
- Gallery
- Gameplay Videos
- Upload
- Articles
- Mod Reviews
- Shop SP: Games, Movies, Books
|
|
RETURN TO MARTEN'S BLUFF

Pulse Pick
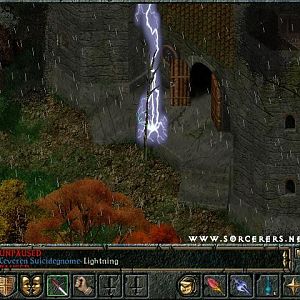
I wind up at the spot labelled 'Old Mine Tunnels' on the Lower Marten's Bluff map. Now the party heads westward, fighting Millipedes along the way.
Note that there's a room towards the middle of the map with three small alcoves on its south side. These alcoves have a number of items. One of them is an Oscillator, which a Gadgeteer can combine with an Electric Lamp to create the Strobe Light, which replicates the Prismic Ray spell. Also to be found is Jericho's Horn, which Errol can use to replicate the Armormelt spell. He replaces the Banshee's Howl with it.
Lastly, there is the Pulse Pick. It can be used to open the doorways indicated by 'pp' on the map, and I begin with the door immediately to the west.
Acquire a Flag
I first go west, kill six Deathsting Apuses along the way, and sell off my excess loot to Sadok. I buy spellbooks so that Ryu acquires the Shadow Hound spell and Chun-Li acquires the Freeze Flesh spell.
I then speak to Z'Ant and give him the Umpani Flag. The party gets 2,000gp and each party member gets 40,000xp. He then has another job for me, kill the Rapax Assassin, Raven Rapax.
Vi Domina advances to her 18th level. I have her take the Lightning spell, for the same reasons as with Rothgar. Now I go up the elevator.
Raven Rapax
I go past the south door of the elevator. Note that there are 2 rooms to the west and east sides of the elevator. I go to the west room of the elevator, and hit the lever.
A hanging dummy then drops down right next to the elevator. Remember the Rapax perfume I bought from Crock? I now use it on the dummy. I then leave and go back to the room west of the elevator.
Raven Rapax will take a while to come to the elevator. I quicksave once he's next to the dummy. I hit the switch on the computer in order to have the press close in on him and kill him.
Raven Rapax will leave behind the Head of Raven Rapax, as well as 1 to 4 items from the Raven Rapax drop list. The one I want is the Bushido Blade (+2 to hit, +3 initiative, 4-22 damage, +5% kill), which makes for a good interim sword for Ryu. I would simply reload if I didn't get it. Chun-Li uncurses Ryu so that he can replace Bloodlust with the Bushido Blade. He can now use throwing weapons again.
I bring the Head back to Z'Ant for 4,000 gp and 80,000xp. His next job for me is to retrieve the Chaos Moliri from the Mook in Arnika. He gives me a T'Rang-Mook Letter to help me get into their base.
I use the Pulse Pick to go back to the room east of Z'Ant. I kill another six Deathsting Apuses once there. I then take the long passageway leading north.
To the right of the north-leading hallway is a place marked 'Mind Control'. This place is guarded by T'Rang who won't let you inside, even if you are allied with Z'Ant. The reason being that inside the room is a Mindblast Rod (-6 initiative, 11-20 damage, +20 to Polearm skill, 20% paralysis, 5% knock unconscious, 75% drain stamina, Nuclear Blast with limited charges, Monk or Bishop or Psionic only). Only force entry if you value having the Mindblast Rod enough to have all of the T'Rang go hostile on you. I figure a Bo that I'll find in the future for RFS-81 will serve just as well.
There are stairs that are precisely underneath the word "Helm" where I've noted "Brilliant Helm" on the map of Lower Marten's Bluff. They lead to other parts of Marten's Bluff above that were previously inaccessible.

Marten's Idol
The stairs lead to the eastern half of Marten's Bluff. I cast Detect Secrets, and find another Amulet of Healing (+3 armor class, +50% divine resistance, +1 health regeneration) for Terra, and also another Dulcimer of Mending which I'll just sell.
I now run into 4 Rebel spirits, who can cast spells and put party members to sleep with their touch. Like all undead, they'll fall rather quickly to repeated castings of Banish.
The room to the east has an Enchanted Broadsword, as well as a Pot with a Hinge. A Gadgeteer can combine the Pot with a Porthole to create the Port-o-Potty that replicates the Noxious Fumes spell.
I continue south, and continue to find various items, including a Book of Set Portal. Rothgar inscribes it to the Set Portal spell. And since he now has both Set Portal and Return to Portal from spellbooks, he's now ready to set travel markers when needed.
I still continue south past a trapped room that always shoots arrows. As long as I have Missile Shield up, there's nothing to worry about. I then continue south and west a little, and find a 'Switch' that I turn down.
From there, I continue east and head down the stairs at the southeast corner.
This brings me to a hallway that runs east-west at the south end of Lower Marten's Bluff. I follow this westwards, and go up the stairs at the west end.
This brings me back up to Marten's Bluff. To be more specific, this route allows me to open the 'Trapdoor' from below.
I go west and kill five Stalker Seekers and three Greater Seekers.
I continue north and east, and fight a dozen Deathsting Apuses all at once. A character getting Critically Hit with this many Deathsting Apuses is a real risk, so I take no chances. Ryu puts Firestorm over them, while Terra casts Acid Storm and Chun-Li casts Toxic Cloud. Chun-Li also summons an Air Elemental Lord. The risk is realized and yet averted in this battle. Vi Domina got Critically Hit, but her Valkyrie ability allowed her to cheat death in that instance. I eventually manage to outlast them and kill them off one by one. Zarax and Errol advance to their 20th levels of experience.
I go back into the fortress through the catapult. The gate that was opened by the switch is a little south and east of the elevator. This leads to a small room with narrow hallways, one that leads up and west and another that leads up and east.
The west hallway leads to a fight with a Thrasher Apus and a Mandoline of the Magus, which a Bard can use for Magic Screen. But I already have this checked off, as Chun-Li with her Power Cast skill can put up a Magic Screen that will last for a very long time. I'd rather have Errol emphasize instruments that will be useful during combat.
I thereafter follow the east hallway, and take Marten's Idol. Taking the idol knocks my party unconscious, and Chun-Li has apparently been kidnapped.
T'Rang Teleporter
I go out the front gate, and then west. I kill three Helligators.
I continue around the western edge of the fort, and again run into a dozen Deathsting Apuses. But this time I use the fact that they're behind a corner to the left to my advantage. I kill six of them by letting them bend around the corner one at a time, which reduces the risk considerably. The rest start to walk away, so that's when I myself bend around the corner and kill them off.
I go down the now open trapdoor and down the stairs to Lower Marten's Bluff.
I am now at the stairs marked 'up' in the southwest corner of Lower Marten's Bluff. I go east and south into a room that has the T'Rang Teleporter. It is only possible to come here either from the trapdoor or the other set of stairs to the east if you wanted to access the teleporter without making the T'Rang hostile. Trying to go past the Sentinels to the north would have turned the T'Rang hostile.
There is a control panel for the teleporter on the south side of the room. Notice that it's screen is blinking between different destinations. That means trying to use the teleporter in its present state will take you to one of four different destinations at random.
Notice also that the left side of the panel has a single blue wire in it. I now use the Red and Yellow Wires that I found when I first came to Marten's Bluff, and insert them in the empty spaces near the blue wire. I can now use the buttons to set my destination. I press the far right button to set the destination for the north side of Marten's Bluff above and step through.
And from there I go north to return to the Swamp.

Brekek
As for my missing Bishop, I have to go back and see Crock in the Swamp. He'll return my companion to me, but only if I kill a giant frog named Brekek for him. Brekek is across the bridge, and towards the northeast corner of the Swamp.
He can breathe poison at the whole party, but he's otherwise pretty easy to chop down. I make sure to take the Giant Frog Leg with me. The pool itself has some assorted loot that can be sold off.
Terra advances to her 18th level after fighting enough monsters on the way back. She selects Purify Air.
I then go back to Crock and give him the Giant Frog Leg. Chun-Li is then returned to me and is no longer missing. I go south and return to Marten's Bluff.
Arresting Aria
I go south and down the trapdoor again.
That brings me to the stairs indicated by 'up' in the southwest corner of Lower Marten's Bluff.
Now I return to the T'Rang Teleporter, but this time I press the second button from the left and then step through.

It brings me to the house marked "T'Rang House" on the map of the Arnika-Trynton Road. The house itself has a teleporter that leads back to the T'Rang Teleporter in Lower Marten's Bluff.
It also has an instrument called the Arresting Arria. It can be used to replicate the Freeze All spell, which can potentially paralyze all enemies the party faces. Errol replaces the Freezing Fiddle with it.
I go north and defeat several plants, and then enter Arnika itself.

I go west towards the Savant Tower, and defeat four Savant Slashers and four Savant Gunners. Chun-Li now advances to her 18th level. She takes the Death Cloud spell. It's arguably the best offensive spell in the game. Every enemy affected by it has to roll their defenses against it every round to avoid dying instantly. And the Power Attack skill affects the probability of instant death.
I also get in some practice with Knock-Knock at the jail door, and Mindread on Braffit.
I don't show it in the videos, but I go back south and east along the Arnika-Trynton Road. I am going to Return to Trynton.