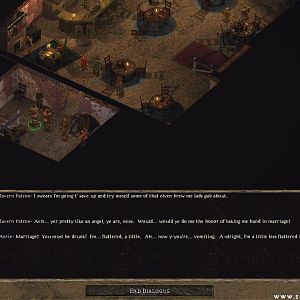
Getting Here: You must receive the following information:
This note can be found inside of Merella's House lying on the floor and once you've read it, you will have your
world map updated with the location of the Temple Ruins which you can then explore. Merella's House is located in the
village of Imnesvale within the Umar Hills.
| Umar Hills - Temple Ruins |
|
This is indeed a very creepy place much like the Blair Witch Project and no doubt one of the reasons
this place is the way it is as someone had some influence on the creation, look and feel of the Temple Ruins. If you noticed, there was
even a book you could purchase from Vincenzo's Inn which is a short, yet funny spoof on The Blair Witch
Project.
This foul and evil place is just that as scores of Shade Wolves, Great Shade Wolves, Shadows and Shadow Fiends move about
through the shadows hunting the very souls that you have within your own bodies, so be on the look out. Over all, they should not prove to be very
difficult for your party and the only time you'll face a good number of them all at once, will be when you make your way to the entrance of the Temple Ruins themselves.
Make your way to the entrance of the Temple Ruins, battling hard as you do and journey down the stone steps into the darkness
beyond. You cannot access the shrine to the Shade Lord from the outside as it is circled by thick trees and brush, so you will have to inch your way
through the passages below before you're able to stand face to face with this pit of evil. Let us be off!
|
Entrance Room
|
|
|
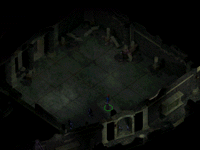
Rubble lies strewn across this room as does a thick layer of dust that blankets everything in this room, but you do happen to notice footprints
which lead out towards the archway ahead. A strange, deep growling sound catches your attention along with the sound of metal being dragged on the dusty floor. Turning
your attention towards the sound, Shade Wolves and two very large Skeleton Warriors are making their way towards the door you've just opened and showing no emotion at all,
continue heading towards you!
The Skeleton Warriors will hurt you more than the Shade Wolves you'll find and they have some decent magic resistance to ward off your magical
attacks. I took these large beasts of evil by having a front line at the door so I could bottleneck the creatures in the room and take them on at two or three at a time,
depending on which ones got to my line of fighters first. I am sure you will have no trouble putting these restless undead creations to rest.
Search the room when you're done for you don't want to have to come back here if you can help it. You'll find a pile of bones, which just happen
to be AMUANA'S BONES that you'll need later on in these dark, dusty depths so hold on to
them and when the time comes to use them, I'll mention it.
|
Jailer Room
|
|
|
Guarding this room is the Shadow Jailer, who
warns you that you shall not free the master's consort and then attacks
you alongside of Shadows who also frequent and guard this room. Banging
can also be heard coming from behind the closed doors here, and a muffled
sound which seems to be that of a female, but it is hard to tell, but you'll
soon find out once the battle is over and you've picked up the SHADOW
PRISON KEY. It is this very key that was on the Shadow Jailer
that shall unlock the doors and free Mazzy Fentan
who has been locked in her cell for some time.
Listen to her tale well and decide if having her in your party would suit you for this adventure. For myself,
I brought her along for the extra power up front and to also get a feel of how she'll fare in battle if I decide to add her to my final
party.
If you come across a parchment stating a possible location to a secret stash of items, do not waste your time
looking for this because this is specific to the Ranger Stronghold Quest only and no other. In fact, it's nothing more than a normal necklace
that a few nobles are cutting down trees looking for. I have had numerous e-mails from our readers asking about this so as a note, don't
kill yourself over this unless your main character is a Ranger.
Thanks to Eric for the heads up.
|
Morn Ritual Room
|
|
|
Long and dark shadows reach out towards you as you enter this small room, a single pillar reaching
upwards to support the cracked ceiling which has rotten and dead tree roots sticking out of it. Whispers twirl around the party
as Shadows emerge from the darkness, their eyes, red pin points, marking you as their feast. Black claws rake the air as they
approach so it is best you deal with them quickly before more come from the same long dark shadows that blanket this room.
Search this room once the battle is over and make sure you pick up the MORN RITUAL PARCHMENT. This
parchment will give you clues to some questions you will face very shortly and ones I will go into full detail later on.
Continue your way down the other passage with your sword ready and your magic crackling!
|
Sun Gem Room
|
|
|
A tall crystal beams out light into this small circular room which is a sight for sore eyes after exploring
the dark, shadowed rooms before. Shadows also make this a place of residence and their numbers will grow once you extinguish the crystals
light and you will have to if you want to get the SUN GEM, which you will
need to penetrate deeper into these ruins.
Battle hard, grab the SUN GEM and head up the
passage to the last room of this area.
|
The Ritual Room
|
|
|
A large, stone statue head formed to resemble Amaunator himself looks at you with blank eyes but don't be so easily
fooled by an empty room such as this because this very statue head plays an important part in your quest to vanquish the foul evil that has
made these Temple Ruins its home.
Searching for traps will reveal that one of these blank eyes is trapped, but give it up because you cannot disarm
such a powerful creation dedicated to the Sun God Amaunator herself. You'll have to go through a series of questions if you have any hope of
exploring the deeper parts of these ruins.
Now before I go and spoil everything for you by giving the correct answers to the questions that this statue head
asks, I will tell you that the answers can be found on the following parchments which are located in the Temple Ruins. If you're stuck, you can
find the answers on these parchments without ruining the fun factor of answering the questions yourself.
MORN RITUAL PARCHMENT can be found in the Morn Ritual Room.
NOONTIDE RITUAL PARCHMENT can be found in the Noontide Ritual Room.
DUSK RITUAL PARCHMENT can be found in the Amaunator's Room.
Now finding each one in order will give you the answers to the specific tests that the Statue Head will put you through and in the very order
as I have shown them above. Morn, Noontide and Dusk. Now it is up to you how you want to do this and if you wish to find them in sequence as you go, you may do so and continue
on with the next part of this solution BUT you can also answer them all right now, right here and never have to come back to this room again, the choice is yours. I have listed
the answers in the order of each test if this is what you wish to do.
MORN RITUAL TEST
Answer for the 1st question:
I shall say a prayer to the light
Answer for the 2nd question:
I shall hold high the holy book that the sun might bless it
Answer for the 3rd question:
I shall reflect on the glory of the Light as it conquers The Dark
NOONTIDE RITUAL TEST
Answer for the 1st question:
I shall sing a hymn of praise to Amaunator
Answer for the 2nd question:
I shall raise hands to the light
Answer for the 3rd question:
I shall rejoice at the dominance of Light
DUSK RITUAL TEST
Answer for the 1st question:
I will recite the tenants of faith
Answer for the 2nd question:
I will hold my children so they can see the sun
Answer for the 3rd question:
I shall mourn as I watch the sun give way to the onslaught of Darkness
After you have completed each test, you will receive 45,500xp plus the SUN RAY SYMBOL which is the first
part of three Symbols you will need to find to form the SYMBOL OF AMAUNATOR which is used to gain entry into the last part of the Temple
Ruins.
Once you have done either all the questions or just the Morn Ritual Test, make your way to the first field so you can open it.
|
 |
|
 |
| Umar Hills - Temple Ruins - The Ritual Room | Room Statistics... |
- Empty
- No creatures moving about
- SUN RAY SYMBOL
2 exits
|
|
|
 |
|
|
 |
|
 |
|
Sun Gem Field
|
|
|
This barrier you will not be able to pass
unless you have the SUN
GEM which can be found in the Sun Gem Room
in case you have missed it or have yet to come across it. By having this
item in your party, it will remove the Sun Gem Field allowing you passage
to explore the deeper areas of the Temple Ruins.
Sylvus Moonbow was here with you hiding in the shadows that make these Temple Ruins spooky! BOO!
|
The Bridge
|
|
|
This old wooden bridge doesn't look like it will support any of you if you attempt to walk on it, but you will have to
if you plan on getting around the other field that cannot be opened by any means and you will have to try your luck on the rotting boards if you want
to get to the other side.
Now you should be careful of an ambush
because this is the perfect place for one, so be ready in case something
happens to come your way. Get across this old bridge as quickly as you
can and make your way into the room on the other side.
|
Lava Pool Room
|
|
|
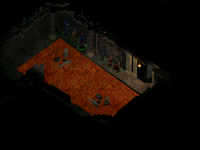
This room is very hot and steamy as a very large lava pool can be found here, leaving very little walking space to
move from one end of the room to the other. Its walls are covered in ancient designs as well as pillars that hold the ceiling up. One must be very careful when stepping through this room because
the lava will cause anyone touching it some damage and that is the last thing you will want because if you step too far out, there is a good chance
your screams of pain will attract the attention of some of the other beasts in the other rooms near by.
Search this room well for it holds some very nice items that will be very useful to your party.
| Umar Hills - Temple Ruins - Temple Ruins - Noontide Ritual Room |
|
|
Noontide Ritual Room
|
|
|
This 20x20x10 room hosts a few foul beasts that you should have a quick time taking care of and that are Shadows
and a Skeleton Warrior which, if you had not attracted their attention in the Lava Pool Room, will be waiting to smash your skulls into the
floor, but show them otherwise.
Other notes of interest in this room would
be the NOONTIDE
RITUAL PARCHMENT which is the second parchment to be found
that will help answer the question from the Stone Statue Head found in
The Ritual Room and is the second of three parchments
that you will find while exploring the Temple Ruins.
Search the rest of the room of its other contents and then continue forth to the other unexplored areas you have yet to go to.
| Umar Hills - Temple Ruins - Temple Ruins - Spirit Guardian Room |
|
|
Spirit Guardian Room
|
|
|
Ethereal beings will greet you as you step into this area but not before the Bone Golem moves to intercept you
in an attempt to keep you from going forth. Swinging its fists in your direction, it is an awesome creation and should be treated with care
by all of those within your party. Remove this only threat so you can hear what the Guardians have to say to you.
If you already have AMUANA'S BONES with you, the Guardians
Badon and Dettseh will sense its pull on their own souls and ask that you hand them over so that the Prophetess Amuana can finally be laid to rest which will set their own souls
free from this evil place. Handing AMUANA'S BONES over will also grant you the second part
that you need for SYMBOL OF AMAUNATOR and that second part would be the DAWN'S LIGHT SYMBOL.
Also for your efforts, you will receive the SHADOW DRAGON WARD STONE which, if carried with the party, will make you undetectable to the beast
that lives in the upper chamber where you will be heading.
Now if you are missing AMUANA'S BONES, they can be attained by searching the Entrance Room.
Search the room when you have completed Badon and Dettseh's task and prepare yourself for the final stages of this foul place.
|
 |
|
 |
| Umar Hills - Temple Ruins - Spirit Guardian Room | Room Statistics... |
- Guardian Badon
- Guardian Dettseh
- Bone Golem [18,000xp]
- Quest from Badon and Dettseh to help find AMUANA'S BONES
Pierce Magic Spell [Wizard]
Sunstone Bullets
DAWN'S LIGHT SYMBOL
SHADOW DRAGON WARD STONE
1 exit
|
|
|
 |
|
|
 |
|
 |
|
Amaunator's Room
|
|
|
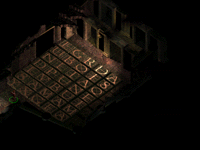
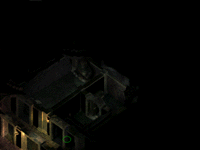
Stone blocks with gold engraved letters make
the floor here of Amaunator's Room, on the other side of these stone blocks
are two open arches which you can faintly tell from the little light that
breaks the darkness, a hallway rests on the other side. You will have to
take care of the foul Shadow Fiends and Skeletal Warriors that will lunge
at you from this room and attack you, standing in the hallway is the best
to make sure none of your party members accidentally step on the wrong stone,
which will do some serious damage if they do.
This is a pretty easy trap to get around and if you've been following the plot of the Temple Ruins, you'll come to realize that
walking on the blocks must come to spell Amaunator so you do not receive the Flame Strike that will burst out onto your party member from the ceilings above.
Simply walking on each block to spell the proper word will get you to the other side without taking any damage.
|
Amaunator's Room
|
|
|
After making your way across to the other
side, you'll find yourself standing inside of a hallway which leads to
two separate rooms, the first room to the left has a statue whose hands
are open as if waiting for you to place something on them while the other
room, to the right, leads to a closed door which has a trapped Shadow
inside of it.
You will find some very nice
equipment to add to your growing arsenal of weapons and spells here in the statue. You will find within the bunch of items
that the statue is holding the last and third parchment to the questions asked by the Stone Statue Head found in The Ritual Room. The
DUSK RITUAL PARCHMENT will help give you the answers to the last test the Stone
Statue Head gives to you.
Now when you check the statue, it says that you could perhaps place something here and although I am trying to create a full Online Solution
of BG2, I also do not want to go out of my way to SPOIL the game for you, especially when certain quests you have to do will appear in later chapters of the game. This
is one such area. If you wish to know what the statue here is used for, simply highlight the black area below for the answer, but trust me, if you are still on very early
Chapters of this game (2-5), I ask you not to ruin the game for yourself by checking out this answer. I found out when a reader e-mailed me what is to be done here and
my game was spoiled because of this. Highlight at your own risk!
The Statue of Amaunator is the giver of life, much like that of the sun that shines high above us day in and day out, burning out the darkness that
night has to bring with it. The statue can bring those characters turned into Vampires by Bodhi in the later segment of your adventure and to revive them, you must bring
Bodhi's heart and the body of the turned party member, place them in the hands of the Statue of Amaunator which will bring them back to the land of the living.
Another SUN GEM is also found here and will open the
last field to the hallway that leads to the door to Thaxll'ssillvia's Lair so be sure to take this with you! You will still need to open this last door to gain entry
into Thaxll'ssillvia's Lair, but don't worry because that part follows next.
Now onto the room with the Shadow, who wants nothing more than to be set free and use your body as a host to get across the floor here in
Amaunator's Room but this is just a trick as he will need your party leader to do this. Many people have fallen for this trick, thinking that the only
real thing found in this room is the Shadow and once taken across, it will attack you so don't bother. Now because of this, many people didn't bother to check the room's
contents and this is where many have gotten stuck, taking the rest of their party back across the floor and moving on. Do not do this. In fact, there is no difference
if you kill the Shadow in the cell or take him across and kill him, just remember to search the room he came from before you leave.
Searching the room will reveal the hidden LIGHTSTONE SYMBOL, the
last symbol to form the SYMBOL OF AMAUNATOR which will allow you to open the final door which
leads to Thaxll'ssillvia's Lair and without this formed part, you will only be able to get past the field that stands before this very door.
Move on to the last field, open the door and head up the stairs. Now the real fun begins.
|
Sun Gem Field
|
|
|
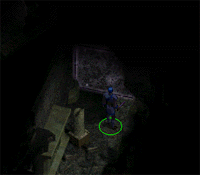
The last barrier requires the SUN GEM
from Amaunator's Room which will unlock this field and allow you passage to the hallway which leads to the door that will take you
up to Thaxll'ssillvia's Lair. This door requires the SYMBOL OF AMAUNATOR
so do make sure you have found all three parts to form this symbol or else you will not be able to open the door.
A final reminder of where these parts lay are listed below.
Sylvus Moonbow walked here at one time...
SUN RAY SYMBOL is found in The Ritual Room.
DAWN'S LIGHT SYMBOL is found in the Spirit Guardian Room.
LIGHTSTONE SYMBOL is found in Amaunator's Room
| Umar Hills - Temple Ruins - Temple Ruins - Thaxll'ssillvia's Lair |
|
|
Thaxll'ssillvia's Lair
|
|
|
|
|
Don't piss Thaxll'ssillvia off!
|
|
|
|
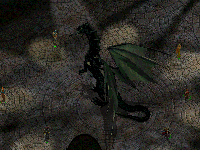
A mighty room, grand and large, its floor carved by craftsmen now long gone and forgotten with time will greet
you as you make your way up the final flight of stairs that spiral up to this part of the Temple Ruins. Its size is rightly so for it is here
that Thaxll'ssillvia lives and spends most of her time, a Shadow Dragon by nature, a force to be reckoned with by yours. Having the SHADOW DRAGON WARD STONE
within your party will allow you to explore this vast chamber without any worry of Thaxll'ssillvia taking notice of you, but as soon as you drop it, she will not be so kind to see
intruders walking freely around her lair. Unless you are positive you will be able to take her down, your next option is to take the last flight of stairs which lead back outside
to the shrine that is surrounded by thick trees and foliage to battle the Shade Lord who waits for you.
|
Thaxll'ssillvia is very pissed off...
|
|
|
Those who wish to take down Thaxll'ssillvia
are more than welcome to try though and will teach you a few things about
the strength and power of Dragons found in Faerun as well as teach you
how to use battle tactics to their full advantage. You will find her ability
to Level Drain 4 levels from a party member to be very devastating and
her high magic resistance will keep you on your heels as you do battle,
but Thaxll'ssillvia is able to be bested and many people who have done
this have very different strategies at doing so. Dragons are by far the
most wondrous beasts found in Baldur's Gate 2 and for that, many people
are interested in attempting to take them down, so send me in your tips
for the Shadow Dragon Thaxll'ssillvia so I can add your bit of fame to
the BATTLE TIP! section of this solution as your
own party is remembered for its battle deeds and their tales woven in
bards' tales to be sung in taverns and inns alike.
Shouts to Wolfgang Klenk for correcting the experience gained from killing Thaxll'ssillvia!
|
Shade Lord Altar
|
|
|
'tis here that the final battle takes place against the very evil that has caused all the problems in and around
Umar Hills and Imnesvale and that would be the Shade Lord, whose demonic plans are about to come to an end by your very blade! The Shade Lord has
used Merella's body as a host so do not be fooled by his attempts to win you over to his side as he did with Patric, Mazzy Fentan's
companion who is now just an empty shell and follows the Shade Lord's bidding.
The Shadow Altar is another form of evil and summons Shadows and Shadow Fiends to help the Shade Lord battle, so it is yet another
part of the battle you will have to take care of, along with the Shade Lord, Shadow Patric and the rest of the summoned creatures of evil that come forth. The Shade Lord
has good magical resistance, so getting someone who can deal damage as well as take it up front is best done as quick as possible to keep the Shade Lord from casting
himself against your party.
I honestly didn't find this battle very
difficult to win, it's just a matter of keeping everyone busy and the
foul beasts occupied as much as possible, using whatever means necessary
to bring them all down. The Shadow Altar does summon Shadows to battle
along side of the Shade Lord, but at a very slow pace and not one that
will turn the tides to their favour, but removing it as soon as possible
is also just as good as anything during this battle.
Once the battle is over, Merella will be seen somewhat alive, but not long enough that she will be able to get back on her feet and return
to Imnesvale, which would seem is now missing a Ranger to guide them and keep them safe.
Return to Imnesvale and show them just what heroes truly look like and if you didn't care for Mazzy Fentan like I
did, now is the perfect time to tell her to return to Trademeet and if you're looking for her again, you'll know exactly where to find her.
| Umar Hills - Imnesvale - All Quests |
|
This is a full list of all Quests found within Imnesvale in the Umar Hills.
| LOCATING ALL THREE SYMBOL PARTS |
This is not a quest that is directly given to you, but are three very important items that you will need to find to continue to brave the very depths
of the Temple Ruins. Each part, once you have found all three, will fit together to form the SYMBOL OF AMAUNATOR
and having this whole symbol will allow you to pass through the last door leading into Thaxll'ssillvia's Lair. The name and location of each part are listed
below.
SUN RAY SYMBOL is found in The Ritual Room.
DAWN'S LIGHT SYMBOL is found in the Spirit Guardian Room.
LIGHTSTONE SYMBOL is found in Amaunator's Room
| LOCATING ALL THREE PARCHMENTS |
Clues to answering the questions asked by the Stone Statue Face in The
Ritual Room can be found on three separate parchments, and although
not a quest that is given to you, it is something you may want to find if
you want to answer the questions yourself rather than using the answers
provided in this solution. Below are the names of each parchment and their
respected locations.
MORN RITUAL PARCHMENT can be found in the Morn Ritual Room.
NOONTIDE RITUAL PARCHMENT can be found in the Noontide Ritual Room.
DUSK RITUAL PARCHMENT can be found in the Amaunator's Room.
| PASSING THE SUN GEM BARRIERS |
If you're having difficulty getting past the Sun Gem Barriers that are found blocking your advancement within the Temple Ruins, you will need
to locate and pick up the two Sun Gems that are needed to open these barriers.
The first SUN GEM you will find in the Sun Gem Room and this will open
the first Sun Gem Field found here.
The second SUN GEM that you come across will be located in Amaunator's Room
and will open the second Sun Gem Field found here.
The Guardians Badon and Dettseh have been trapped in the Temple Ruins for quite a while and want nothing more than to be laid to rest, knowing
that who they were Guardians for, Amuana, is found and her remains be brought to them. You will come across Badon and Dettseh when you arrive
in the Spirit Guardian Room and it is AMUANA'S BONES
from the Entrance Room that they seek.
Returning AMUANA'S BONES will gain you 17,750xp, the
SHADOW DRAGON WARD STONE and the DAWN'S LIGHT SYMBOL.
| Umar Hills - Temple Ruins - All Items |
|
This is a full list of all Magical
Items found within the Temple Ruins. Their locations can be found
by viewing the rooms separately through the solution as they are also covered
in the Room Statistics.
- 40x Darts of Wounding
- 40x Arrows of Ice
- 40x Bolts of Lightning
- 40x Bullets +1
- 20x Sunstone Bullets +1
- Two-Handed Sword +1
- Arla's Dragonbane Sling +3
- Dark Mail +3
- Duskbane Halberd +2
- Cloak of Stars
- Wyvern Call Spell [Wizard]
- Pierce Magic Spell [Wizard]
- Protection from Magic Weapons Spell [Wizard]
- Disintegrate Spell [Wizard]
- Wand of Lightning
- White Ioun Stone of Regeneration
- Shadow Dragon Scales
| Umar Hills - Temple Ruins - All Monsters |
|
This is a full list of all Monsters
found within the rooms on all levels of the Temple Ruins,
their locations can be found by viewing the rooms separately through the
solution as they are also covered in the Room Statistics.
- Lots of Shadows
- Lots of Shadow Fiends
- Lots of Shadow Wolves
- Some Skeleton Warriors
- 1x Bone Golem
- 1x Shadow Jailer
- 1x Shadow Dragon
- 1x Shade Lord
- 1x Shadow Patric
|
 |
|
 |
|
With Jaheira off on business, the sixth spot was available and
eventually taken when I found and saved Mazzy Fentan whom I found
within the Temple Ruins. Although I was not very impressed with her at all, that including her
personality, I kept her out of honor of her fallen companions who had attempted to clear out
the very Temple Ruins I had been asked to explore.
I allowed her to travel and stay with my party until she avenged the death of Patric, one of
her companions who was turned into a Shadow by the Shade Lord and also let her engrave their
memory on the Altar so their courage and strength would never be forgotten.
As soon as she was finished with all of this, I asked her to leave and Korgan
was more than pleased to see her go as the two of them had more than a few words for each other.
My party during the exploration of the Temple Ruins consisted of the following:
Once Mazzy Fentan was asked to leave, I immediately
went back to Imnesvale and snagged Valygar
so I could start on his quest to the Planar Sphere.
|
|
|
 |
|
|
 |
|
 |
|


