-

- Forums
- Chatrooms
- Gallery
- Gameplay Videos
- Upload
- Articles
- Mod Reviews
- Shop SP: Games, Movies, Books
|
|
CHAPTER 3
Wandering Village
Your first battle in Chapter 3 is another priestess of Auril named Thrava, helped out by several Barbarians, a Barbarian Shaman, and a Fomorian Giant named Borbog. Since the crevice leading to you is narrow, the standard recipe of crowd-control plus offensive spells will work wonders here as well.

Your next major fight is against a pack of Dire Wolves, and there will be a lot of them coming after you. The sheer size of the pack means they can overwhelm you if you aren't careful. But again, Chaos is just the thing to keep them divided and unable to attack you.
Anyway, when you wander into the village, the first person you'll meet is a Drow merchant named Nym, who has quite an assortment of goods for sale. What I bought from him included:
Also in town is Tahvo the Huntmaster, who also has some goods for sale. What I bought was:
At the north end of the village is Kanno the Bowyer, courtesy of the Light of Selune mod, who can sell some pretty interesting bows, crossbows, and ammunition. What I bought from him was:
He also has a couple of fed-ex quests that are worth your while if you have a Human, Half-Elf, or Elven Ranger in your party who is either Neutral Good or Chaotic Good in alignment. It basically involves giving the Dryad in the deep woods Acorns from Kanno as a gift in exchange for a bowstring.
Once you complete this quest, Kanno will have the bow ready for sale, but only a Ranger can speak to Kanno in order to complete the sale. The bow is:
This will be Alliria's bow for the rest of the game.
He'll also give me a tome of the Elven God, Solonor. When Alliria uses it from one of her quick-item slots, she'll get:
Fellwood, Outskirts
Once you arrive at the outskirts of the Fellwood, there are two battles of note before you encounter Limha. First is a bunch of Snow Trolls, led by a Snow Troll Shaman. Same as before, take 'em out one at a time and deliver the coup de grace with fire or acid.
The next group will be a bunch of Barbarians, including a Barbarian Shaman. Again, they can overwhelm you if you're not careful. Party-friendly spells that hinder their ability to land blows, like Chaos and Slow, are always helpful. Stygar by now has also reached 13th level, so he can also start chipping in with spells like Holy Word, and Power Word: Blind, which always have some sort of effect, and with no saving throw to boot.

When you first talk to Limha, have somebody else besides a Paladin do the talking. Otherwise, you won't get the chance to buy any spell scrolls you might want from her. The one trinket of note that she sells is:
Once you're ready for Limha, goad her into leaving Agog to attack you. Once you're done with Agog, go outside the tent. Limha and several Snow Trolls will attack you. The Trolls will come from too many angles for crowd-control to be effective. Also, Limha will be layered up with spell protections and casting from a distance. The ol' Feeblemind trick won't work here anymore during Tactics. Thus, your first step should be to summon some help right away. If you're so inclined, have them attack Limha as meat shields in order to occupy her while you go to work on the Trolls. Once the Trolls are taken care of, go all out for Limha. A Dispel Magic on the otherwise physically weak Limha might not be untoward here. Note that Limha will always be under an Improved Invisibility effect, the first example of why your warriors should grab the Blind-Fight feat as soon as can be managed. Once she falls, loot her body for her scroll case and other goods, and head back to the village.
Fell Wood
When you battle the undead of the Fell Wood, bring out your anti-undead and blunt weapons. One thing to keep in mind is that they'll single out whoever holds a weapon capable of disruption. So, I had Alliria cast a second Barkskin on Stygar, since its generic armor bonus will stack with his Brazen Bands.

Next up are a Death's Candle and two Witch Lights deep in the Fell Wood. This is a significantly more difficult battle in Tactics, because they now inflict a lot more electrical damage with their attacks. Persistence is the key here, meaning keep on them with physical attacks and using healing spells or potions when you have to. If you have Mass Haste, it will certainly help. If you're having trouble, try memorizing multiple instances of Protection from Lightning beforehand.
When you're done all of Suoma's quests, speak with her and you'll have your first meeting with Isair and Madae. They'll turn some of the local villagers into Possessed Corpses that will attack you, but this shouldn't be difficult by now.

After you're done with the village, next up is the Dark Treants, which in Tactics can use an Entangle effect on you that will make you easier for them to hit. The Elder Dark Treant can also inflict a Confusion effect on a target. Simply get in as much fire damage (which will score bonus on the Treants) as you can on them before they close in, then finish them off.
Gate of Stone
There are about four key fights in this area. The first will be against a pack of Frost Spiders. Have your Rogue disable the two traps first. The Spiders shouldn't be difficult, but this fight does occur in tight quarters, so be ready to switch to longer range weapons.
The next fight is against a large pack of Snow Trolls, including a few Snow Troll Shamans. Again, one at a time, delivering the coup de grace with fire-based attacks.

Next up is a Gate of Stone held by several Barbarians, led by a Shaman named Hadbruki. Have your archers open fire on Hadbruki himself. For the Barbarian warriors, throw in spells to minimize their fighting ability. I found the one-two-three punch of Chaos from Elanna, Slow from Tithian, and Power Word: Blind from Stygar more than adequate. Now open the pathway to through the Gate of Stone. Another horde of Barbarians may or may not attack you from your left side. If it happens, simply plant crowd-control spells in the path and then blast away.
On the other side of the Gate of Stone will be a pack of Wyverns. Again, Chaos works to get them divided.
White Dragon Lair

The next two battles will each involve a White Dragon and several White Wyrms. The White Dragon will have a breath weapon that can slow down your characters. Take out the Wyrms first, one at a time, since they have less hit points. Fire-based attacks will also score reliable damage against any of them.
In a mound in the underground lair, you'll find:
Duergar Stronghold
When you first enter here, you'll get ambushed by several Hook Monsters. They'll come at you from all sides, so there's no opportunity for crowd-control here. Instead, I fire off a few party-friendly spells like Chaos, Slow, and Power Word: Blind first, and then take it to them. Of course, it also helps to throw in party-friendly damaging spells as well like Spiritual Wrath (that is, if you keep everybody of good-alignment) or Chain Lightning.

You'll have to find a key to enter the Duergar Stronghold itself. This means venturing into the southern parts of the caves, where you'll be welcomed by a pack of Ice Trolls.
After this, you'll have to battle several Ochre Jellies. The thing here is they'll split apart in response to physical attacks. On the other hand, fire-based attacks will take them down. Magic damage works as well, so Tithian switches over to his Moonblade.
At some point, the lord the Duergar, Brazu, will send you on a quest to rid the caves of the nearby monsters. In the same room as the mining instruments, you can find:
Also in the compound is another Duergar, named Dragu. A character with a high enough Intelligence (in this case, Tithian) can help him improve his pet project crossbow and receive a copy as a reward. It's the Doom Bolter (+3 to both attack and damage, 2 attacks per round), and an improvement for Tithian.

For the rest of the caves, keep in mind that Hook Horrors will come in really huge packs, and from all sides. So again, start off with party-friendly spells that lessen their ability to hit you, then fire off with party-friendly spells that score damage (e.g. Chain Lightning).
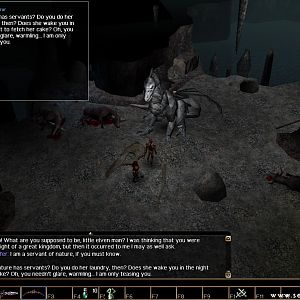
A theme that I often like to use is that of casting any offensive spell while Tithian as a decoy occupies a large group of monsters by himself. In the picture above, note how my warriors are going to work on a few Hook Horrors to the right. Tithian meanwhile is taking the heat from the rest, to the left. Between his high armor class, Stoneskin, and Mirror Image, he's not in any danger of getting scratched anytime soon. Elanna in the meantime cast at least 3 Cones of Cold right over Tithian and the Hook Horrors surrounding him. Between his Spell Resistance as a Drow and his Evasion ability as a Rogue, Tithian emerged from this battle unscathed. The Hook Horrors however took a real beating, and were either dead or softened up by the time my warriors were ready to join in.
Beastlord Harshom

The last battle of Chapter 3 is against The Beastlord Harshom. This can be quite a difficult fight, even for higher level parties. The main reason is that Harshom is going to lead off combat with a Chaos spell, and there's not a lot you can do about it since he's immune to things like confusion, stunning, or Insect Plague. What you will have going for you is that, because he packs a big looking sword, he'll think he can take you on in a straight up physical fight. So ... you're just gonna have to suck it up, and let the Chaos come. But get in a few spells of your own before it hits. I find that if just one or two characters are confused, the battle is still winnable. If you're whole party is confused though, you may as well just reload. When Harshom comes forward, go all out for him with the party members that you can still control in order to minimize his spellcasting. Save the others for later.
Harshom will leave behind:
And we move ahead...