-

- Forums
- Chatrooms
- Gallery
- Gameplay Videos
- Upload
- Articles
- Mod Reviews
- Shop SP: Games, Movies, Books
|
|
| Pillars of Eternity 2 Video-Based Walkthrough by David Milward |
Neketaka Island
Nomu the Marauder
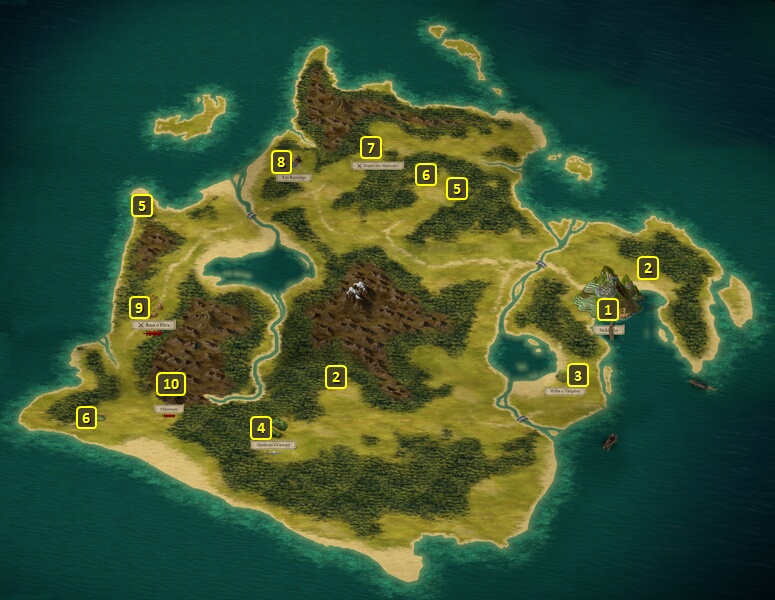
I put the core party back together and leave Neketaka by foot. That brings me to #1 on the map of Neketaka Island.
I go northwest, and collect food from points marked #2, #5 and #6 along the way. I thereafter go to #7.
The next fight is against several Barbarians, two Druids, a Boar, and a Bear, all led by Nomu the Marauder. I buff up and wear them down with the usual methods. Pallegina's Wurms aim their projectiles at the Druids constantly.
Nomu leaves behind a ring called Chameleon's Talons. It provides +1 to an Attribute and +1 to a Skill depending on the class of the wearer. It's especially beneficial to multi-class characters, as having two classes will result in two bonuses to Attributes and two bonuses to Skills. For Pallegina it means +1 Intellect and +1 History as a Chanter, and +1 Might and +1 Diplomacy as a Paladin. The +1 to Might will increase the healing provided by several of her abilities, including Ancient Memory and Exalted Endurance. The +1 to Intellect will help expand the area-of-effect of those healing abilities.
I head back to Neketaka, since I have a change in party composition and a new objective in mind.
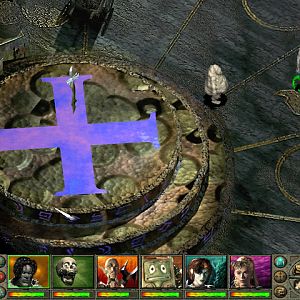
*Evil* Nomu the Marauder
I switch out Ydwin for Eder for this encounter.
As for the battle itself, Mirke holds up a lot of the enemies herself as a tank. Tekehu blankets the area with Chill Fog, hits the enemies more than once with Nature's Mark, summons an Ondra's Whip, and hits the enemies with a Cinder Bomb.
Eder gets Chameleon's Touch. His Fighter class means the Ring gives him +1 Might, bringing him that much closer to the 25 Might needed to use Amra to its full power from the very start of every ship battle.
I return to the gates of Neketaka, and switch Eder to bring Ydwin back in.
The Deck of Many Things
I click on Neketaka itself, and reconstitute the party to include Aloth, Mirke, Fassina and Rekke.
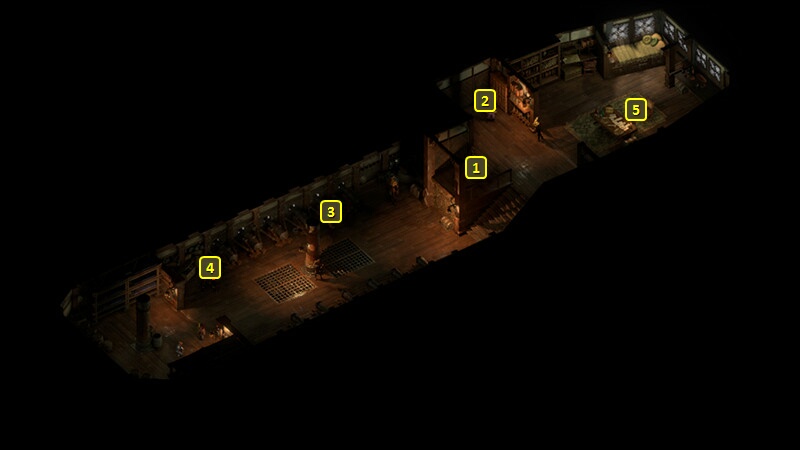
I now return to my ship. The reason being that Deck of Many Things is approaching Neketaka. I sail southwest a bit and click on the ship. I am greeted by Captain Thaenic and go below-deck.
I start off at #1 on the map of The Deck of Many Things. Captain Thaenic will himself be at #5, and I buy a few items from him.
One of them is the Ring of Prosperity's Fortune, which Mirke wears for the rest of the game. It provides a percentage chance of converting Hits to Critical Hits that scales with how much money the party has. It ties in with maximizing her ability to score Critical Hits, and thereby make Stunning Surge (when she gets it) a self-replenishing attack.
Another is the Slippers of the Assassin, which Fassina wears for the rest of the game. The wearer will turn Invisible for at least 5 sec upon scoring a killing blow. I normally concern myself with Invisibility for Rogues and not Wizards. But it may help her take advantage of a particular feature of a helmet she will acquire, one that inflicts Raw Damage over time after an Attack made from Stealth. Not exactly a game-breaker, but I don't mind when it comes to a ship combatant.
Another is the Cape of the Falling Star, which Rekke wears for the rest of the game. The +7 to all Defenses when no allies are within 5m is useless to me, as I'm not on a solo run. The real point is that it will unleash Burning or Crushing Damage only to enemies and over a large area should the wearer be knocked unconscious. Rekke's build is based on encouraging Critical Hits by lowering his Defenses, Deflection included. And if that means he gets knocked unconscious, he will both unleash a wave of damage only against enemies and he'll revive through Unbreakable when he gets it.
I buy the Sandals of the Water Lily from Sautara at #2. Rekke wears them for the rest of the game. The immunity to Dexterity Afflictions is a nice benefit. But the real point is to encourage Critical Hits against him by lowering all Defenses by -10. And Critical Hits against him will have a 10% chance to trigger a replenishing of +1 Discipline once he gains the Toughened Fury passive. And should it get to the point that he's knocked unconscious, he'll revive through the Unbreakable ability when he gets it, and unleash two waves of damage against enemies only through the Cape of the Falling Star and an armor he will obtain later on.
Another item that Sautara sells that may be noteworthy is the gloves called Hylea's Talons. It has a chance to add extra Slashing Damage to your attacks, but may itself cause you to take small bits of Raw Damage over time through self-inflicted bleeding. Although they ultimately didn't fit into my long term plans, the gloves are actually an item of choice for Monks that will rely on using activated abilities whenever possible. The Raw Damage contributes to gaining the Wounds needed to fuel those abilities. They're also handy for Forbidden Fist Monks, who rely on ending hostile effects instead of taking damage to gain Wounds. Put your Resolve high, maybe even activate Clarity of Agony beforehand, and the self-bleeding effect from Hylea's Touch will end very quickly but still gain Wounds for the Forbidden Fist Monk each time.
I also buy a Ring of Minor Protection from Bauble at #4. Rekke wears it for the rest of the game. It's more or less by default. And its +5 to all Defenses besides Deflection will stack with the +10 to all Defenses when Unbreakable triggers.
I board a Deadfire Merchant Ship and a Huana Novice Captain on the way back to Neketaka.
Burning House
I put the good core party back together once I return to Neketaka. It is while attempting to leave Neketaka by foot that I have the burning house encounter. Alliria pursues the arsonists beyond the house, and starts the fight with the Passionate dialogue option.
I rely on the usual buffs and passive healing resources. Pallegina summons her Wurms. Mirke and the Wurms take out the two Pyromancers as quickly as they can, one at a time. At one point I noticed that a Pyromancer was planning on using Grease on the party, which can be a real bother. So Mirke hits him with Confounding Blind to Interrupt it. Beyond that it is a matter of outlasting them and gradually wearing them down.
I sell off my excess gear, and then switch Pallegina out for Xoti. My next few actions would earn disapproval with the former, but win it with the latter. I leave Neketaka by foot.
Teo Ramunga
I go to the Shrine to Ondra named Teo Ramunga at #8. Xoti makes a Religion check of 8 that identifies the Shrine as dedicated to Ondra.
You can desecrate it if you choose. If Xoti is in the party, then you will lose a lot of influence with her.
You can choose to pray at it. If it is during the night time, or early morning, you can pray and rest for 8 hours and then leave without further incident. You will gain Ngati's Blessing (+2 Constitution), but any other until Rest bonuses will expire.
If it is around the afternoon, the group of Huana will verbally accost you. You can attack them if you wish. If you kill them, there won't be any further opportunity to interact with Teo Ramunga and it will be gone from the map.
There are possibilities to resolve matters amicably with the Huana. The Watcher can personally sing an Ondrite dirge, or make either a Diplomacy check or Intimidate check (both 8) to convince them to leave the party alone.
An alternative path is to let a party member speak for the Watcher. Tekehu always succeeds in convincing the Huana of the party's good intentions. Eder can make a Religion check of 5. Xoti can make one of 7. Either Maia or Pallegina can make an
Intimidate check of 8. Any one of Aloth, Fassina, Konstanten, Mirke or Ydwin can make a Diplomacy check of 7. A companion you choose can make two attempts at a skill check.
One failed check from you, or two failed checks from a companion will result in a fight.
If you managed to placate them, you can pray alongside them. Praying at the Shrine alongside the Huana also bestows Ngati's Blessing (+2 Constitution), but without the 8 hours rest and without expiring any until Rest bonuses you may have in place.
Whether you prayed while the Huana were absent, or if they accosted you to begin with, you can return to the Shrine for the Blessing whenever you want thereafter.
For purposes of a no Rest run, it is obviously better to time your prayer so that the Huana show up. Alliria makes the Diplomacy check to smooth things over. The reason I left Pallegina out is I would have lost influence with her if I prayed at the Shrine while she was in the party. The prayer earns Ngati's Blessing (+2 Constitution) without the 8 hours rest, and that leaves all my other until Rest bonuses intact.
*Evil* Teo Ramunga
I let Tekehu do the talking for me, and he easily persuades the Huana to let me pray and be on my way. Everyone in the evil party gets Ngati's Blessing.
*Evil* Maukotu's Canopy
I go south until I reach a Burial Site called Weba a Tangaloa. I search and reload until I get a Sigil of Nightmares Wardstone.
I next go west until I reach Maukotu's Canopy at #4, which involves an extensive scripted interaction. A thoroughly trashed campsite will be noticed right away.
Ydwin makes a Perception check of 13 to determine that whatever destroyed the camp came from and returned to the south. She also makes a Religion check of 6 to deduce that the victims were Dawnstars of Eothas, and an Arcana check of 8 to notice ice on the bark of one of the nearby trees.
Tekehu makes a Survival check of 10 to determine that the camp was destroyed by Lurkers. Zarathos uses his Watcher powers to determine the same thing.
I also search the area and loot the chest to obtain numerous food items and creature parts.
Xoti gathers the souls of the slain into her Lantern.
I burn the bodies of the slain to earn reputation with both Tekehu and Xoti.
I could leave the area without any further interaction or combat, but obviously prefer not to. Following the tracks leads to sighting the Lurkers. I could have confirmed the additional presence of Dank Spores and Sporelings, as well as the corpse of an elven woman with a frost-sheened bow, had I a Spyglass.
A Wizard can use the Essential Phantom spell to have the Lurkers leave so that you fight only the Spores and Sporelings.
You can also have a character make a Stealth check of 10 to start off combat in Stealth and allow you to set up a preferred starting position for combat. Be warned that if the character you choose fails the Stealth check, he or she
will start the fight with an injury.
But I chose to fight them openly. I make the Dank Spores the priority targets, to remove the possibility of any party members getting Dominated. Keep in mind that Lurkers can occasionally use a Pull power on individual party members, so you often have to improvise your strategy. Sometimes that means carrying on as you were if the Pulled character is a tank who can handle things on his or her own. It can mean retreating and regrouping, especially if it's necessary to keep everyone close so that all can be affected by buffs or healing spells. But it otherwise remains a matter of getting rid of the Dank Spores first, then the weaker Sporelings, and then the Lurkers.
Zarathos and Xoti have their relationship moment after the battle.
A Pet dog named Trixie is nearby. I loot the nearby corpse for a War Bow called Frostseeker. Ydwin equips it on an interim basis as an alternate weapon for when she wants to attack single targets instead of a group of foes.
I return to Neketaka and switch in Aloth, Serafen, Maia and Konstanten.
Maukotu's Canopy
The good party also gets a Sigil of Nightmares Wardstone from Weba a Tangaloa.
I get increases in reputation with both Eder and Xoti for burying the bodies. I would have lost reputation with Pallegina had I kept her in the party.
The good party has little trouble with the fight itself. The power of Eder's build is starting to make itself felt. He's the one who got pulled from the rest of the party by the Lurkers, and he gets ganged up on. And yet his stacked Damage Resistances means he just shrugs most of it off.
He has a conversation with Alliria afterwards now that she's earned at least one point of positive reputation with him.
Black Oozes from the Well
It is on my return that the good party has its encounters with the Black Oozes that emerge from the well. Alliria earns Benevolent disposition by trying to protect the Huana, and then earns positive reputation with Neketaka by drawing weapons and attacking.
I keep the party together as they go from Lesser Ooze to Lesser Ooze, so that Pallegina's regenerative auras can keep the whole party going. I also position her Wurms near the mass of Oozes to absorb as much of the onslaught as they can.
I take out the Lesser Oozes first to reduce the number of attackers as quickly as possible. I then go to work on one Greater Ooze, reduce it to zero Health so that it splits into two Lesser Oozes, and then kill each Lesser Ooze. I repeat the process on each Greater Ooze one at a time. I eventually manage to wipe everything out in a process of attrition.
*Evil* Bounty on Nomu the Marauder
The evil party travels to Queen's Berth (as does the good party). Maia takes Defensive Bond on her 9th-level. It provides both Ishi and herself with +10 to all Defenses vs. area-of-effect attacks.
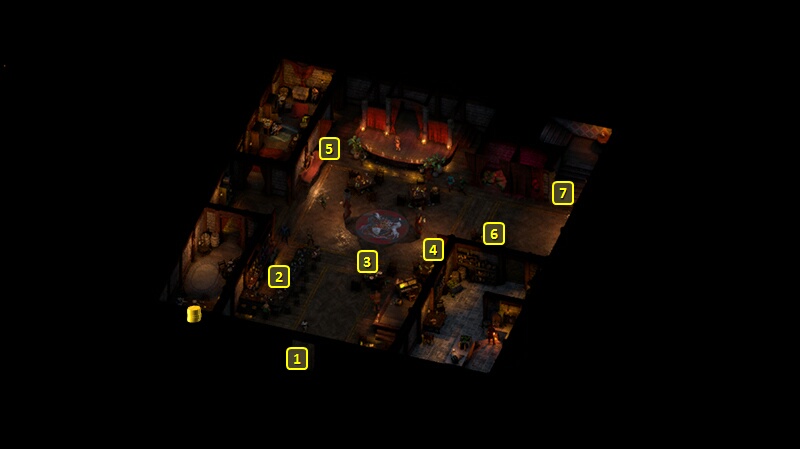
I then travel through the door at #24.
I speak to Abocco at #4 and gain 1,500cp, 2,800+ xp, and a minor gain in positive reputation with Neketaka as rewards for the Bounty on Nomu the Marauder.
I conclude by buying up crafting ingredients in Periki's Overlook and Serpent's Crown, putting my core party back together, and leaving town. I also along the way have Zarathos use the Sigil of Nightmares Wardstone on the core party.
Now I sail for the east island of Wakara Reef.