-

- Forums
- Chatrooms
- Gallery
- Gameplay Videos
- Upload
- Articles
- Mod Reviews
- Shop SP: Games, Movies, Books
|
|
| Pillars of Eternity 2 Video-Based Walkthrough by David Milward |
Pahowane
*Evil* Laethern
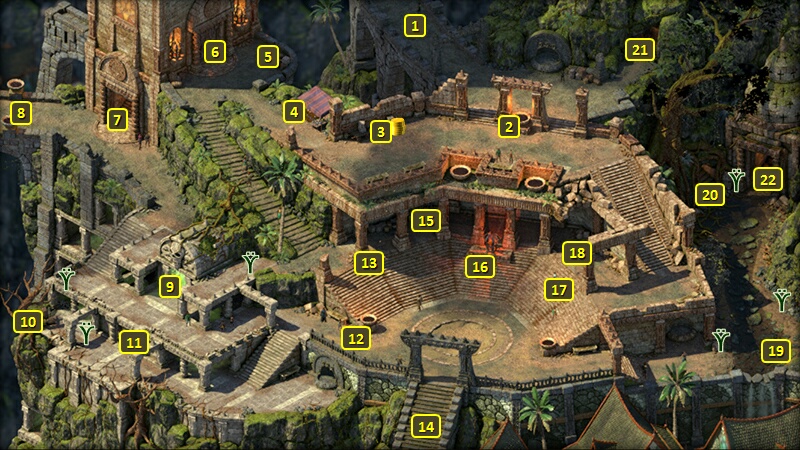
Zarathos gets a Missive from Flaune Elette the moment he steps out of Sanza's Map Emporium, the entrance to which is at #20 on the map of Queen's Berth.
I reassemble the core party with the adjustment that Konstanten takes Tekehu's place for the time being.
I initially attempt to travel to the Spire of Soul Seers, but encounter the Child of the Dawnstars named Laethern. The same one who left Hasongo just before Eothas destroyed it. Zarathos is more or less apathetic towards Laethern, but pulls himself short of being outright hostile towards him for fear of a negative response from Xoti.
The evil party likewise makes its way back to Queen's Berth.
Skipping Ahead
I am now at the stairs at #18. I enter the Vailian Trading Company Headquarters through the door at #28.
That brings me to the door at #1 on the map of the main floor of the Vailian Trading Company Headquarters. I go up the stairs at #9.
Which brings me to #1 on the map of the upper floor of the Headquarters. I speak to Director Castol, and inform him of the results of Flaune's experiments. I get 10,000+ xp to fully complete the Quest called A Glimpse Beyond.
He now wants me to investigate a possible transaction between the Royal Deadfire Company and the Principi. The request starts the Dirty Laundry Quest. But I have no interest in that, as completing it would force a rest and cancel out all the until Rest bonuses that I've accrued.
So I just leave the way I came, and head for the exit at #33 leaving Queen's Berth. I now switch out Aloth for Xoti. She'll soon get an item I want for her. I travel directly to the Spire of Soul Seers.
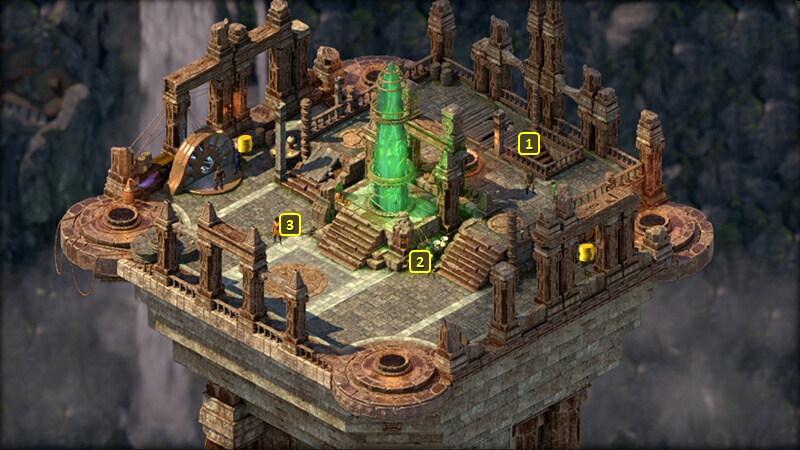
I go up the stairs at #3 on the map of the Spire of Soul Seers.
That brings me to #1 on the map of the Rooftop of the Spire of Soul Seers. I speak to Flaune Elette at #3, who teleports me again to start the Skipping Ahead Quest.
Bone Setter's Tarc
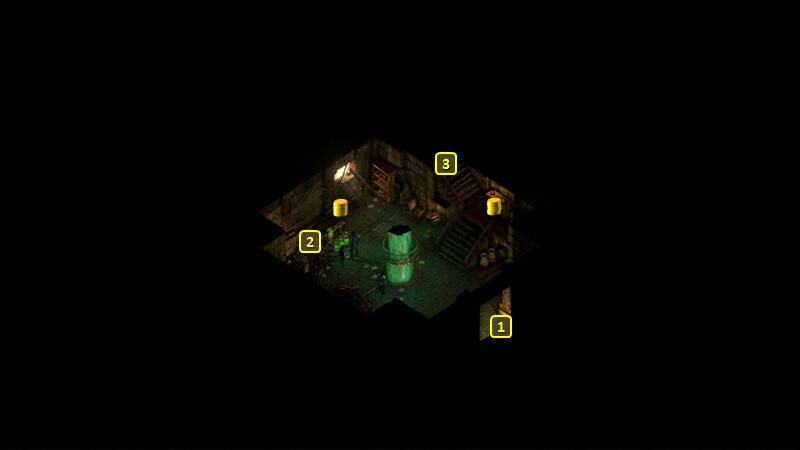
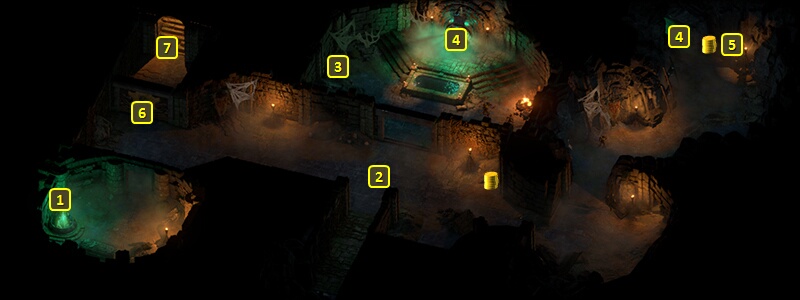
I start off at #1 on the map of the Pahowane Underground. I go east and defeat numerous Xaurips, Grubs and a Bog Lurker with familiar tactics.
A chest at #5 has the Lever.
A chest at #3 has the Bone Setter's Tarc. Xoti wears it for what's left of the game. I don't need the Sawbones power, which only has three charges. The 5% chance to convert Hits to Critical Hits will improve the chances of triggering extra attacks through abilities like Swift Flurry and Heartbeat Drumming. The +10% to Healing will improve the Healing she personally receives from several items she wears, as well as the area-of-effect Healing that triggers when she lands a killing blow with The Twin Eels.
I use the Lever to open the door at #6, and then go up the stairs at #7.
*Evil* Bone Setter's Tarc
Konstanten gets the Bone Setter's Tarc in the evil party. The 5% chance to convert Hits to Critical Hits will improve his ability to obtain the Melee Critical Hits to build up Phrases that he wants as a Skald. The +10% to Healing will augment abilities like Ancient Memory and Sip From the Marrow.
Acolyte's Frostbite
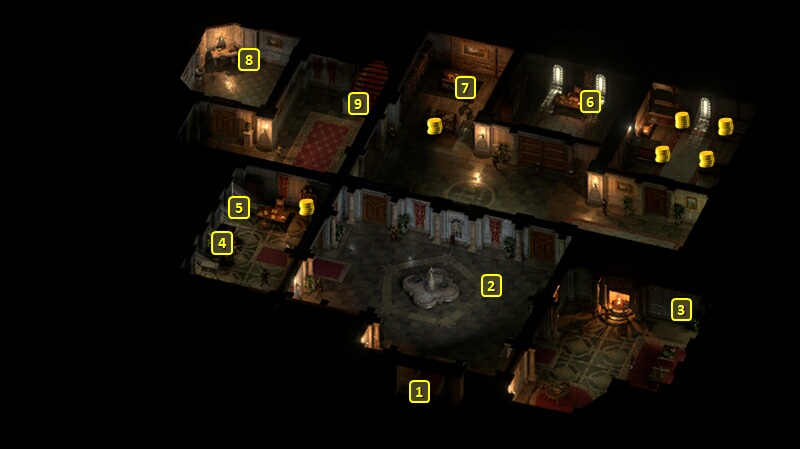
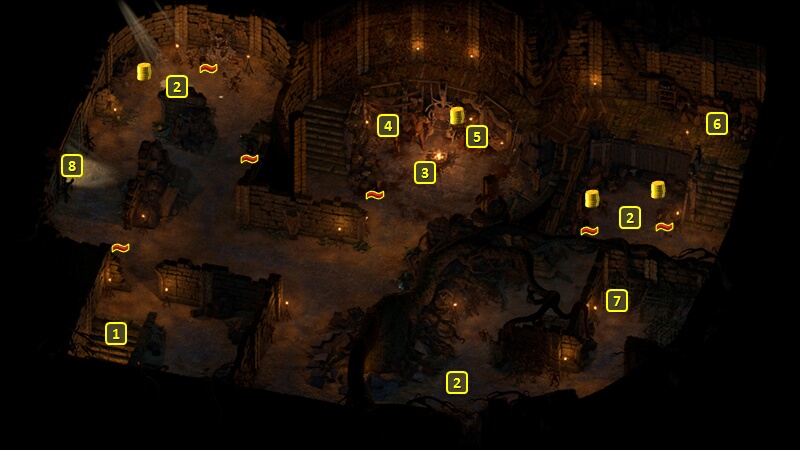
I start off at #1 on the map of Pahowane. Mirke disarms a trap to the left. I defeat a few Xaurips and Grubs in the northwest corner of the area.
I defeat a few more Xaurips and Grubs a little east of where I initially entered.
I continue north and defeat a large group of Xaurips and Grubs led by an Eoten. The Eoten leaves behind Cell Key. I speak with the Kuaru Trader at #5 for a bit, and free him.
The chest at #4 has a Hatchet called Acolyte's Frostbite. The weapon itself is a possibility for a solo run, as many of its powers depend on not being near any allies. It didn't fit into any of my plans though.
I defeat another large group of Xaurips and Grubs in the northeast corner. A chest at #6 has Gauntlets of Greater Reliability.
I use the Cell Key to open the cage at #7, and free Badema.
Now I leave through the exit at #8.
Raoa O Hara
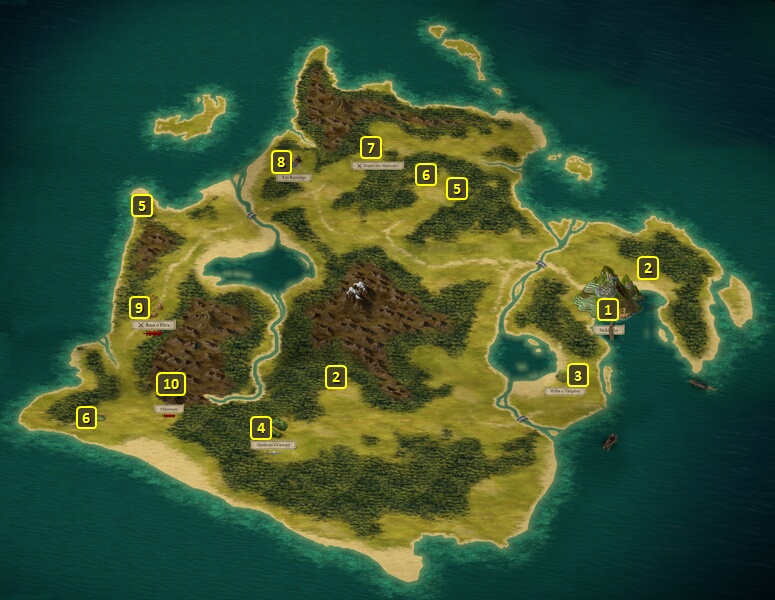
I am now at #10 on the map of Neketaka Island. I go to Raoa o Hara at #9.
The scripted interaction features Xaurips having Grubs fight each other for entertainment. You can approach openly, which opens up several options.
You can make an Intimidate check of 13 to scare them away. They'll leave behind the specifically mentioned items below and some coins.
A Sleight of Hand check of 9 or a Diplomacy check of 13 can convince them to offer you the Ivory Wurm Figurine to leave without further hostilities. You can at that point instead decide to attack them if you want.
A Ranger can make a Diplomacy check of 10 to ask if his or her Animal Companion can join in the sport. Going easy on the Grubs results in the System Shock Injury (-2 Perception, -3 Shocking Armor Rating). Acting towards the Grubs aggressively means no negative consequence.
You can also make a Stealth check of 8 to sneak up on them instead of approaching them openly. If you fail the Stealth check, everyone in the party can make an Athletics check of 11 to run away without a fight.
Successfully making the Stealth check means the Intimidate check of 13 and openly attacking them will still be available as options. But there's different options available from Stealth as well.
You can attack them from Stealth mode, which allows you to gain a better and closer position on them before attacking.
You can also make another Stealth check of 10 to avoid them altogether and sneak away.
A Druid (but not Tekehu) can use Charm Beasts on the Grubs. That will give you some options. Having the Grubs dance or crawl away has no result other than distracting the Xaurips. But that means you can either sneak up on them for the ambush, or have the Stealth check required to get away without a fight lowered to 4. Having the Grubs attack the Xaurips forces the Xaurips to kill their pets, and that means the Grubs won't be in the fight if you attack the Xaurips. The Intimidate check of 13 is also available after using Charm Beasts.
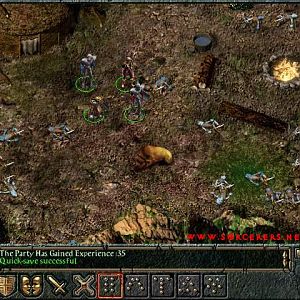
Both the good and evil parties go the obvious route of attacking them and the Grubs. They'll leave behind an Ivory Wurm Figurine, Rune Powder, Razorgill Dust and a Superb Xaurip Quarterstaff among other items.
I make my way back to Neketaka at #1.
*Evil* Animancer's Energy Blade
I show this part from the perspective of the evil party. I travel directly to The Spire of the Soul Seers. *Good* The good party switched out Xoti for Serafen as he'll soon get an item for himself.
I easily defeat a pair of Mercenaries within. One of them leaves behind the Animancer's Energy Blade. It inflicts only Raw Damage. I hold onto it for the time being, because it will be useful in pursuing upgrades for Soulbound items that I will soon get.
I go up the stairs at #3.
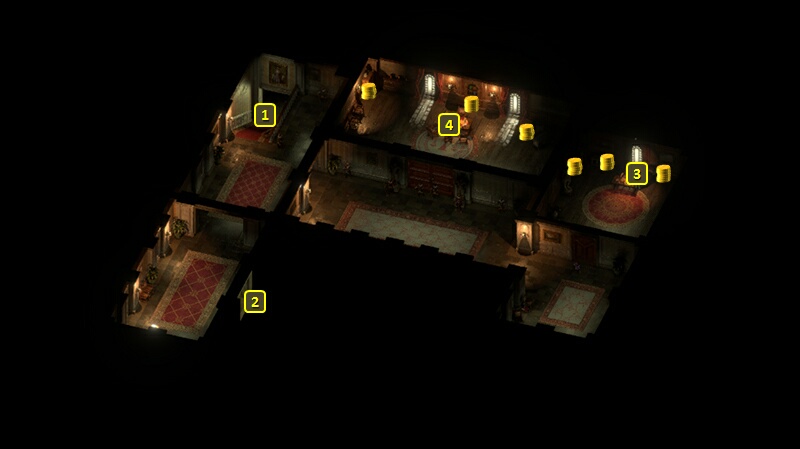
Rakhan Field Boots
The good party now reaches #1 on the map of the Spire of the Soul Seers Rooftop. They have to fight several more mercenaries. Flaune Elette bids the Watcher to report what happened to her superiors at the Vailian Trading Company.
One of the Mercenaries leaves behind Rakhan Field Boots. Serafen wears them for what's left of the game. It does have an interesting power that can be used once per Encounter, whereby the wearer teleports to a target and emits a small wave that can Interrupt nearby enemies on arrival. The real point here is the +3 Corrosive Armor Rating, which ties in with the theme of maximizing Serafen's Armor Ratings to the greatest extent possible.
I go back down the stairs at #1.
That brings me to #3 on the map of the Spire of the Soul Seers. I go out the door at #2.
That brings me to #7 on the map of The Sacred Stair. I go to the exit at #8. I switch out Serafen and bring Aloth back in.
Now it's time for the good party to seal the alliance with the Vailian Trading Company. The evil party intends to wipe it out.