-

- Forums
- Chatrooms
- Gallery
- Gameplay Videos
- Upload
- Articles
- Mod Reviews
- Shop SP: Games, Movies, Books
Prologue | Chapter 1 | Chapter 2 | Chapter 3 | Chapter 4 | Chapter 5 | Tales of the Sword Coast | Chapter 6 | Chapter 7 | |
Cloakwood Lodge | Cloakwood Spider Nest | Shadow Druid Enclave | Cloakwood Wyvern Nest | Cloakwood Mines | |
CLOAKWOOD MINES
Lakaadar
I don't cross the bridge just yet. I travel northeast, and take out a couple of Wolves.
I continue on and run into somebody named Lakadaar. If you choose responses involving Wyverns, you can make him run away. However, I prefer to kill him. He summons four Iron Throne Guards to his side. Iron Throne Guards are definitely enhanced in SCS. They start combat by quaffing a potion. A Potion of Heroism, an Oil of Speed, or a strength-enhancing potion are typical choices. If they are numerous enough you may be well advised to cast Dispel Magic on them, like Jaheira did here. They also quaff Potions of Extra Healing if the need arises, so they'll definitely last longer.
Drasus
Now I go east across the bridge. I have Kivan scout out the location of the next bunch of enemies, who are even tougher in SCS. Drasus and Genthore will enhance their abilities even further with potions, and will use Potions of Extra Healing to pick themselves back up. Kysus and Rezdan, the mages, will already have magical protections in place. I inch a little closer once Kivan marks their location. I have crowd-control in mind, but I have to be careful as Drasus is easily capable of running out of the crowd-control zone before it's even in place. So, I have Avastrian, Jaheira, and Imoen start the casting of their crowd-control spells. Khalid then goes forward a little to start the dialogue and the fight, just as the crowd-control spells are about to take effect. The plan more or less works. The set up requires my foes to make three saving throws at once for several rounds, and they don't succeed. Imoen softens them up with two Fireballs in succession. Kivan shoots down Drasus, Kysus, and then Genthore with his bow.
This leaves only Rezdan by the time the crowd-control spells have worn off. He does manage to get me with spells like Chaos and Ray of Enfeeblement, but they are nowhere near as potent now that he's by himself as opposed to if Drasus and Genthore were still around. It's only a matter of time before the spells wear off, and then I'm able to wear out his protections, and finally kill him.
Kysus leaves behind an Adventurer's Robe. Rezdan leaves behind a Robe of Cold Resistance (+20% cold resistance). Genthore leaves behind a Plate +1, which I keep for when I get Yeslick in my party. Drasus leaves behind a Flail +1, and the Boots of Speed (doubles foot speed). Avastrian will wear these for the rest of the game, and it furthers certain tactics based on having Avastrian put himself ahead first as an invulnerable party member (at least once he finds spell scrolls for Mirror Image and Stoneskin).
I continue east and reach the entry shaft to the Mines after killing a few more Iron Throne Guards.
Mines Plug
Now I begin to explore the first level of the Mines, killing the odd guard or two along the way.
Towards the northeast corner is a Miner standing by a plug of sorts. The Miner proposes a plan to the party, find the key to the plug, evacuate the slaves from the mine, then use the key to open the plug and flood the Mines.
I continue south, where I find the way down to the next level.
Hareishan
This fight is also revved up for SCS. In vanilla BG1 you could clear out the perimeter at leisure. Then you could inflict decisive pre-emptive strikes on Hareishan at her guards through the hallway to the east. In SCS, they come for me as soon as I go down the stairs. And Hareishan will have spell protections in place as well. So ... I put Stinking Cloud and Web into place as soon as I come down the stairs. Khalid and Jaheira form a front-guard pair against any that happen to make it out. Kivan is able to reach over them with his Spider's Bane sword. This pretty much assures a 3 hitting 1 situation for anybody that makes it out. Imoen meanwhile freely blasts away with her Fireballs. At some point, no more come forward, so I grab the opportunity to quick-save and rest up.
Hareishan and the rest will be a little further down the hallway leading east. Kivan scouts out their location. Avastrian and Imoen set up another crowd-control zone. Imoen continues her Fireball blasting. I pay attention to the text-scrolling, and in the instant that I notice that Hareishan is caught in my Web, I have Kivan finish her off with his bow. At one point a Guard or two break out, and yet several are still caught in a straight line. Imoen and Kivan lead the Guards back to the rest of the party. Avastrian grabs the opportunity to send a Lightning Bolt down the straight line, which hits the caught enemies twice, and then regroups as well. It becomes a mop up after this point.
Hareshein leaves behind a scroll of Haste, which Avastrian promptly scribes into his spellbook.
I then round out the perimeter to the south and the east, searching for any loot I can find. As I start to head south I run into the odd Ghast or two. Kivan switches over to Arrows of Fire, and shoots them down quite easily. I then make my way to the central room.
Rill and Yeslick
Now I continue south and then unlock a door to the east. On the other side is a prisoner named Rill. In the good party Avastrian gives 100gp to Rill to make good the slaves' escape from the Mines. In the evil party I tell off Rill.
I continue east and find a Dwarven Fighter/Cleric named Yeslick, whom I welcome as a companion. My good party is now complete. Yeslick also equips the Plate Mail +1, Sling, Bullets +1, Medium Shield +1, and Warhammer +1 that I had been saving up.
Guard Barracks
Now I descend to the next level of the Mines, a good deal of which consists of a series of guard barracks. For the first fight note how Yeslick brings a new weapon to the table, a Hold Person spell that can be effective for humanoid opponents that are closely grouped together.
I go north a little, and there will be a LOT of Hobgoblins past the door to the east. I simply have Yeslick, with a very good armor class against missile weapons, but himself within view. Imoen comes up behind and blasts the room twice with Fireballs.
Note that there are a few points around here that will respawn Hobgoblins if you leave them out of view but then come back. This can make picking up the loot a pain in the arse. A way around this, as I show in my video, is to station a few party members at various points to prevent respawning, allowing Imoen to go around checking the chests and looting the bodies.
An armory towards the northwest corner has a Small Shield +1, which becomes a welcome upgrade for Jaheira.
Natasha
In the room to the east will be a Mage named Natasha. Fortunately most of her guards had previously left the room only to get slaughtered by me. Here I show a different method. Kivan scouts and marks her location. Yeslick then Silences her from outside her 'fog of war'. I then rush her. She's able to negate being Silenced with a Vocalize spell, but even so her having to do this buys me time to surround her and stay on top of her. She does manage to put up protections, but Jaheira's Dispel Magic brings them down and makes her an easy kill.
A final comment, please do not interpret my battle descriptions as foolproof scripts. Think of them as guidelines instead. Many battles have to be conducted on a 'play by ear' basis. If Yeslick's Silence 10' Radius spell had not worked, I had the alternative plan of sending Web and Stinking Cloud into the room, and then trying to shoot her while she was down.
So far Avastrian has been unable to use any magical buffs because I've made as straight a line for Yeslick as I could. Here he finds his first one, a scroll of Mirror Image, which will become a staple spell for him throughout the rest of this game and the sequel. He also finds and inscribes a Slow scroll, a party-friendly spell that severely limits the ability of enemy fighters to land physical blows.
Ogre-Mage Torturer
Now I run into a room towards the southeast, where I run into an Ogre-Mage that apparently likes to torture its victims. In vanilla BG1 it liked to cast Confusion right away if it could. In SCS it takes a little time to put up protections, so this buys me time as well. Yeslick renders it all but helpless with a well placed Silence 10' Radius spell.
Shrine of Cyric
This part of the level is actually rather unremarkable. At the south end is an east-west hall, in the middle of which is a Shrine of Cyric that will send Yeslick into a fit. One of the Urns has a Potion of Stone Giant Strength.
The southeast corner has a few small scale fights against Hobgoblins, and then the stairs leading down.
Davaeorn
I soon get attacked by Davaeorn's body guard, but I kill him easy. I then loot a couple of nearby chests.
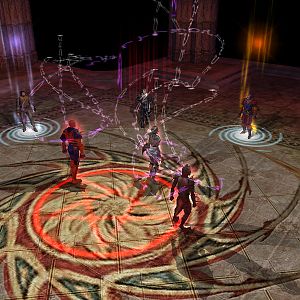
Davaeorn is much harder (or trickier) in SCS. He won't start with all of his spell protections in place right away. He'll wait until he sees you first. He then has a definitive battle plan in mind. He'll start with a spell combo that plants both Stinking Cloud and Web right in the middle of the level. This effectively cuts the level in half and severely confines the party's mobility, assuredly limiting them to the northern third of the level. Trying to run past it, even while Hasted, will not work. Once that happens Davaeorn will employ various tactics. He can teleport right in the midst of the party, and unleash spells like Fireball and Lightning, from which he'll take no damage. Or he can cast another Web, establishing crowd-control over the northern two-thirds of the level. The Webs won't hinder him in any way. He can also cast Dimension Door, giving his tactics a 'hit and run' theme. Also, he has two Battle Horrors who won't take any damage from his spells.
The key to success is to remember my motto, "Choose your battle field". First, I get everybody off to the room to the side. Also, as you may have noticed from my previous fight with Natasha, mages in SCS have a harder time getting their spell protections in place if I've silenced them beforehand. They take longer to get them up, instead of all at once when battle first starts. So ... I have Kivan go into stealth and mark Davaeorn's location. Yeslick then casts Silence 10' Radius on Davaeorn successfully. Kivan then fires an arrow at Davaoern, who is now unable to get his protections up right away and all at once, to get things started. Kivan and Yeslick then regroup with the party.
The next phase is my own bit of crowd-control. Avastrian sends Web and Imoen sends Stinking Cloud into the room I just left. This presents Davaeorn with a difficult choice. He can either teleport into the adjacent room without his protections, and risk getting Webbed or rendered unconscious while I pelt him with missile weapons. Or he can teleport right into my midst, allowing my party members to attack him up close. It turned out to be the latter, and it didn't last long.
Now I'm ready for Chapter 5.