Many ages past, a tower of great beauty
created by the Elves of Faerun stood in the Spine of the World, the heart
of Orcish and Goblin clans, or so it was said. For many years did the
tower stand in all of its magical glory, a wondrous creation by the work
efforts of all who lived within. Alas, beauty does not last forever and
soon a war waged for many years as wave upon wave of Orcs and Goblins
bombarded the Elven Outpost, pushing the Elven forces to the walls and
with one last hope, Larrel cast his magics to save them all.
Today, the tower still stands, known as The
Severed Hand, a reminder of what magic can do when something goes
terribly wrong. Long shadows and darkened hallways await your exploration
along with walking, dead reminders of those who died in the long battles.
The background effects as well as music adds to this eerie place and will
keep you busy for sometime as you explore its depths and four towers that
jut into the sky.
The Severed Hand took me awhile
to complete as it is dotted with an seemingly endless supply of foul beasts
who bar your exploration deeper in to the tower and having more than one
access up or town the tower via stairs or elevators makes this an interesting,
yet enjoyable place to visit. If you think this is just an easy job, you're
wrong as you will have to complete a few quests before you can continue
with your own and that is the Heartstone Gem which brought you here originally.
So with that in mind, let's look at the levels which you will be venturing
to.
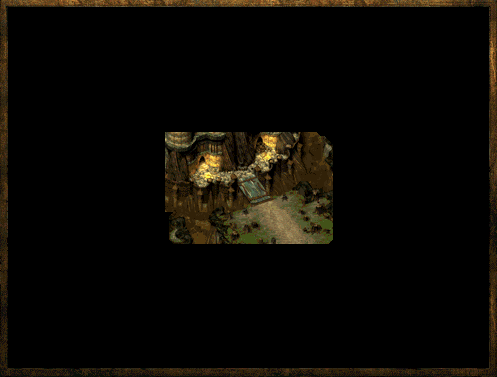
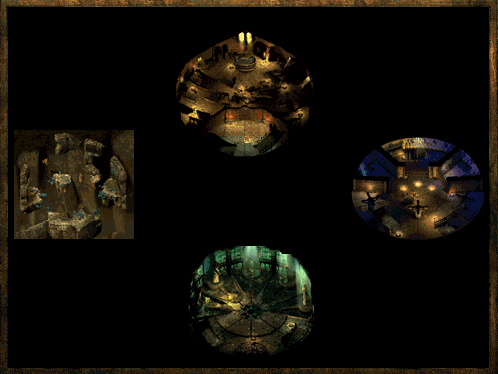
THE SEVERED HAND - Outside of The Severed Hand
You
will be greeted by a wonderful, exploding fireball warning as you step before
the entrance to The Severed Hand, which
sets a tone for what you should expect inside but I won't spoil that for
you in case you are playing this step by step through my solution.
If you have a dwarf in your party, expect some dialog change during this short little introduction to
The Severed Hand and then prepare yourself to venture forth into the ruins and of course, learn its
history and what happened.
THE SEVERED HAND LVL 1 - Forgotten Shadows
Stepping foot into the first level of the tower may very well leave your thief smiling softly to
themselves for this is a place full of long and very dark shadows and it will become useful for your
party to have someone who can move about undetected. Of course, there is the mage with his invisibility,
but a good thief can do it all in such situations, especially detect hidden traps under all of the
rubble that is strewn across the towers floor.
Here you will be introduced to Shadowed Orc Grunts, Archers, Shamans as well as Goblin Grunts, Warriors
and Archers. Throw in a few Shadowed Ogres and Worgs from forgotten battles long ago and you have yourself
some good battles on the way. I found the Goblin Archers pretty tough and don't let the name "Goblin" fool
you either for they strike true with their bow and arrows, so get close and get there quick. As mentioned
above, shadows lurk around every corner and where light is not, danger surely is but beware for walking
into a room full of foul beasts will suddenly make their Shadowed forms alert and all those in viewing range
will begin to move to the party who is waiting for your thief to return. Be careful when exploring because
one minute it'll be you and the dark shadows while the next your party is surrounded by battling beasts
wanting your very blood!
As many of the tower levels, it is occupied by more than one flight
of stairs, either going up or down depending where you are. I suggest
if you are having trouble piecing the tower together, to check the Online
Maps I have created and marked in detail so you are able to move around
freely. The Online Maps are broken down by levels 1 to 8, and from level
5 and up, I have marked each separate tower with a letter which matches
the corresponding stairway from level 4. I hope it isn't difficult for
you to follow, but I placed all the tower levels from level 5 and above
as the stairs are situated on level 4 and also put them on the same map.
With that in mind, it is this very level that you will also find the
1ST
PART TO THE ASTROLABE which you will need to acquire to have
Larrel help you unlock the power of the Heartstone Gem. Even if you have
not been told of this quest, keep these parts on you because when you
do meet up with Larrel's helping hand who is looking for the parts to
complete the Astrolabe, you will already have some or all of them on you.
This part you find on level 1 is the first part of four and can only be
gotten by going down the stairs from Level 3. See the Online Map of The
Severed Hand for more details. There are also two stairs going up
to level 2 as well as the entrance in which you came through. Search this
level out fully and kill everything you come across to lay the foul beasts
to a final rest. They've been haunting this place far too long.
THE
SEVERED HAND LVL 2 - Spirits of the past return!
The second level is far from bringing you
closer to your destination within the tower, but rather is another level
full of forgotten undead who had battled in ages past during the time
that the Tower fell and was brought to its current state. The battled
veterans of Orcs, Goblins, Worgs and Skeletons make this level enjoyable
from a battle perspective and it is always wise to search this level for
any interesting equipment that may help you in your journey. Two sets
of stairs go down to the first level as well as an elevator while three
others lead up to the third level.
THE SEVERED HAND LVL 3 - Battle onward!
Foul undead await you as you make your way to this level and it best for you to be
ready for the large massive Bladed Skeletons who will race towards you with blades instead of arms. Swinging, they
will aim for thy head, so time your duck and attack. They will also be joined by Burning Skeletons, who have the
ability to launch fireball attacks at the tightly grouped party and it best to keep a close eye out for these as
they linger in the distance waiting for the chance to strike!
If it not for the undead, watch out for Goblin Archers who will shoot at your party from above if you've come from the
second level via the centre stairway. Arrows will fly not only from the floor you stand on, but from the openings in
the upper walls. Move quickly through here or you'll become a pin cushion soon enough.
There are five exits from this level and if you need help knowing where they all are, check The Severed Hand LVL 3
Enlarged Map for more details as to what will take you where. Two stairs lead down to the second level as does an elevator
while one flight will return you to the very first level and another going up to the fourth.
Once again, make sure you have explored this entire level from top to bottom to minimize the chances of your party missing
items that may help you along your way.
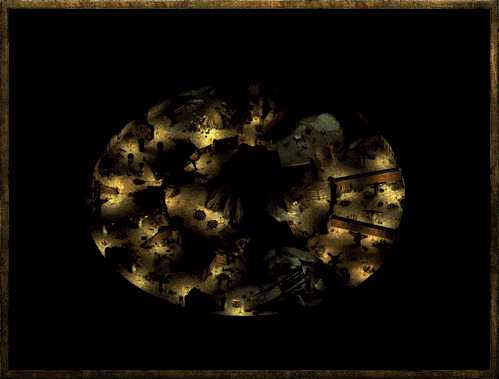
THE SEVERED HAND LVL 4 - The Tale of Telanis
One may relax as the last stair is climbed
and you reach the top of this level for it is here one will meet Elves
from ages past and even get to speak with some of their spirits who still
haunt these rubbled halls and rooms. Circular in nature is this level,
the top level of the base part of The
Severed Hand, but it is on this level that four separate towers branch
off from the base and soar into the sky above. Each is marked easily on
The Severed Hand LVL 4 Enlarged Map,
which I suggest you take a look at if you are having problems finding
your way around.
Not having to worry about foul beasts or creatures lurking in the long, dark shadows will give you more time to explore
the ruined tavern, the mess hall, the bedrooms and other smaller rooms that make this level. On your way, you will bump
into a few elven spirits by the name of Telanis, Lethias and Sehriya who can fill you in on what happened during the last
few minutes of the towers fall. Telanis Songbender can be found in the Mess Hall, where his spirit still haunts and sings
to those who wish to listen to his beautiful voice. Lethias Defender of the Hand can be found in the main hallway, just a
little ways from the stairs that lead down to the third level, while Sehriya can be found playing in the bedroom. Each
will give you information that will help you understand and unfold the exact events in The Severed Hand although Lethias
will be able to give you much more information than the other two.
Unless you failed to clear out the lower levels, you will want to begin to explore the four towers that loom above this
floor and each are marked on The Severed Hand LVL 4 Enlarged Map for easy navigation.
There are no set flight of stairs that I suggest you going up first as I did not do them in any specific order, so pick
one and let's begin detailing the next few levels and the Quests that go along with them!
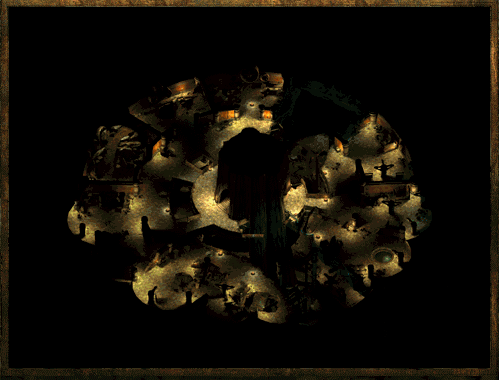
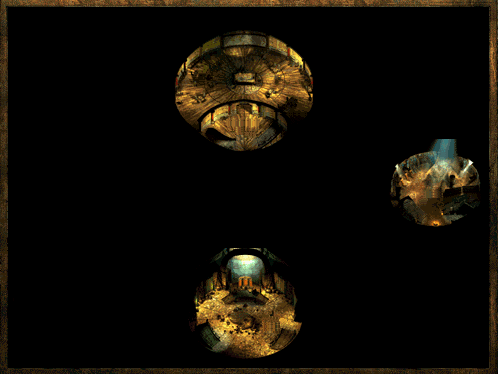
THE SEVERED HAND LVL 5 - The Four Looming Towers
Pay attention to the map I have created
for The Severed Hand LVL 5 for it
is detailed in one image rather than four separate ones and this was to
make things easier on myself and you as well when viewing these online
maps. Each level shown is level 5 of their respected tower, each marked
from A to D respectively and they will always be in the same place on
the levels to follow for easy understanding as they appeared on The
Severed Hand LVL 4.
For you brave warriors and those who like attention to detail, I am going to serve it up to you on a silver platter and
hopefully everything will be explained smoothly as I have tried to do in the previous chapters. So let us begin and look
at our first tower on level 5, followed by the other three.
THE SEVERED HAND LVL 5 - Tower A
What was once a glorious pool full of elven carved stone statues and over all
beauty was destroyed when the tower fell, the pools now murky and the remains of the statues and their tears
as dry as the desert. Saddened by this is Demaini, the female elf who maintained the pools that once stood still
and reflected your image back as that of a mirror. Her own lingering hope of sanity lays in restoring the pools
to their former glory and beauty, but bound by her spirit to this part of the tower, finding the HOLY WATER she
feels will return the pools to their original form is out of the question.
Demaini asks of your services and it is open for you to take if you want to, that is if you wish to go hunting for
a barrel of HOLY WATER that will turn the murky water back to its former crystal clear state. Also, being a former
priest when she was alive and defending the tower from the Orc and Goblin assaults, she will also ask that you lay
the priests in The Severed Hand to rest by slaying them. Their current state of madness believes that they are still
defending the tower from an attack and you will gain a certain amount of experience if you do so.
Besides Demaini, there are two flight of stairs leaving this level, one heading up to the sixth level while the other
returns you to the fourth.
THE SEVERED HAND LVL 5 - Tower B
'tis here in this tower, that you will come across Kaylessa, a brave warrior who fought
in the battles as the tower was falling and who can help you, if you help her. She is shamed that the fighters within the
tower have lost their own sanity as they haunt The Severed Hand and she asks you to lay them to rest, as did Demaini asked
of you to lay the Priests to rest.
Accept this quest and eliminate all Elven Swordsmen found within The
Severed Hand so you can receive the 2ND
PART TO THE ASTROLABE which she will gladly hand over once
you've completed her quest.
There are three locked doors on this level behind Kaylessa which house a multitude of foul beasts that are locked behind
in the rooms beyond. A thief who can pick locks or a fighter who can bash doors in will be needed to get into the rooms.
Stairs lead down to the fourth level as well as upwards to the sixth on this level.
THE SEVERED HAND LVL 5 - Tower C
A magical view awaits you as you climb these stairs and make your way out to this
destroyed tower, the magics so powerful during its destruction has caused the formation to remain floating like lilly
pads on water as the bricks are with the air around them. There is no other way to access the floors above this tower,
perhaps they vanished in the explosion. Although I had never attempted to rest here, it does look peaceful enough
as well as safe enough to attempt it.
THE SEVERED HAND LVL 5 - Tower D
Careful where you step as you open the door into
this ruined looking tavern or perhaps feast hall and keep close together
so back to back fighting can be done here. A lone Elven Spirit resides behind
the counter, polishing off the counter with a dusty old rag, his eyes lost
in some other existence but don't be fooled. He's watching you approach
and waiting for you to get close enough away from the door so he can signal
the Elven Swordsmen waiting in the Ethereal Plane and once you are close
enough, they will appear and attack the party.
This is a great battle if your entire party walks straight in to explore as you will be surrounded and your escape blocked
by the Elven Swordsmen Spirits but by now, you should be able to handle yourself in these types of situations so hack away
and lay them to rest.
Two stairs exit this level, one goes down to the fourth level while the other climbs to the sixth.
THE SEVERED HAND LVL 6 - The Four Looming Towers
THE SEVERED HAND LVL 6 - Tower A
Crackling magic will make its debut as
you climb these stairs and open the door to the room beyond as Elven Clerics
and Elven Mages begin to weave their hands as you break into the room so
be ready with your own offensive spells and tactics to bring these Elves
to rest.
A flight of stairs leads down to level 5 while another flight goes upwards to level 7.
THE SEVERED HAND LVL 6 - Tower B
The sound of the stairs creaking and giving way will give the party away as Elven Swordsmen
will be preparing for you! Battle hard brave warrior.
Stairs leading down will take you to the 5th level while a dirt ramp leading up towards sunlight will take your party to the
7th level.
THE SEVERED HAND LVL 6 - Tower D
Prepare thyself for a slaughter fest, on your part I do hope brave warrior. This floor
and the room beyond the closed door is littered with Elven Swordsmen which are discussing their battle tactics for the
battle they still believe is on the way. I didn't waste anytime here and rushed them quickly, taking on the whole bunch
at once is a lot of fun as fireballs exploded and my swords swung true.
It is this room you will want to search very well for hidden in one
of the tables is the 4TH
PART TO THE ASTROLABE, another piece you will need to help
Gelarith complete the Astrolabe Once again, if you have failed to get
this quest yet, do not worry and simply carry this part of the Astrolabe
with your party so when you do meet Gelarith, you won't have much exploring
to do.
Two stairs exit this level, one goes down to the fourth level while the other climbs to the sixth.
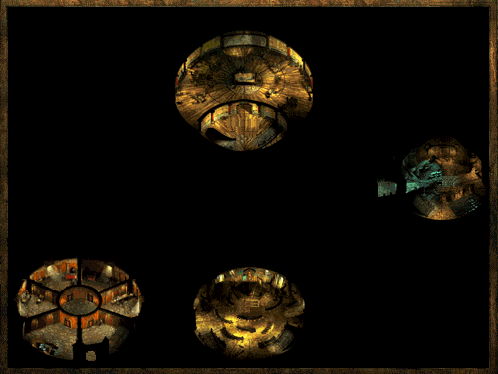
THE SEVERED HAND LVL 7 - The Four Looming Towers
You will notice the map for this level has changed slightly and that is due to the fact
that there is a bridge that joins Tower 7B to Tower 7E and although I did not put up the map of the bridge, I have noted
this on The Severed Hand LVL 7 Enlarged Map and it is Tower 7E that will lead you to Larrel, the one you seek to help you
unlock the mystery of the Heartstone Gem. Let's take a look at this level in depth.
THE SEVERED HAND LVL 7 - Tower A
Do not overwrite your Auto Saved Game as you climb the stairs from level 6 to this
level because you may need to go back to it, but more on that later.
Battle well here brave warrior for there are items of great interest to you
and another who makes The Severed Hand
their home. Dotted with Elven Priests and Elven Swordsmen who want to
see you dead will be upon your party as soon as you come up the stairs
and they show no mercy in their attacks. Do your best to take out the
Elven Archers who will be pelting you with their arrows from afar and
if you get a chance to get off a fireball before their numbers surround
you, do so to shrink their large numbers.
Once the battle is completed and you are cleaning your weapons, have
someone search the room and grab all the items available and found stashed
away in hidden places and also make sure you snag the 3RD
PART TO THE ASTROLABE while you are here.
Also, check the chest in the northeast corner and if everything went
well when the item was randomized as you entered this level, you should
have yourself a lovely piece of Elven Chain Mail Armor. Due to the fact
this item is randomized in this location it may not be here when you first
open the chest and it may also take a few more tries to get the Elven
Chain Mail but I was told by a reliable source this is where it is. If
you've missed it here, there is one more place you can gain this item
from and I'll cover that further down in this solution.
The reason I asked you not to save over your Auto Saved Game was so you'd be able to reload and do the battle over again
and get the item in the chest randomized. I have also been told that saving your game AFTER this battle and simply
reloading it will randomize the items in the chest, but I have not tried this as I was given this information after I had
already taken the randomized item out of the chest and saved over my game. If you try this method of saving after the
battle, then reloading the saved game and the item is randomized afterwards, please send me a note and I will update
this part of the solution accordingly.
On a reader note, I send you some added information about attaining the Elven Chain perhaps a little easier or harder,
but that's for you to decide.
"well, I got the Elven chain on level 3 of Solanar tower...the one with the
priestess wanting holy water. Anyway, you can be on level 2 and keep
reloading from there until elven chain shows up on level 3. Can you reload
on level 3 and make it change. I doubt it highly. I probably have a saved
game there so I can try it sometime. However, it's not really needed. You
can always just haste a guy to run and check for the armor and if it's the
right stuff, then kill all the elves and save the game at that point.
Kaylessa, to get hers, I'd just make a save upon entering the tower...then
after saving kill her. I'd keep reentering and making an initial save
before killing her. When she finally gave up elven chain, I'd reload from
the save I made after entering the tower that time. Then instead of killing
her, I'd go clear out the tower and then come back down knowing she'd have
the armor.
So I got the chain of the Hand first time I opened things. Reloaded to see
other items just b/c none of my friends had gotten the chain. It was some
potion or a ring usually. Lame. As for Kaylessa, I reloaded several times
to get the chain."
Thanks to Cameron for supplying this great additional information about the Elven Chain!
Stairs lead down to level 6 while you can climb others to take you to level 8.
THE SEVERED HAND LVL 7 - Tower B
This is a unique level of this tower because it is attached to a bridge that soars high
above The Severed Hand and will also take you to another tower were Larrel is and where you must take the Heartstone Gem
if you wish to complete your quest.
First though, you will have to deal with the Elven Swordsmen and Elven Archers who make this level their home and they will
attack you as you make your way up the stairs to this level. Battle hard as always and when the battle is over and you
are cleaning your weapons, search this floor out and make sure you leave nothing left for any other looters who come this
way.
It is best to take the stairs upwards to level 8, just so you don't forget about it and then return to take the bridge
across to the other tower and to meet up with Larrel and his helper Gelarith.
There are three exits from this level, one being to the bridge to Tower 7E, while you can go down to level 6 or take a
flight of stairs up to level 8.
THE SEVERED HAND LVL 7 - Tower D
A circular level will greet you as you climb the last pair of stairs and make your way
to the flagstone landing above to where you have come to the resting rooms of the Elven Commanders and Elven Swordsmen who
rested here before the tower fell. Make your way through each room, which houses roughly one to two Elven Spirits and once
you've cleared out each small room, do make sure you search and get everything you can.
There are two flights of stairs here, one going down to the 6th level while another climbs to the 8th.
THE SEVERED HAND LVL 7 - Tower E
This part of The Severed Hand is reached by taking the bridge from 7B and this is the tower
where you will find Larrel and his assistant Gelarith who are on the very top of this tower. First though, you will have
to battle through a slew of Elven Swordsmen, Elven Priests and Elven Mages who will make your trip unenjoyable as you get
closer and closer to your final destination.
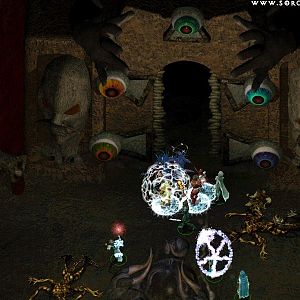
The majority of the battle will take place in the central circular room and
my tactic was very simple as I had one PC open the door just as my mage
was finished casting his Monster Summoning II, which placed about 4-5
Lizard Men around the Elves inside and then quickly closed the door to
let them all do battle. Even though the Lizardmen perished, they still
dropped the health of the Elves as well as a few priests before I opened
the door again to have my fighters finish them off.
Search all the rooms for it is here on this level you will find the DIARY OF EVAYNE, the daughter
of Larrel and he will reward you with some extra experience once you are able to talk to his spirit as he will learn of what became of his loving
daughter during the towers last stand.
An exit to the bridge can be found here as well as stairs leading up to Level 8.
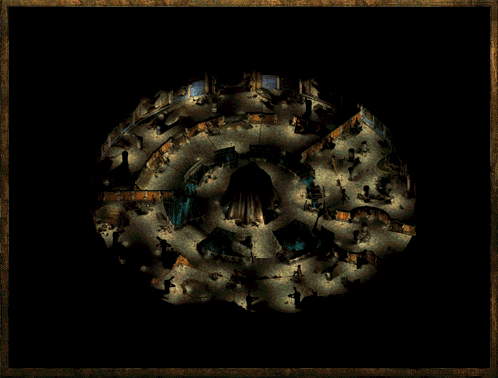
THE SEVERED HAND LVL 8 - The Four Looming Towers
Ah, 'tis good to see you have made it this far within The Severed Hand and you are on your
way to completing the quest of the Heartstone Gem within this foul and ancient, forgotten Elven Outpost. This is the very top
of The Severed Hand, except for one more level which is where you can find Larrel, on level 9 to be exact which you can get
to from going up the stairs through tower 8E. So with the last level of The Severed Hand at a reach, let's finish off this
level and get to the grand finale!
THE SEVERED HAND LVL 8 - Tower A
Beautiful bedrooms rest at the very top of this tower which remain untouched by time and
the elements and one can get a wonderful view from the windows as well as enjoy the rays of the warm sun that basks The
Spine of the World.
Elven Priests line these walls and you will have to bring them to their rest if you wish to explore each room and find what
treasure awaits the adventurer such as yourself!
Other than the battles, you will also find the HOLY WATER that you
need for Denaini's quest so she can return the pools of water to their original look. You will have to return and speak with
Denaini for your reward, but I suggest finishing off the tower before doing so and head to the 8th level.
Thanks to Christo again for pointing out the incorrect location of the Holy Water. It's correct now!
There is only one flight of stairs and they head down to level 7.
THE SEVERED HAND LVL 8 - Tower B
Chilling cold will be felt as you make your climb up the stairs to the very top of this
tower who's outer walls have been blasted away leaving the locked rooms behind which hold a few hungry Wraith Spiders who
want to feast on your fresh, plump bodies. Pray tell that does not happen brave warrior! Draw thy weapon and cast thy
magics at these foul creatures and lay them to rest! Search this last level just to make sure you do not miss anything!
Stairs lead down to level 7, the only flight exiting this level.
THE SEVERED HAND LVL 8 - Tower D
Stained windows create wonderful colours of light which illuminate what once was a lovely
and well taken garden which obviously died so long ago due to lack of care. A stone statue stands in the middle of the room,
perhaps once a resting place for birds who came to feel the warmth of the sun and remain out of the cold weather at such high
altitudes but even that doesn't look as magical as it once did.
Here you will meet Valestis who will tell you of the once grand beauty of his garden and how it pains him so to view it as
it is now. Valestis will tell you what he could use to help replenish the beauty and return it to its former self and you
are more than welcome to take on this quest for these items. PURE WATER,
AN ANIMAL and A SEED. You will not
find these items within The Severed Hand, so don't bore yourself looking for them here as they are within another part of this
adventure, which I will note on when we come to them. For now, accept this quest and let's get on to the last two parts.
THE SEVERED HAND LVL 8 - Tower E
Many books from ages past line the walls, the floors and tables of this grand library, being
kept and taken care of by Custhantos who will welcome you to learn and read some, if not, all the books he can give you. You will
want to take all these books, just for safe keeping and historical reasons which you can sell in Kuldahar but do not sell them
until you speak with Orrick The Gray for one of the books is the one he's been seeking. Review the Quest portion of this chapter
for more details on returning the book he seeks.
Two flights of stairs exit this level, one going down to level 7 while the last leads to level 9 and Larrel! Let us go there
now brave warrior!
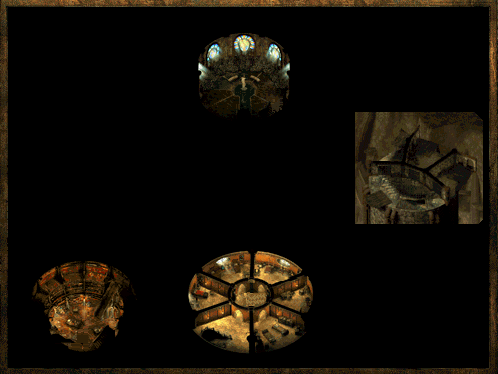
THE
SEVERED HAND LVL 9 - The Astrolabe
"Welcome adventurers! The sight you see
before you is The Astrolabe!"
Indeed it is and this is the highest part of The
Severed Hand one can reach and also where one can find Larrel and
his assistant Gelarith, the latter who is looking for the missing parts
to the Astrolabe Now if you've come to this part without the help of the
rest of this chapter, you will need all the missing parts to the Astrolabe
before Larrel will converse with you. Restructuring the Astrolabe will
retain some of Larrel's sanity and he will be able to converse with you
then rather than his mindless dribble.
Are you missing some or all parts of The Astrolabe? Tsk, tsk, tsk. You
haven't been exploring very much now have you brave warrior? Well then,
off you go to continue thy search or simply go here
for the answers.
Once you have recovered the missing parts to the Astrolabe that Gelarith
needs, he will put the Astrolabe back in working order and Larrel will
be able to be understood as well as talked to, which I suggest you do.
If you've picked up the DIARY
OF EVAYNE hand it over to Larrel for it was his daughters before
the tower fell. Larrel will unleash the power of the Heartstone Gem and
will give you a vision of where you are to go next in your quest for the
evil that plagues Kuldahar.
Return to Kuldahar if you must to rest, identify or sell items as well as get your reward and item from Orrick The Gray.
THE SEVERED HAND - The Quests
There are a few quests given to you within The Severed Hand and some given to you before that can now be completed
and gotten experience for and I will cover each and everyone and detail them below for you.
THE ASTROLABE QUEST [story advancement]
The Astrolabe is a vast network of gears, sockets, switches and other
parts that lets the users pear into the sky and the black universe above
but it is currently not working and Gelarith needs the missing parts.
The Astrolabe and the parts are also tied with Larrel, who's sanity will
be regained when the Astrolabe, one of his grand creations, is put back
together and is running smoothly. You will have to find all four parts
to the Astrolabe to get Larrel to speak and help you with the Heartstone
Gem. The parts can be found as detailed below.
1ST Part of the Astrolabe
This is found on The Severed Hand LVL 1.
2nd Part of the Astrolabe
This is found on The Severed Hand LVL 5 on Kaylessa and is given to you when you complete her own quest.
3rd Part of the Astrolabe
This is found on The Severed Hand LVL 7 in Tower 7a.
Thanks to Christo and GangStarr for the heads up. I had the 3rd part on Level 6 in Tower 6a.
4th Part of the Astrolabe
This is found on The Severed Hand LVL 6 in Tower 6d.
DENAINI'S QUEST [mini-quest]
Denaini can be found on The Severed Hand LVL 5 in Tower 5a and is looking to clean the water
and return them back to their original state as she remembers them before the tower fell. Denaini is looking for
some HOLY WATER that will
restore the water and create beautiful and clean pools for her to look at for all of eternity. The HOLY WATER you
seek is above her on level 8 in Tower 8a. Find the HOLY WATER and return it
to her for your reward.
As well as the HOLY WATER,
Denaini is also looking for you to lay her fellow Priests to rest that are scattered through The Severed Hand. Doing so
will also get you some extra experience.
KAYLESSA'S QUEST [mini-quest / story advancement]
Kaylessa can be found on The Severed Hand LVL 5 in
Tower 5b and is looking to put her fellow Swordsmen to rest who are scattered
through The Severed Hand as the priests
are in the quest above from Denaini. By giving her Swordsmen a brave and
fighting end to their haunting lives, Kaylessa will in return, give you
the 2ND
PART TO THE ASTROLABE that she has on her. Do her quest, for
you will need this part of the Astrolabe to give to Gelarith so he may fix
the machine which will also bring back some of Larrel's sanity so he may
help you with the Heartstone Gem.
When you return from killing all of the Elven Swordsmen within The
Severed Hand, Kaylessa upon giving you the 2ND
PART TO THE ASTROLABE will ask to be laid to rest as well and
join her fallen Elven Swordsmen in their resting place and she will attack
you. Before this happens and before you speak with her, save the game.
The reason for doing this is because this is another location the Elven
Chain Mail can be found, a random occurrence which will be on her corpse
if you did not get the Elven Chain Mail that was randomized on Level 7
in Tower 7a. If you missed it from that location, you have a chance to
find it on Kaylessa's corpse.
Unfortunately when I went through The
Severed Hand for this solution, I did not get the Elven Chain Mail
in either places noted and only found out about its location after the
fact I had completed this. The information passed to me is from the official
Icewind Dale message board from a reliable source BUT if you find any
of this information incorrect regarding the Elven Chain Mail or I have
the wrong locations, please let me know and I will fix this part of the
solution to match the correct information.
Otherwise, as of now, that is the two locations for the Elven Chain Mail, which you can only find once.
VALESTIS [mini-quest from Kuldahar]
Valestis is looking for a few items to replenish his own garden and return it to the beauty that once could
be found there. The items he is looking for are PURE WATER,
AN ANIMAL and A SEED.
Need the PURE WATER? It can be found here in Chapter 5.
Need the AN ANIMAL? It can be found here on a Merchant Drow named Nym in Chapter 6.
Need the A SEED? It can be found here on a Merchant Drow named Nym in Chapter 6.
Thanks to Bob who reminded me about this quest, which I forgot to add during the solution under this section.
Also, when you purchase from Nym, you can buy two animals instead of just one, which will gain you even more experience if you would just brought
the one Valestis was looking for.
Thanks to Kris for the added experience note.
ORRICK THE GRAY'S QUEST [mini-quest from Kuldahar]
Noted from Kuldahar in Chapter 1, Orrick The Gray has been looking for many
years for a book which chronicles a forgotten Elven Outpost, which you happen
to be in for it is The Severed Hand
that he is talking about. The book he seeks can be found on Level 8 in Tower
8e which is called "The Mythal Theory". Take all the book to be on the safe
side as I did and return to Kuldahar, speak with Orrick The Gray and receive
your reward.
** At the time of this publication, Interplay still had not released their public patch and when you return to
speak with Orrick The Gray, the item he is supposed to give you will remain on his body as you receive an error
message about the dialog. What you can do, if you wish to continue is save the game then pick pocket him. If
he attacks you, simply reload until your pick pocket attempt is successful.
** Download the patches now available to get around this small bug.